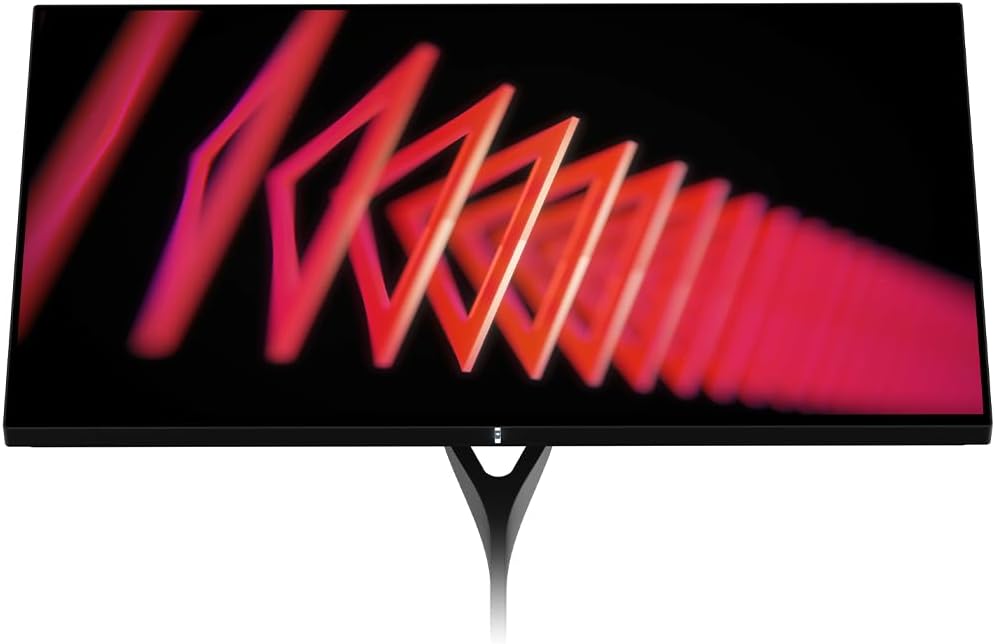
The Dough / Eve Spectrum monitor offers impressive features, but some users face issues. Common problems include connection instability, firmware glitches, and display inconsistencies. Fixing Eve Spectrum problems often involves simple steps like power cycling, cable checks, and firmware updates.
Troubleshooting your Eve Spectrum can boost your user experience. Start by unplugging the power cord for 30 seconds, then reconnecting it. This quick reset often solves many issues. Next, inspect your cables for damage and ensure they’re properly connected. If problems persist, check for firmware updates on the Eve website.
Some users report motion stability problems over HDMI ports. To address this, try different HDMI cables or switch to DisplayPort if your device supports it. Remember, patience is key when troubleshooting. Each step brings you closer to a smooth, high-quality display experience.
| Issue | Quick Fix |
|---|---|
| No display | Check power and cable connections |
| Flickering screen | Update firmware or try different cable |
| Color issues | Adjust monitor settings or reset to default |
| USB devices not working | Check USB cable connection and ports |
Troubleshooting Your Dough / Eve Spectrum Monitor
The Eve Spectrum is a community-driven monitor designed for gamers and creators, offering impressive specs and customization options. But even the best monitors can run into issues. Here’s a troubleshooting guide to help you resolve common problems:
1. No Power/Monitor Won’t Turn On
- Check Power Connections: Make sure the power cord is securely plugged into both the monitor and a working wall outlet.
- Test the Outlet: Try plugging another device into the outlet to ensure it’s working correctly.
- Inspect the Power Button: Make sure the power button on the monitor is not stuck or damaged.
- Test with a Different Power Cord: If possible, try using a different power cord to rule out a faulty cable.
2. No Signal/Black Screen
- Verify Input Source: Confirm that the correct input source (DisplayPort, HDMI, or USB-C) is selected on the monitor.
- Check Cable Connections: Ensure the video cable is securely connected to both the monitor and your computer/device.
- Try a Different Cable: Try using a different cable to rule out a faulty DisplayPort or HDMI cable.
- Check Your Graphics Card/Device: Make sure your graphics card or the device you’re connecting to is functioning correctly.
3. Display Issues
- Image Quality: Adjust brightness, contrast, sharpness, and color settings in the monitor’s OSD (On-Screen Display) menu.
- Color Accuracy: Calibrate the monitor using a colorimeter for optimal color accuracy, especially if you’re doing color-critical work.
- Dead Pixels: Check for dead pixels by displaying a solid color background. A few dead pixels are generally considered normal for LCD panels.
- Backlight Bleed: Look for excessive backlight bleed, especially in dark scenes. Some backlight bleed is normal for LCDs, but it shouldn’t be distracting.
4. Adaptive-Sync Issues
- Enable Adaptive-Sync: Ensure Adaptive-Sync (FreeSync or G-SYNC Compatible) is enabled in both the monitor’s OSD menu and your graphics card settings.
- Check Refresh Rate: Make sure your refresh rate is within the supported range for Adaptive-Sync.
- Update Drivers: Update your graphics card drivers to the latest version.
5. Other Issues
- OSD Menu: If you’re having trouble navigating the OSD menu, try resetting the monitor to its default settings.
- Firmware Updates: Check the Eve website for firmware updates for your monitor model.
- Stand/VESA Mount: Ensure the stand is properly attached or the monitor is securely mounted to a VESA arm.
Table of Troubleshooting Steps
| Issue | Possible Causes | Solutions |
|---|---|---|
| No Power | Power cord, outlet, power button | Check connections, test outlet, inspect button |
| No Signal | Incorrect input, cable connection, graphics card/device | Verify input, check cables, check graphics card/device |
| Image Quality | Brightness, contrast, sharpness, color settings | Adjust settings in OSD menu |
| Adaptive-Sync Issues | Adaptive-Sync not enabled, refresh rate, drivers | Enable Adaptive-Sync, check refresh rate, update drivers |
Tips for Optimal Performance
- Optimal Viewing Distance: Maintain a comfortable viewing distance to minimize eye strain.
- Ambient Lighting: Avoid placing the monitor in direct sunlight or under harsh lighting.
- Regular Cleaning: Clean the screen with a microfiber cloth to prevent dust and smudges.
- User Manual: Refer to the Eve Spectrum user manual for detailed troubleshooting steps and specifications.
- Eve Community: Engage with the Eve community forums for support and troubleshooting tips from other users.
- Eve Support: If you’re unable to resolve an issue, contact Eve support for further assistance.
Understanding Your Eve Spectrum Monitor
The Eve Spectrum monitor offers advanced features and requires proper handling for optimal performance. Familiarizing yourself with its key aspects and usage guidelines will help you get the most out of your display.
Key Features and Technology
The Eve Spectrum boasts HDMI 2.1 compatibility, enabling high refresh rates and resolutions. This technology allows you to enjoy 4K gaming at up to 144Hz on compatible devices. The monitor’s IPS panel provides wide viewing angles and accurate color reproduction.
Color calibration is a standout feature of the Eve Spectrum. Each unit undergoes factory calibration to ensure color accuracy out of the box. You can further fine-tune the display using the on-screen display (OSD) menu.
Adaptive sync technology, compatible with both NVIDIA G-Sync and AMD FreeSync, reduces screen tearing and stuttering during gameplay. The monitor also supports HDR, enhancing contrast and color range in compatible content.
| Feature | Specification |
|---|---|
| Resolution | 4K (3840 x 2160) |
| Refresh Rate | Up to 144Hz |
| Panel Type | IPS |
| HDR | Yes |
| Adaptive Sync | G-Sync and FreeSync compatible |
Proper Usage and Handling
To maintain your Eve Spectrum’s performance, place it in a well-ventilated area away from direct sunlight. Use the provided stand or a VESA mount for stability. Clean the screen gently with a microfiber cloth to avoid scratches.
When connecting devices, use high-quality cables that meet HDMI 2.1 specifications for the best results. Ensure your graphics card supports the monitor’s full capabilities to utilize its high refresh rate and resolution.
Adjust the monitor’s settings through the OSD menu. Experiment with different color profiles and brightness levels to find your ideal setup. If you experience random black screens, try disabling adaptive sync as a troubleshooting step.
For eye comfort, enable the blue light filter feature during extended use. Take regular breaks to reduce eye strain. Keep firmware updated to access the latest features and bug fixes.
Common Troubleshooting Tips
When facing issues with your Eve Spectrum monitor, several effective solutions can help resolve common problems. These tips cover basic diagnostics, connectivity issues, and display problems.
Basic Diagnostic Steps
Start by checking the power connection. Ensure the power cable is securely plugged into both the monitor and the wall outlet. If the monitor still won’t turn on, try a different power outlet.
Next, examine all cable connections. Make sure HDMI or DisplayPort cables are firmly attached to both the monitor and your device. Loose connections often cause display issues.
Check your device’s graphics settings. Verify that the correct resolution and refresh rate are selected for your Eve Spectrum model. You can find these specifications in the user manual.
Restart your computer and monitor. This simple step can often resolve temporary glitches or software conflicts affecting display performance.
Resolving Connectivity Issues
If your Eve Spectrum isn’t detecting a signal, first try switching input sources. Use the monitor’s on-screen display to cycle through available inputs.
Update your graphics drivers. Outdated or corrupted drivers can cause connectivity problems. Visit your graphics card manufacturer’s website for the latest drivers.
Test with a different device or cable. This helps identify if the issue is with your monitor, computer, or cable.
Check for firmware updates. Eve occasionally releases firmware updates that can improve compatibility and resolve known issues.
| Connectivity Issue | Possible Solution |
|---|---|
| No signal detected | Switch input source |
| Intermittent connection | Replace cable |
| Resolution mismatch | Update graphics drivers |
| Feature not working | Check for firmware updates |
Fixing Display and Color Problems
For color issues, start by resetting the monitor to factory settings. This can often resolve unexpected color shifts or incorrect gamma settings.
Calibrate your display. Use Windows’ built-in calibration tool or a third-party calibration device for more accurate results.
If you’re experiencing image retention or “ghosting”, adjust the monitor’s overdrive settings. Find the optimal setting that reduces motion blur without introducing artifacts.
For HDR-related problems, ensure HDR is properly enabled in both Windows settings and your game or application. Some users report washed-out HDR on the Eve Spectrum, which may require adjusting in-game HDR settings.
Address screen flickering by trying a different refresh rate. If the problem persists, it could indicate a faulty unit requiring warranty service.
Firmware Update Guidelines
Keeping your Eve Spectrum monitor’s firmware up-to-date is crucial for optimal performance and access to the latest features. Regular updates can improve device functionality and resolve known issues.
Checking for Firmware Updates
To check for firmware updates on your Eve Spectrum monitor:
- Visit the Dough downloads page.
- Locate your specific model (ES07D03 or ES07DC9).
- Compare the latest firmware version to your current version.
You can find your current firmware version in the monitor’s on-screen display menu. Navigate to the “About” or “System Information” section to view this information.
It’s good practice to check for updates every few months. New firmware versions often include bug fixes and performance enhancements.
Firmware Update Process
To update your Eve Spectrum firmware:
- Download the latest firmware file for your model.
- Unzip the downloaded file to a USB drive.
- Turn off your monitor and unplug all cables except power.
- Insert the USB drive into the monitor’s USB port.
- Turn on the monitor and wait for the update to begin.
The update process usually takes 5-10 minutes. Do not turn off the monitor or remove the USB drive during this time.
After the update completes, your monitor will restart automatically. You can then remove the USB drive and reconnect your cables.
Troubleshooting Firmware Update Issues
If you encounter problems during the firmware update:
- Ensure you’re using the correct firmware for your model.
- Try a different USB drive. Some drives may not be compatible.
- If the update stalls, power cycle your monitor. Unplug it for 10 seconds, then plug it back in.
For persistent issues, contact Dough support. They can provide model-specific guidance and troubleshooting steps.
| Issue | Possible Solution |
|---|---|
| Update won’t start | Check USB drive compatibility |
| Update stalls | Power cycle the monitor |
| Wrong firmware | Verify model number and download correct file |
Remember to back up any custom settings before updating. Some updates may reset your monitor to factory defaults.
Accessing Customer Support
Eve Spectrum users have several options for getting help with their monitors. You can reach out to Spectrum customer support for assistance with various issues.
Phone Support:
- New services: 855-860-9068 (7 AM – 2 AM ET, Mon-Sun)
- Account and billing: 833-949-0036 (24/7)
Online Support:
Visit the Spectrum Customer Support website for 24/7 technical help and account management.
Common Troubleshooting Steps:
- Check cable connections
- Restart your monitor
- Update firmware
For persistent issues, try disconnecting and reconnecting the power cable. This may temporarily resolve problems until a permanent fix is available.
| Support Method | Availability | Best For |
|---|---|---|
| Phone | 7 AM – 2 AM ET | Complex issues |
| Online Chat | 24/7 | Quick questions |
| Website | 24/7 | Self-help guides |
Remember to have your account details ready when contacting support. Be prepared to describe your issue clearly to get the most effective help.
Frequently Asked Questions
Eve Spectrum monitors can face various issues. These questions address common problems and provide solutions for signal loss, resetting, audio features, connectivity, and compatibility.
Why is there no signal on my Eve Spectrum monitor?
Check your cable connections. Ensure they’re securely plugged in at both ends. Try a different cable or port if available. Verify your computer’s display settings are correct. If issues persist, update your monitor’s firmware.
How do I reset the Eve Spectrum monitor to factory settings?
Access the monitor’s on-screen display menu. Navigate to the system or reset options. Choose “Factory Reset” or a similar option. Confirm your choice when prompted. This will revert all settings to their original values.
Are there built-in speakers in the Eve Spectrum monitor?
Eve Spectrum monitors do not have built-in speakers. You’ll need to connect external speakers or headphones for audio. Use the monitor’s audio output port or connect speakers directly to your computer.
What are the steps to troubleshoot Eve Spectrum monitor connectivity with Xbox Series X?
First, ensure you’re using a high-speed HDMI cable. Set the Xbox display settings to match your monitor’s capabilities. If problems continue, try a different HDMI port on the monitor or console. You may need to update your monitor’s firmware for full compatibility.
How can I resolve compatibility issues with Windows 10 on my Eve Spectrum monitor?
Update your graphics drivers to the latest version. Check Windows Update for any pending system updates. Adjust your display settings in Windows to match your monitor’s native resolution and refresh rate. If HDR issues occur, try toggling it on and off in Windows settings.
What should I do if my Eve Spectrum monitor is not recognized by my computer?
Restart both your computer and monitor. Check and reseat all cable connections. Try a different video port on your computer if available. Update your graphics drivers. If the problem persists, test the monitor with another computer to determine if it’s a monitor or computer issue.
| Issue | Quick Fix |
|---|---|
| No signal | Check cables and ports |
| Factory reset | Use on-screen menu |
| No audio | Connect external speakers |
| Xbox connectivity | Use high-speed HDMI |
| Windows compatibility | Update drivers and settings |
| Not recognized | Restart and check connections |

