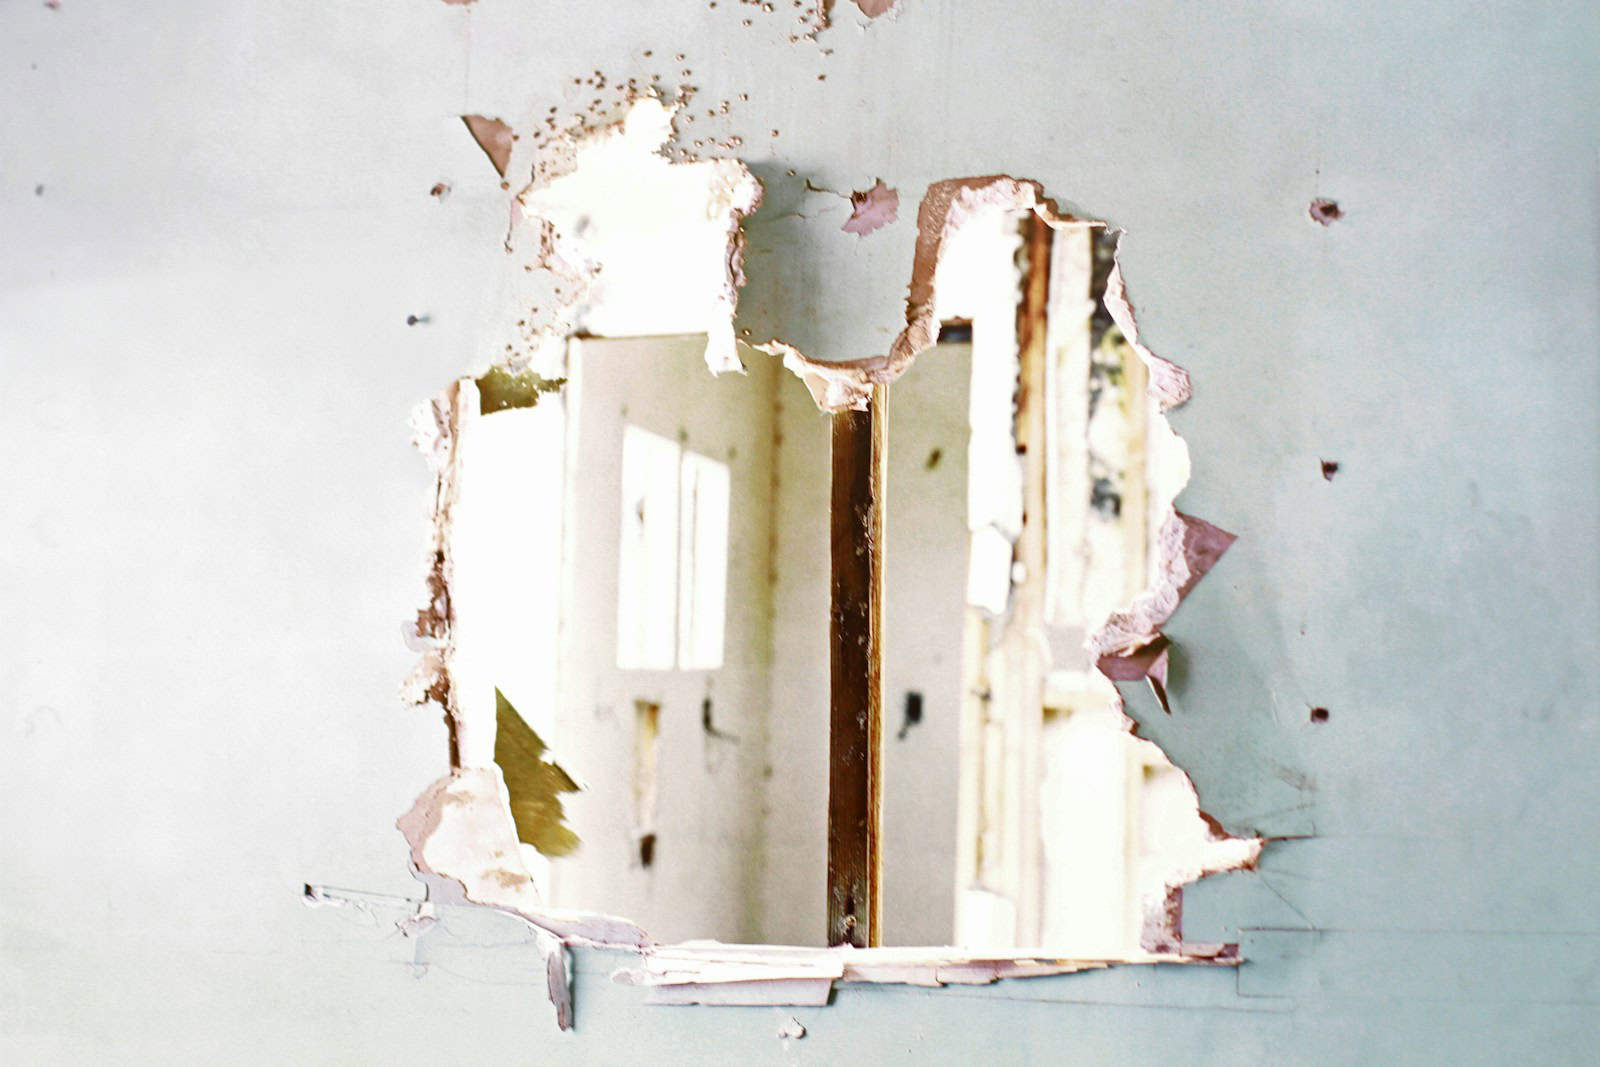
Repairing a hole in drywall is a straightforward task that many homeowners can tackle. It’s a common part of home improvement. Whether the wall has a small dent or a large hole, the repair process isn’t complicated. Drywall repair can restore walls and make them look new again.
Small holes from nails or screws are the simplest to fix. They often need just a bit of spackle and some sanding. After that, you can touch up the paint. Large holes might need a patch and some more steps to blend in with the rest of the wall.
To patch drywall, it’s important to have the right tools and materials. You will need a patching compound, joint tape, and a putty knife, among other things. With patience and careful work, anyone can repair drywall damage. It makes your room look good as new.
Drywall Repair Made Easy: Tools, Steps, and Tips
Necessary Tools and Materials
Before diving into the repair, gather the following tools and materials:
| Tool/Material | Purpose |
|---|---|
| Drywall saw or utility knife | To cut out the damaged drywall and create a clean edge. |
| Measuring tape | To measure the hole and cut the replacement drywall piece accurately. |
| Pencil | To mark the cut lines on the new drywall piece. |
| Replacement drywall piece | To fill the hole (should be slightly larger than the hole itself). |
| Drywall screws | To secure the replacement drywall piece to the wall studs. |
| Drill | To drive the screws into the wall studs. |
| Joint compound | To cover the seams and create a smooth surface. |
| Drywall tape | To reinforce the seams and prevent cracking. |
| Putty knife | To apply and smooth out the joint compound. |
| Sandpaper | To sand the dried joint compound and create a smooth finish. |
Step-by-Step Repair Process
- Prepare the area: Remove any loose debris or damaged drywall around the hole. If the hole is larger than a few inches, you may need to install a wood backing for support.
- Measure and cut: Measure the hole and cut a replacement drywall piece that is slightly larger. This will allow you to secure it to the wall studs.
- Secure the patch: Position the replacement drywall piece over the hole and screw it into the wall studs. Make sure the screws are flush with the surface of the drywall.
- Apply joint compound: Using a putty knife, apply a thin layer of joint compound over the seams and screw heads. Embed drywall tape into the joint compound for added strength.
- Let it dry: Allow the joint compound to dry completely. This may take several hours or overnight, depending on the humidity and temperature.
- Sand and repeat: Once dry, sand the area smooth with sandpaper. Apply a second coat of joint compound, feathering the edges for a seamless finish. Let it dry and sand again if necessary.
- Prime and paint: Prime the repaired area to seal it and prepare it for painting. Once the primer is dry, paint the area to match the rest of the wall.
Tips for a Successful Repair
- Use a sharp utility knife or drywall saw for clean cuts.
- Wear safety glasses and a dust mask to protect yourself.
- Don’t overtighten the screws, as this can damage the drywall.
- Apply thin, even coats of joint compound to avoid cracking.
- Allow each coat of joint compound to dry completely before sanding.
- Use a damp sponge to smooth out the final coat of joint compound for a professional finish.
By following these steps and tips, you can easily repair a hole in your drywall and restore your wall to its former glory.
Assessing the Damage and Preparing for Repair
Before fixing a hole in drywall, check the hole’s size and get the tools and materials you need. Let’s start by looking at the hole closely.
Identify the Size of the Hole
There are different sizes of holes. Nail holes are small. Dings are tiny dents. Medium holes might be from doorknobs. Large holes are bigger and might need more work.
Gather Necessary Tools and Materials
For this job, get these things:
- Drywall saw or utility knife
- Joint compound or spackling compound
- Drywall patch or patch kit for larger holes
- Paint and primer
- Drywall tape or self-adhesive mesh patch
- Sanding paper or a sanding sponge
Prepare the Work Area
Move furniture out of the way. Lay down paper or a drop cloth to catch dust. Use a pencil to mark a square around the hole. This makes it easy to cut out.
Safety Precautions
Wear goggles to protect your eyes from dust. A dust mask helps you not breathe in small bits of drywall. Be careful of wires and pipes in the wall.
Measuring and Cutting the Patch
Measure the hole. Cut a drywall patch to fit. Make sure it’s a bit bigger than the hole. The edges should be clean so it fits well.
Securing the Patch and Applying Joint Compound
Use screws to attach a scrap of wood inside the wall for support. Then put the new piece of drywall over the hole. Use screws to hold it in place. Cover the seams with joint tape. Then spread joint compound over the patch.
Sanding and Priming
After the compound dries, sand it smooth. Make sure there’s no dust when you’re done. Now, cover the patch with primer. This gets the wall ready for paint.
Applying the Final Touches
Paint the area so it matches the wall. Sometimes you need to paint the whole wall to make it all look the same. This makes the patch blend in and your wall will look new again.
Finishing and Painting the Repaired Area
Before painting, make sure the drywall repair is smooth and even. Then, choose the right paint and tools for a good look.
Choosing Appropriate Paint and Tools
When fixing drywall, pick paint that matches the wall. Use a primer first if the surface has patches. For tools, you need:
- A paint roller for large areas
- Brushes for small spots and edges
- Paint tray
Techniques for Seamless Painting
Apply primer over the repaired spot. Let it dry. Then paint from the middle outward. Blend the new paint with the old to hide where you fixed the wall. Use even strokes with a roller for a clean finish.
Adding Wall Texture If Necessary
If your wall has texture, add it to the patch before painting. Mix joint compound with water. It should be thin. Apply with a brush or sponge. Let it dry before you repaint.
Frequently Asked Questions
This section answers common questions on fixing holes in drywall. It provides simple steps and different methods for small and large repairs.
What is the best method to fix a small hole in drywall?
For small holes, like nail punctures, use spackle. Apply it over the hole and smooth with a putty knife. Once dry, sand it for a clean finish.
Can a drywall hole be patched without a patch kit?
Yes, a small hole can be covered with heavy-duty tape before applying joint compound. Larger holes may need a backing piece to support the patch.
What are the steps for repairing a drywall ceiling after a hole has occurred?
First, clear loose debris. Apply joint compound to the hole’s edges. Place a patch and cover with more compound. Sand it smooth after drying.
What techniques are used for fixing large holes in drywall?
Cut a piece of drywall to fit the hole. Secure it with screws to a wooden backing. Tape the seams and cover with joint compound. Sand for a smooth finish.
How can I patch a drywall hole if I don’t have any spare drywall?
For tiny holes, apply joint compound directly. For larger holes, use a piece of mesh tape. Cover with compound, let dry, and sand smooth.
Is it possible to repair a drywall by myself, and if so, how?
Simple repairs can be a DIY task. Use spackle for small holes. Install a patch for bigger ones. Apply compound, allow to dry, and then sand. For best results, paint the area to match the wall.