Maintaining the brakes on a bike is crucial for safe riding. Brake pads play a critical role in this system by pressing against the bike’s wheels to slow it down. Over time, these pads can wear out and need replacement. To replace brake pads, you’ll need to identify the type of brakes your bike has – rim brakes or disc brakes – as each type requires a different approach. With the right tools and instructions, you can change the pads and adjust the brakes, ensuring a safer and more comfortable ride. Learning how to replace brake pads is a useful skill, eliminating the need to visit a bike shop for this simple task, especially if you ride frequently.
Replacing Your Bicycle Brakes: A DIY Guide
Types of Bike Brakes
Before you start, it’s crucial to identify the type of brakes on your bike. The two main types are:
- Rim Brakes: These brakes use pads that press against the wheel rim to slow or stop your bike.
- Disc Brakes: These brakes use pads that squeeze a rotor attached to the wheel hub.
Tools You’ll Need
The specific tools you’ll need depend on the type of brakes you have. Here’s a general list:
- Allen wrenches (various sizes)
- New brake pads
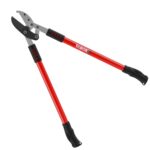
- Brake cable cutters (for rim brakes)
- Needle-nose pliers
- Flat-head screwdriver
- Degreaser and a clean rag
Replacing Rim Brakes
- Remove the Wheel: This gives you easier access to the brake components.
- Release the Brake Cable: Loosen the cable anchor bolt on the brake caliper to release tension.
- Remove the Old Pads: Use an Allen wrench to loosen the pad-retaining bolt and slide the old pads out.
- Install New Pads: Insert the new pads into the caliper, ensuring they’re properly aligned.
- Adjust the Pads: Tighten the pad-retaining bolt and adjust the pads so they contact the rim evenly.
- Re-tension the Cable: Tighten the cable anchor bolt until the brake lever feels firm and responsive.
Replacing Disc Brakes
- Remove the Wheel: This allows access to the brake caliper and rotor.
- Remove the Pads: Use an Allen wrench to remove the pad-retaining pin or screw and slide the old pads out.
- Install New Pads: Push the pistons back into the caliper and insert the new pads.
- Reinstall the Wheel: Make sure the rotor sits properly between the brake pads.
- Check Brake Function: Squeeze the brake lever to check if the brakes engage smoothly.
Important Tips
- Safety First: Wear gloves when handling brake components to avoid contamination with oil or grease.
- Bed in the Pads: After installing new pads, ride your bike gently and apply the brakes gradually to help them “bed in” and perform optimally.
- Regular Maintenance: Check your brake pads regularly for wear and replace them when they become too thin.
By following these steps and tips, you can easily replace your bike brakes and ensure your safety on the road.
Understanding Bike Brake Components and Their Functions
To maintain your bike’s brakes properly, it’s essential to know their parts and how they work. This understanding enables you to spot wear and decide when to replace them.
Anatomy of Bike Brakes
Bike brakes consist of a few key parts. Brake calipers grip the rotors on disc brakes or the rims on rim brakes to slow down the bike. They use pistons to press the brake pads against the braking surface. Cables or hydraulic lines connect the calipers to the brake levers on your handlebars.
Types of Bike Brakes
- Disc brakes come in two kinds: mechanical and hydraulic. Mechanical disc brakes use cables to move the calipers, while hydraulic brakes use fluid.
- Rim brakes press brake pads against the wheel rim. Types include caliper brakes, common on road bikes, and V-brakes found on mountain and hybrid bikes.
- Other types like drum and coaster brakes are less common but work differently from disc and rim brakes.
Brake Pad Materials
Brake pads are made from different materials:
- Resin pads are softer and quieter but wear faster.
- Metal pads last longer and work well in wet conditions but can be noisy.
- Ceramic pads offer strong braking and less noise but can be more expensive.
Determining Wear and When to Replace
- Check pad thickness: Replace disc brake pads if the pad material is less than 1.5 mm thick. Replace rim brake pads when they’re worn down to the wear indicator.
- Inspect for uneven wear: Look for pads wearing more on one side, which could hint at caliper issues.
- Listen for noise: Squealing or grinding sounds can signal that it’s time to replace your brake pads.
Step-by-Step Guide to Replacing Bike Brakes
Replacing bike brakes ensures safe rides. This guide will cover changing brake pads for disc and rim brakes.
Tools and Preparation
Before starting, gather these tools:
- Allen keys
- Screwdriver
- Wrench
- Pliers
Make sure to have grease and new brake pads ready. Clear a workspace. Have your bicycle steady.
Removing the Wheel and Brake Pads
First, remove the wheel. Loosen the bolts with an Allen key. Lift the wheel out of the frame. For disc brakes, remove the retaining screw from the caliper with a screwdriver. For rim brakes, open the brake caliper using a lever or by unscrewing the bolt holding the brake cable.
Next, take out the old brake pads. They might need prying with pliers. Be careful not to harm the caliper.
Installing New Brake Pads
For disc brakes, apply a thin layer of grease to the back of the new pads. This prevents noise. Slide the pads into the caliper. They should sit flush.
For rim brakes, place the pads against the rim. Position them so they do not touch the tire. Tighten bolts securely.
Adjusting and Aligning the Brakes
The brake pads must align with the rotor or rim. Adjust the position so pads are parallel to the braking surface. For disc brakes, the pads should not rub on the rotor. Spin the wheel to check for noise or rubbing. Adjust until there is no contact. Ensure bolts are tight.
Final Checks and Maintenance Tips
Finally, test the brakes. Squeeze the brake lever and look for solid contact between pads and rotor or rim. The wheel should not spin when you apply the brakes. After that, inspect your bike regularly. Look at brake pads and rotors for wear. Check the brake fluid. Keeping your brakes in good shape means safer rides.
Routine maintenance is key. Remember, good brakes save lives.
Frequently Asked Questions
Replacing bike brakes is a key part of bicycle maintenance. It ensures safety and optimal performance.
How does one change the brake pads on a bicycle?
To change bicycle brake pads, start by removing the wheel. Then unscrew the bolts that secure the old brake pads. Take the pads out. Put in new ones. Make sure they line up with the rim or rotor correctly.
What are the steps to install caliper brakes on a bicycle?
First, attach the caliper to the bike frame or fork. Then, thread the brake cable through the lever and caliper. Adjust the pads so they touch the rim when you use the brake. Tighten all bolts and test the brakes.
What is the estimated cost for a bike brake replacement?
The cost can vary. It will depend on the type of brakes and quality you choose. Basic brake pads can start around $5 to $20. Whole brake systems can range from $20 to over $100.
Can an individual easily replace the brake cables on a bicycle?
Yes, a person can change brake cables. You will need new cables and tools like cable cutters. Remove the old cables. Route the new cables through the housing. Attach them. Adjust tension. Test your setup.
Is it possible to self-install Shimano disc brake pads on a road bike?
It is possible to install Shimano disc brake pads yourself. Remove the wheel and the retaining clip or bolt. Take out the old pads. Put the new pads in. Replace the clip or bolt. Check the alignment with the rotor.
Does upgrading a bicycle’s braking system provide significant benefits?
Upgrading your braking system can improve safety and control. Better brakes offer more consistent performance in various weather conditions. They can require less force to use too.


