If your KitchenAid dishwasher isn’t cleaning dishes properly, it’s a problem that needs a quick fix. This common issue can stem from various causes, from clogged filters to faulty spray arms. Understanding the root of the problem is the first step toward getting your dishwasher back in top shape. Many homeowners rely on their KitchenAid dishwashers for daily use, making it frustrating when dishes come out dirty. By identifying common problems and solutions, you can tackle the issue head-on and restore your dishwasher’s cleaning power.
This guide aims to help you diagnose and fix the most typical reasons behind a KitchenAid dishwasher not cleaning effectively. Ensuring your KitchenAid dishwasher performs at its best isn’t just about loading it correctly or regular maintenance. It’s also about understanding the role of detergents and rinse aids in getting your dishes spotlessly clean. By adjusting the amount of detergent based on water hardness and load size, and ensuring the rinse aid dispenser is correctly set, you’ll see a significant improvement in your dishwasher’s performance. Remember, the right products and settings make all the difference in preventing water spots and achieving that desired shine on your glassware.
Troubleshooting Your KitchenAid Dishwasher: Common Issues and Solutions
Dishwasher Not Starting
This is a frustrating problem, but often has a simple fix.
- Check the power: Make sure the dishwasher is plugged in and the circuit breaker hasn’t tripped.
- Door latch: Ensure the door is fully closed and latched. KitchenAid dishwashers have a safety feature that prevents them from starting if the door isn’t properly closed.
- Control lock: If the control lock is engaged, the dishwasher won’t start. Refer to your owner’s manual to see how to disable it.
- Delay start: If you’ve set a delay start, the dishwasher won’t begin until the set time.
Dishwasher Not Cleaning Dishes Properly
Dirty dishes after a cycle? Let’s investigate:
- Spray arm blockage: Check the spray arms for any food debris or mineral deposits that might be blocking the spray holes.
- Water temperature: The water needs to be hot enough (at least 120°F) for the detergent to work effectively. Check your water heater settings.
- Detergent issues: Use the correct amount of detergent and make sure it’s fresh. Also, ensure the detergent dispenser is not blocked.
- Filter: A clogged filter can restrict water flow and impact cleaning performance. Clean the filter regularly.
- Overloading: Don’t overload the dishwasher. This can prevent proper water circulation and detergent distribution.
Dishwasher Not Draining
Water left in the bottom of the dishwasher is a common complaint.
- Drain hose: Check the drain hose for kinks or clogs. The hose should be properly connected and free of any obstructions.
- Air gap: If your dishwasher has an air gap, check it for clogs.
- Garbage disposal: If your dishwasher drains into the garbage disposal, make sure the disposal is clear and the knockout plug has been removed.
- Drain pump: If the drain pump is malfunctioning, it won’t be able to pump out the water. This might require professional repair.
Dishwasher Leaking
A leaking dishwasher can cause water damage, so it’s important to address it promptly.
- Door gasket: The door gasket creates a watertight seal. If it’s damaged or worn, it can lead to leaks. Inspect the gasket and replace it if necessary.
- Spray arm: A loose or cracked spray arm can cause water to spray outside the dishwasher. Check the spray arms and tighten or replace them as needed.
- Drain hose: A loose or damaged drain hose can also cause leaks. Make sure the hose is securely connected and in good condition.
- Float switch: The float switch prevents the dishwasher from overfilling. If it’s stuck or malfunctioning, it can cause leaks.
Dishwasher Making Noise
Unusual noises from your dishwasher can be concerning.
- Spray arm: A loose spray arm can hit against dishes or the dishwasher interior, causing noise.
- Drain pump: A worn or damaged drain pump can make a grinding or humming noise.
- Motor: A malfunctioning motor can create a loud buzzing or humming sound.
- Wash arm bearing ring: If the wash arm bearing ring is worn out, it can cause a squeaking or squealing noise.
Dishwasher Error Codes
Modern KitchenAid dishwashers often display error codes when there’s a problem.
- Refer to your owner’s manual: Your owner’s manual will have a list of error codes and their meanings. This can help you diagnose the problem.
- Common error codes: Some common KitchenAid dishwasher error codes include:
- F1: Indicates a long drain time.
- F2: Signals an overfill condition.
- F3: Means the water is not heating properly.
- F4: Indicates a problem with the water inlet.
- F5: Suggests a problem with the water circulation pump.
| Error Code | Meaning | Possible Causes |
|---|---|---|
| F0E1, F0E2, F0E3, F0E4 | Communication error between the control panel and other components | Loose connections, faulty control panel, or other electronic issues |
| F1 | Long drain time | Clogged drain hose, air gap, or garbage disposal, faulty drain pump |
| F2 | Overfill condition | Faulty water inlet valve, float switch stuck, or drain pump issue |
| F3 | Water not heating | Faulty heating element, thermostat, or control board |
| F4 | Water inlet problem | Clogged water inlet valve, low water pressure, or faulty water inlet valve |
| F5 | Water circulation pump issue | Faulty circulation pump, motor, or impeller |
| F6 | Suds detected | Using too much detergent or the wrong type of detergent |
| F7 | Water leak detected | Leaking door gasket, spray arm, drain hose, or float switch |
| F8 | Sanitize temperature not reached | Heating element, thermostat, or control board issue |
| F9 | Control board error | Faulty control board, power surge, or electrical issue |
Note: These are some of the most common KitchenAid dishwasher error codes. For a complete list and troubleshooting steps specific to your model, refer to your owner’s manual.
Troubleshooting Tips
- Consult your owner’s manual: Your owner’s manual is a valuable resource for troubleshooting specific problems with your KitchenAid dishwasher model.
- Clean regularly: Regularly cleaning your dishwasher, including the filter, spray arms, and interior, can help prevent many problems.
- Use the right detergent: Use a high-quality dishwasher detergent and avoid using too much.
- Load properly: Load your dishwasher according to the manufacturer’s instructions to ensure proper water circulation and cleaning.
- Call for professional help: If you’re unable to diagnose or fix the problem, don’t hesitate to call a qualified appliance repair technician.
Remember:
- Safety first: Always disconnect the power to your dishwasher before attempting any repairs.
- Regular maintenance: Proper maintenance can help prevent many problems and extend the life of your dishwasher.
- Don’t ignore problems: Addressing issues promptly can prevent further damage and costly repairs.
By following these tips and troubleshooting guides, you can keep your KitchenAid dishwasher running smoothly and ensure your dishes are sparkling clean!
Key Takeaways
- Regular maintenance of the filter and spray arms is crucial to prevent clogs from food particles and debris, ensuring efficient water circulation for optimal cleaning.
- Ensuring the water temperature is at least 120°F and verifying proper water supply and pressure are vital for dissolving detergent properly and achieving forceful water spray for thorough cleaning.
- Using high-quality detergent and rinse aid in appropriate amounts can significantly impact cleaning effectiveness, with different types of detergents offering benefits for various needs.
- Correct dishwasher loading, following manufacturer’s guidelines, prevents obstruction of water and detergent flow, allowing for even cleaning across all dishes.
- Regular checks, cleaning, and possible replacement of key components like filters, spray arms, and water inlet valves help maintain the dishwasher’s performance and extend its lifespan.
- Addressing common issues through simple troubleshooting steps can often restore a KitchenAid dishwasher’s cleaning power without the need for professional repair.
Common Reasons for a KitchenAid Dishwasher Not Cleaning
Several factors could be behind your KitchenAid dishwasher’s inability to clean dishes properly. Each issue can significantly impact the appliance’s effectiveness, leaving users puzzled and frustrated with dirty dishes after a cleaning cycle. Understanding these common issues is the first step towards troubleshooting and finding a solution.
One of the primary reasons could be a clogged filter. Over time, food particles and debris accumulate, blocking the filter. This obstruction prevents water from circulating efficiently, resulting in unsatisfactory cleaning. Regularly checking and cleaning the dishwasher filter is essential for maintaining its performance.
Water temperature plays a crucial role in dishwashing effectiveness. If the water isn’t hot enough, it won’t dissolve detergent properly, leaving residue on dishes. KitchenAid recommends a water temperature of at least 120°F for optimal cleaning results. Users can check their water heater settings to ensure it meets this requirement.
Spray arms are responsible for distributing water throughout the dishwasher. However, if these arms are blocked by large items or accumulated gunk, water flow is restricted. This results in patches of dishes not getting cleaned. Inspecting and cleaning the spray arms can help resolve this issue.
Dishwasher detergent and rinse aid quality can’t be overlooked. Low-quality or incorrect detergent types might not dissolve well, affecting cleaning quality. Switching to a high-quality detergent and ensuring adequate rinse aid can make a difference.
Lastly, proper loading is crucial. Overloading the dishwasher or placing dishes incorrectly can prevent water and detergent from reaching all areas. Following the manufacturer’s guidelines for loading can vastly improve cleaning outcomes.
Several common issues can affect a KitchenAid dishwasher’s cleaning ability. Addressing these problems often involves simple checks and adjustments, leading to better cleaning performance.
Inspecting and Cleaning the Filters
When a KitchenAid dishwasher doesn’t clean dishes right, checking the filters is a smart move. Dishwashers have filters to catch food bits and other stuff. These filters can get clogged over time. That can lead to water not spraying out like it should.
The first step is finding the filter. In most KitchenAid dishwashers, it’s at the bottom inside. Sometimes there are two parts: a main filter and a coarse one. They’re there to trap food particles.
Cleaning these filters doesn’t need special tools. People can usually twist and lift them out. Once out, rinse them under running water. A soft brush can help remove stubborn gunk. This process helps water flow better.
Doing this regularly keeps the dishwasher working well. It’s a simple task. It makes a big difference in how clean the dishes get. This care helps avoid bigger issues later on.
Sometimes, the problem might not just be about cleaning. If the filters look damaged, replacing them might be necessary. KitchenAid and other appliance stores offer replacements. Matching the right model is crucial.
In addition to cleaning the filters, checking the spray arms is wise. They can also get clogged. Making sure water can flow freely through all the tiny holes is important. Sometimes, just poking through the holes with a toothpick or similar tool does the trick.
These steps help in improving the efficiency of the dishwasher. It’s about maintaining it, so it does its job without a hitch. Cleaning filters and unclogging spray arms are among the easiest and most effective ways to fix cleaning issues.
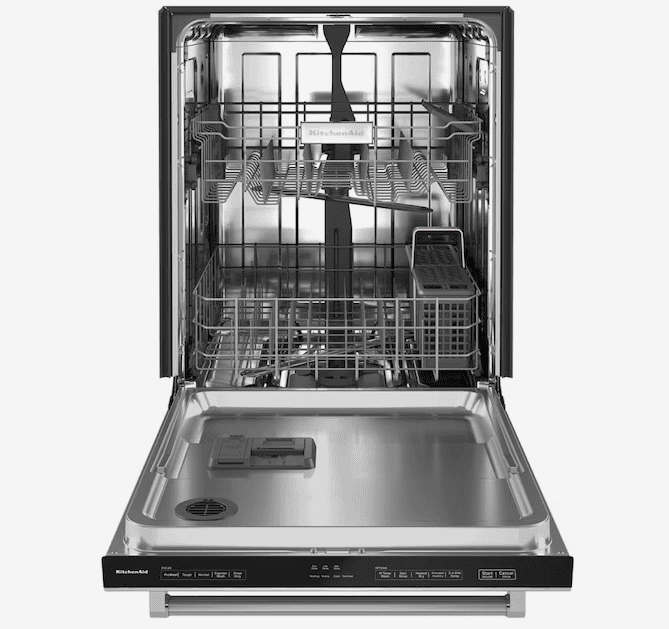
Checking the Spray Arms
When a KitchenAid dishwasher isn’t cleaning dishes as it should, one of the first areas to inspect is the spray arms. These crucial components are responsible for distributing water and detergent throughout the unit, ensuring a thorough wash. However, they can become blocked by food particles or debris, leading to inadequate water flow and, consequently, poorly cleaned dishes.
To begin, they should locate the spray arms, typically found at the bottom and mid-level of the dishwasher. After identifying them, the next step involves careful removal. They need to gently twist or unclip the spray arms from their position, paying close attention to the manufacturer’s instructions to prevent any damage.
Once removed, the process of examining and cleaning can start. They should look for any visible blockages in the spray holes—tiny pieces of food, glass, or other debris can easily clog these openings, restricting water movement. Running water through the spray arms can help dislodge any obstructions. For stubborn blockages, using a toothpick or a similar tool can be effective in clearing the holes.
In some cases, mineral deposits from hard water can also contribute to blockages. Soaking the spray arms in a mixture of warm water and vinegar can help dissolve these deposits, enhancing the efficiency of the spray arms.
Regularly checking and cleaning the spray arms are essential steps in maintaining the performance of a KitchenAid dishwasher. Simple upkeep not only improves cleaning results but also extends the life of the appliance. They can avoid frequently encountered issues and ensure their dishwasher operates smoothly by paying attention to these components.
Verifying Water Supply and Pressure
When tackling issues with a KitchenAid dishwasher not cleaning dishes properly, checking the water supply and pressure becomes a crucial step. A sufficient water supply and correct water pressure are key for the dishwasher to operate effectively. Without these, the dishwasher can’t spray water forcefully enough to clean dishes.
First, it’s important to ensure the water supply valve, usually located under the kitchen sink, is fully open. A partially closed valve restricts water flow to the dishwasher, cutting down on the washing power. After verifying the valve is open, the next step involves checking water pressure. Dishwashers require a certain range of water pressure to function optimally, typically between 20 and 120 psi.
Homeowners can check their water pressure using a pressure gauge attached to a sink spout. If the pressure is too low or too high, it may need adjustment. Low water pressure can lead to poorly cleaned dishes, while high water pressure can cause leaks or damage the appliance.
In cases where water pressure is within the acceptable range but the dishwasher still struggles to clean dishes, the issue might lie elsewhere. Other components, such as the water inlet valve, might be clogged or faulty. This valve controls the flow of water into the dishwasher and, over time, can become obstructed with sediment or debris, reducing water flow.
Cleaning or replacing the water inlet valve might resolve cleaning issues. However, it’s a more complex task that might require professional help. Regular maintenance checks can help avoid such problems and sustain the dishwasher’s optimal performance over time.
By systematically verifying the water supply and pressure, homeowners can often troubleshoot and remedy common dishwasher cleaning problems without needing to delve into more complicated repairs.
Troubleshooting Detergent and Rinse Aid Usage
When a KitchenAid dishwasher fails to clean properly, many immediately blame the machine. However, detergent and rinse aid usage plays a critical role. They’re like the unsung heroes of spotless dishes. Misuse or inaccuracies in their application can thwart the dishwasher’s ability to perform.
Adjusting Detergent Amount
Detergents work by breaking down food residues. But the amount matters. Too little and dishes stay dirty. Too much, and it leaves a residue. Start with the recommended dosage on the detergent’s label and adjust based on water hardness and load size. Soft water requires less detergent, while hard water might need more.
- Powder: Affordable but needs correct storage to prevent clumping.
- Liquid: Offers flexibility in amounts but can be pricier.
- Pods or Tablets: Convenient but not adjustable for specific loads.
Choosing the right type hinges on personal preference and specific washing needs. Pods, while handy, might not be ideal for small loads or lightly soiled dishes.
Rinse Aid Importance
Rinse aid isn’t just a fancy addition; it’s essential for drying. It helps water evenly sheet off dishes, preventing droplets that dry into water spots. Regularly check the rinse aid compartment to ensure it’s filled and adjust the dispenser setting based on the finishing results on glassware. Lower the setting if you see streaks, up it if spots remain.
Frequently Asked Questions
What is the significance of detergent in a KitchenAid dishwasher?
The significance of detergent in a KitchenAid dishwasher lies in its crucial role for ensuring dishes come out clean. The correct type and amount of detergent contribute significantly to achieving spotless dishes, making it an essential element in the dishwasher’s operation.
How does water hardness affect detergent usage in a dishwasher?
Water hardness affects detergent usage in a dishwasher by requiring adjustments in the amount of detergent used. Hard water may require more detergent to effectively clean dishes, while soft water requires less to prevent soap residue.
Are all detergent types suitable for KitchenAid dishwashers?
No, not all detergent types are equally suitable for KitchenAid dishwashers. While powder, liquid, and pod detergents can be used, each type has its own considerations. It’s important to choose the type that best suits your water hardness, load size, and dishwasher model.
Why is rinse aid important for KitchenAid dishwashers?
Rinse aid is important for KitchenAid dishwashers as it aids in drying dishes and preventing water spots, especially on glassware. It plays a key role in ensuring dishes come out looking spotless and dry by helping water disperse and evaporate quickly.
How can I adjust the rinse aid dispenser setting for optimal results?
To adjust the rinse aid dispenser setting for optimal results, check the dispenser in your KitchenAid dishwasher and adjust according to the manufacturer’s instructions. The goal is to find a setting that provides the best drying performance and spot prevention, which may vary based on your specific dishwashing needs and water hardness.