Your laptop’s DC power jack is crucial for charging and powering the device. If it’s broken or faulty, you can fix it yourself to save money and get your laptop back up and running quickly. This step-by-step guide can help you with the repair process. One common issue is a damaged DC power jack, which can stop the laptop from charging and using its power source. Fixing the power jack is important for keeping your laptop working and preventing further electrical damage.

Repairing a laptop’s DC power jack might seem challenging, but with the right guidance and tools, you can often do it without professional help. Whether the problem is a loose connection, a broken solder point, or a need for a replacement, following the repair process step by step can lead to success. Remember to work in a clean, static-free environment and take appropriate precautions when handling electronic components.
DIY Laptop DC Power Jack Repair: Save Money & Fix Your Charger
What You’ll Need
Before you start, gather these tools and supplies:
- Small Phillips head screwdriver
- Flathead screwdriver or plastic pry tool
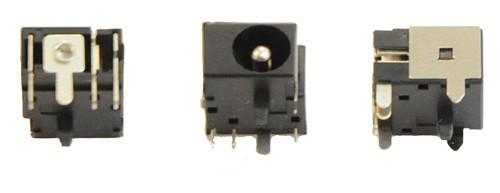
- Replacement DC power jack (match your laptop model)
- Soldering iron (if the jack is soldered to the motherboard)
- Solder
- Desoldering pump or wick (if needed)
- Heat gun (optional, for removing adhesive)
Step 1: Disconnect Power & Remove Battery
Always turn off your laptop and unplug the power adapter before starting any repairs. If possible, remove the battery to avoid electrical shocks.
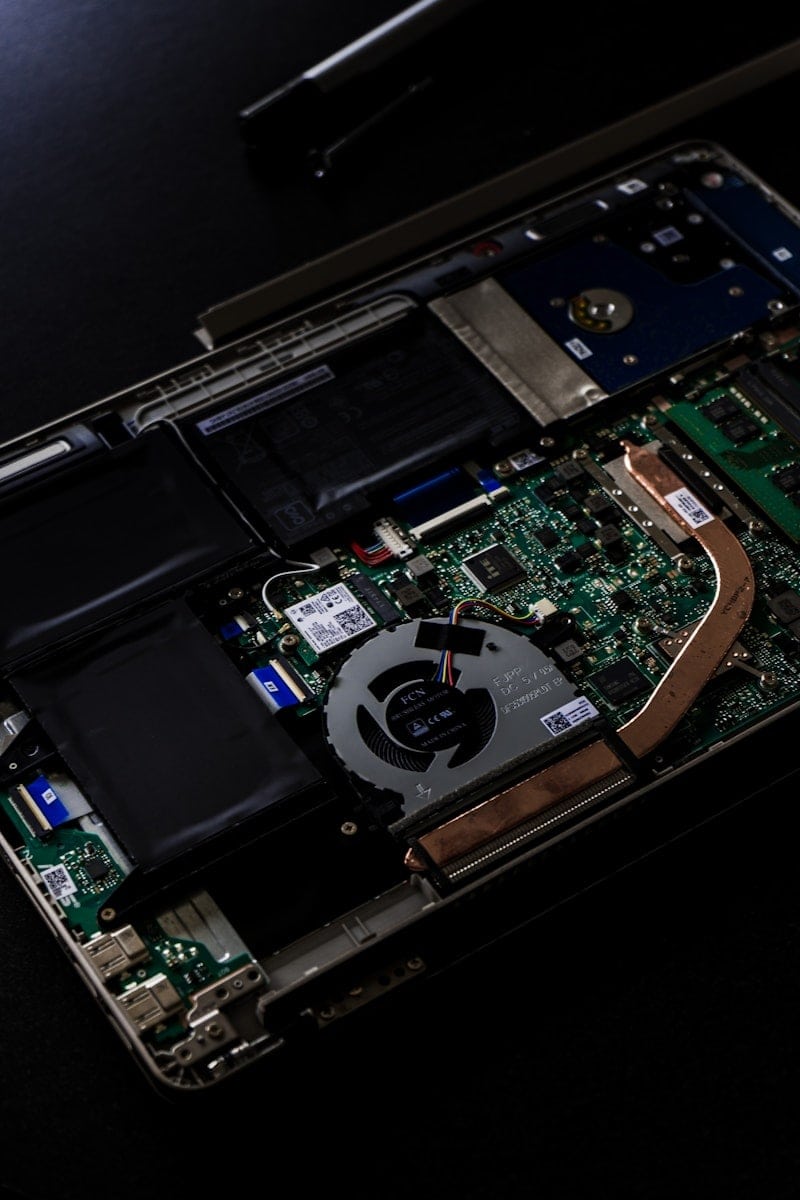
Step 2: Access the DC Power Jack
Most laptops have a separate panel covering the DC power jack. Locate the screws holding this panel and remove them with a Phillips head screwdriver. Gently pry open the panel using a flathead screwdriver or plastic pry tool.
Step 3: Disconnect and Remove the Old Jack
If your DC power jack is soldered to the motherboard, you’ll need to desolder it first. Heat up each solder joint with a soldering iron and use a desoldering pump or wick to remove the solder. Once desoldered, carefully unplug any wires connected to the jack and remove it.
If your DC power jack is not soldered, it may be held in place with screws or adhesive. Remove any screws and use a heat gun to soften the adhesive if necessary. Gently pry the jack out of its housing.
Step 4: Install the New Jack
Place the new DC power jack in the same position as the old one. If it’s a solder-type jack, carefully solder each pin to the corresponding pad on the motherboard. Use a small amount of solder and avoid creating bridges between pins.
If your jack is not soldered, secure it with screws or adhesive as needed. Make sure it’s firmly in place and aligned correctly.
Step 5: Reassemble and Test
Reconnect any wires you disconnected earlier. Carefully close the panel and secure it with the screws you removed. Reinsert the battery if you removed it. Plug in the power adapter and turn on your laptop. Test the new DC power jack by moving the power plug slightly to ensure it maintains a good connection.
Troubleshooting Tips
If your laptop still doesn’t charge after replacing the DC power jack, here are a few things to check:
- Loose connection: Ensure the new jack is securely connected and all wires are properly plugged in.
- Faulty power adapter: Try a different power adapter to see if it charges your laptop.
- Motherboard issue: If the problem persists, the charging circuit on your motherboard may be damaged and require professional repair.
Note: Repairing electronic devices can be tricky, and there’s always a risk of damaging your laptop further. If you’re not comfortable with soldering or disassembling your laptop, it’s best to seek professional help.
Key Takeaways
- A damaged DC power jack can prevent laptops from charging and needs timely repair.
- The repair process involves diagnosing the issue, securing a proper connection, or replacing the jack.
- It’s essential to approach the repair methodically, with attention to safety and device care.
Understanding Laptop DC Power Jack Issues
A laptop’s DC power jack is a crucial component since it connects the charger to the device, allowing battery charging and powering the laptop. If this jack is faulty, it may lead to the laptop not charging or failing to receive power, even when plugged in. Various factors can lead to issues with the DC power jack.
Common Causes of DC Power Jack Damage:
- Physical Damage: Rough handling, such as yanking the charger cord, can loosen or break the jack.
- Wear and Tear: Repeated plugging and unplugging of the power cord can wear out the jack over time.
The symptoms of a damaged DC power jack are usually clear. The laptop might only charge when the power cord is held at a certain angle, or it might stop charging altogether. In some cases, the laptop might not power on, or it could intermittently switch between battery and AC power.
Signs of Power Jack Failure:
- Intermittent charging or power
- Needing to apply pressure to the charger to make a connection
- No LED indicator light when plugged in
Before you can fix this, identify whether the issue is with the power jack and not with the charger or battery. If the charger and battery work fine with another laptop, then the power jack could be the culprit.
Repairing a DC power jack involves either resoldering the existing jack or replacing it with a new one. This repair can be intricate and usually requires disassembling the laptop and access to the motherboard.
It’s essential to address power jack damage quickly because it can harm the laptop’s motherboard if left unchecked. This could lead to a more expensive and complex laptop repair down the line.
Step-by-Step Repair Process
Laptop DC power jack repair involves careful steps from diagnosing the issue to replacing the faulty jack and reassembling the laptop. Each phase is crucial to restore the laptop’s ability to charge and function properly.
Diagnosing the Problem
First, test the DC power jack’s continuity using a multimeter. Set the device to continuity mode and check if there is a stable connection from the jack to the motherboard. A lack of continuity or unstable readings suggest a damaged jack or a broken motherboard track.
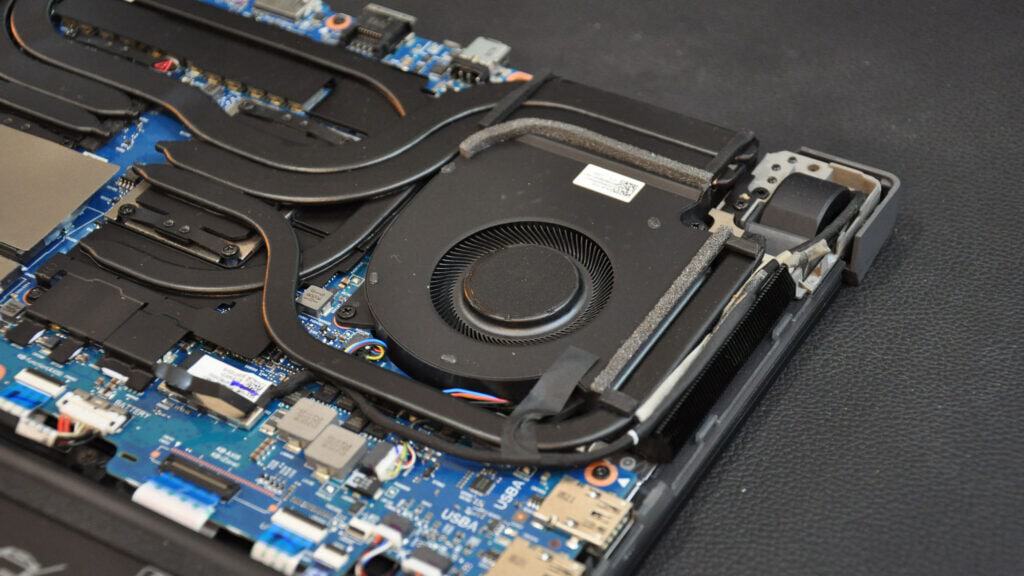
Disassembling the Laptop
Turn off the laptop and unplug all power sources. Carefully remove the screws from the base of the laptop. Place these screws in a small container to avoid losing them. Gently remove components like the keyboard, hard drive, and RAM in sequence, based on the laptop model.
Removing the Damaged DC Jack
Locate the faulty DC jack and assess how it’s connected to the motherboard. It may be soldered or connected with a cable. In the case of a soldered jack, apply flux and use a soldering iron with a desoldering pump or braid to remove the old jack.
Installing the New DC Power Jack
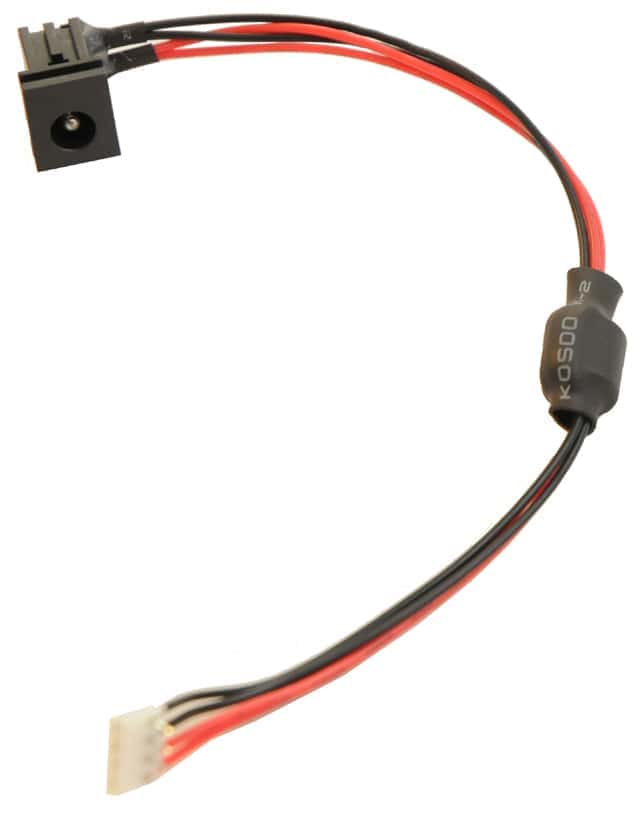
Prepare the new jack by applying flux to its connectors. Position the new DC power jack and solder it securely to the motherboard, ensuring the joints are strong. For models with a cable-connected jack, simply replace the old jack with the new one and connect the cable firmly.
Reassembling and Testing
Reattach all components in reverse order. Ensure the power cable and other disconnected parts are placed back correctly. Once the laptop is reassembled, plug in the power adaptor and test the new DC jack by checking if the laptop powers up and charges efficiently.
Laptop Power Issues: Decoding the Culprit
Identifying the Problem:
When your laptop experiences power issues, it can stem from various components. Here’s a breakdown to help you pinpoint the cause:
- AC Adapter: The external power brick that connects to your laptop.
- Charging Port: The port on your laptop where the AC adapter plugs in.
- Battery: The internal power source that stores electricity for portable use.
Troubleshooting Steps:
Here’s a step-by-step guide to identifying the faulty component:
Check the AC Adapter:
- Inspect the power cord and adapter for physical damage.
- Ensure it’s securely plugged into a working wall outlet.
- Look for a light indicator on the adapter, which usually signals power flow.
- Try a different, compatible AC adapter if available.
Examine the Charging Port:
- Look for any visible damage, bent pins, or debris inside the port.
- Gently wiggle the adapter plug while plugged in to see if the charging indicator light flickers, suggesting a loose connection.
Assess the Battery:
- If your laptop has a removable battery, take it out and try powering on the laptop with just the AC adapter.
- If the laptop works without the battery, the battery is likely the culprit.
- If the laptop still doesn’t power on, the issue might lie with the AC adapter or charging port.
- For laptops with non-removable batteries, monitor the battery health through system settings.
Common Signs and Possible Causes:
| Symptom | Possible Cause |
|---|---|
| Laptop won’t turn on or charge | Faulty AC adapter, damaged charging port, or dead battery. |
| Battery drains quickly | Aging battery, power-hungry applications, or incorrect power settings. |
| Laptop shuts down unexpectedly | Overheating, battery issues, or software conflicts. |
| Charging indicator light is off or flickering | Loose connection, faulty AC adapter, or damaged charging port. |
| Battery not charging to 100% | Battery calibration issue or power management settings limiting charge. |
Solutions:
- Replace the AC adapter: If the adapter is faulty, purchase a new one that’s compatible with your laptop model.
- Repair or replace the charging port: A damaged port often requires professional repair or replacement.
- Replace the battery: If the battery is dead or aging, install a new one.
- Adjust power settings: Optimize your laptop’s power settings to improve battery life.
- Update drivers and BIOS: Outdated drivers or BIOS can sometimes cause power-related issues.
- Seek professional help: If you’re unable to identify or fix the issue, consult a qualified technician.
Frequently Asked Questions
This section provides answers to common questions about laptop DC power jack repair, including symptom identification, cost estimation, DIY repair possibilities, and professional service options.
What are the signs of a malfunctioning laptop DC power jack?
A faulty DC power jack may result in intermittent charging or a complete inability to charge. The laptop might also power off abruptly when moved due to a poor connection.
What is the average cost to repair a laptop power jack?
Repair costs can vary widely but typically range between $100 to $200. The price depends on the laptop model and the complexity of replacing the power jack.
Can I replace my laptop’s charging port on my own, and what tools will I need?
DIY power jack replacement is possible with the right tools, including a soldering iron, screwdrivers, and a replacement jack specific to your laptop model.
Is it possible to fix a loose charger port on my Lenovo laptop, and how?
You can fix a loose charger port on a Lenovo laptop by re-soldering the existing jack or replacing it with a new one after disassembling the laptop to access the motherboard.
Why might replacing a DC power jack be a complex process for some laptops?
Some laptops may have power jacks soldered directly onto the motherboard or located in hard-to-reach areas, making the repair process intricate and time-consuming.
Where can I find a reliable service for laptop power jack repair near me?
Seek out local electronics repair shops with positive customer reviews or opt for manufacturer-approved service centers to ensure a reliable repair for your laptop’s power jack.