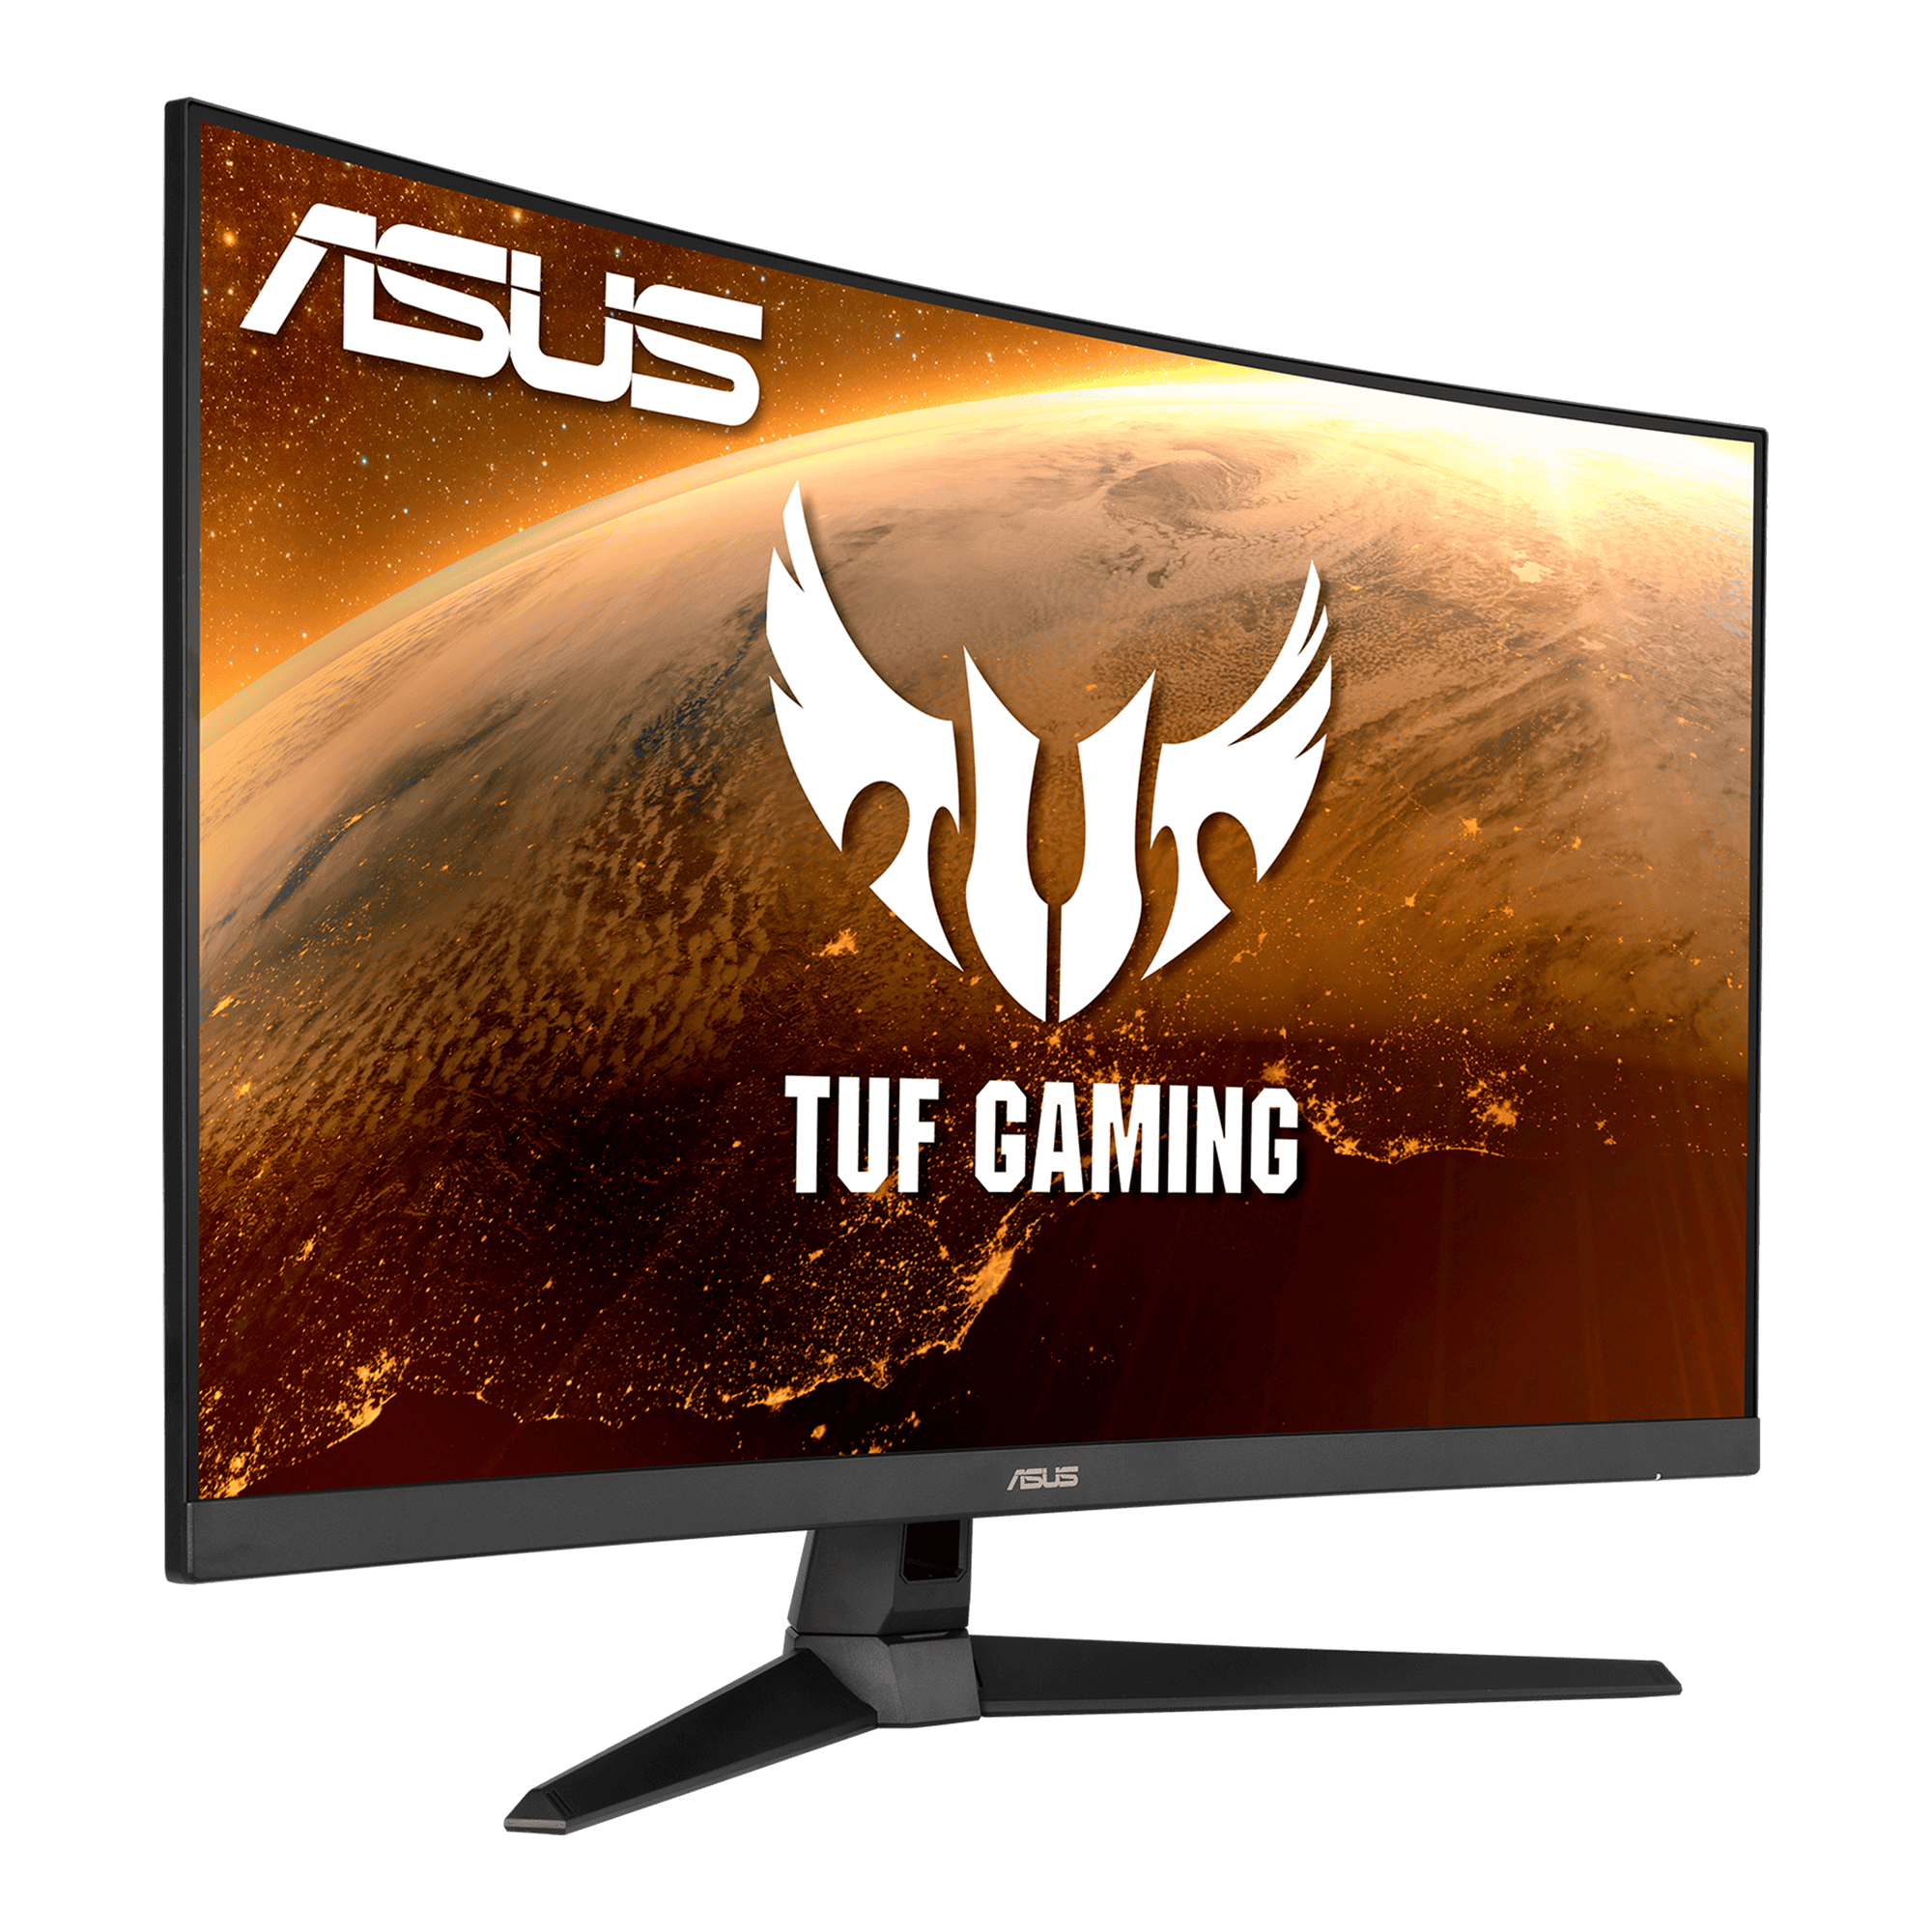
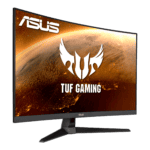
Turning on (or off) your ASUS monitor is a simple process that can be done in just a few steps. Whether you’re setting up a new monitor or troubleshooting an existing one, knowing how to power it on correctly is essential.
To turn on your ASUS monitor, locate the power button on the front or side of the screen and press it once. The power light should change from amber to blue, indicating the monitor is now on. If you don’t see any image, check that your computer is also powered on and the video cable is securely connected.
Sometimes, ASUS monitors may not turn on due to common issues. These can include loose power cables, incorrect input settings, or problems with the connected device. By understanding these potential hurdles, you can quickly resolve most monitor power-up issues and get back to work or play.
| Step | Action |
|---|---|
| 1 | Check power cable connection |
| 2 | Press monitor power button |
| 3 | Verify computer is on |
| 4 | Ensure video cable is connected |

Powering Your ASUS Monitor On and Off
It might seem obvious, but sometimes the simplest tasks can be confusing with new tech. Here’s a clear guide to turning your ASUS monitor on and off, with some troubleshooting if you encounter issues:
Turning On Your ASUS Monitor
- Connect the power cable: Ensure the power cable is securely plugged into both the monitor and a working wall outlet.
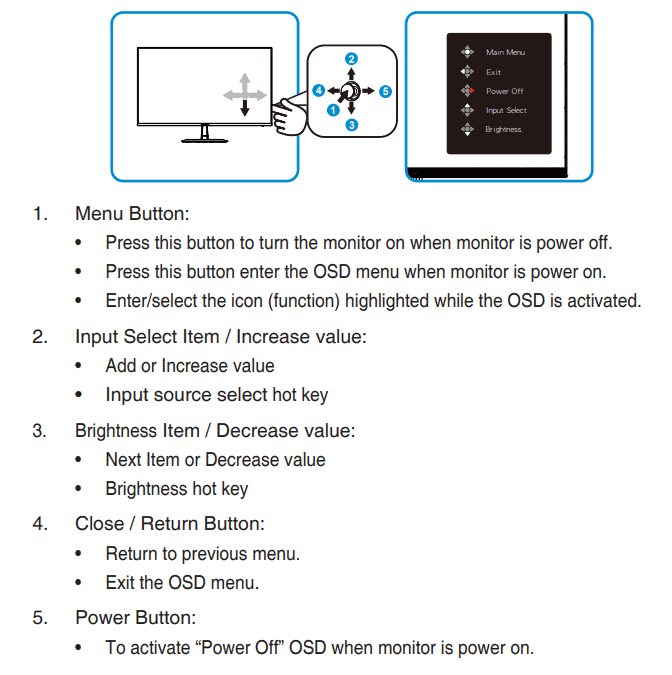
- Press the power button: Locate the power button on your monitor. It’s usually on the bottom or side of the bezel, and might be labeled with a power symbol or the word “Power.” Press it once to turn on the monitor.
- Check the input source: If the screen remains blank, make sure the monitor is set to the correct input source (e.g., HDMI, DisplayPort). You can usually cycle through input sources using a button labeled “Source” or a similar icon on the monitor’s controls.
- Check the signal cable: Ensure the signal cable (HDMI, DisplayPort, etc.) is properly connected to both the monitor and your computer or device.
Turning Off Your ASUS Monitor
- Press the power button: Press the power button once to turn off the monitor. The power indicator light should turn off.
- Alternative method: If your monitor has a menu button, you can often access a power off option within the on-screen display (OSD) menu.
Troubleshooting
- No power:
- Check the power outlet: Make sure the wall outlet is working by plugging in another device.
- Check the power cable: Inspect the power cable for any damage. Try a different cable if possible.
- Check the power button: Ensure the power button is not stuck or damaged.
- No display:
- Check the signal cable: Ensure the signal cable is securely connected to both the monitor and your device. Try a different cable if possible.
- Check the input source: Make sure the monitor is set to the correct input source.
- Check your device’s output: Ensure your computer or device is sending a video signal. Try connecting the device to a different display.
- Monitor goes to sleep:
- Adjust power settings: Check your monitor’s power saving settings and adjust the sleep timer or turn it off completely.
- Check your device’s power settings: Ensure your computer or device is not set to turn off the display after a period of inactivity.
Additional Tips
- Consult the user manual: If you’re having trouble with your ASUS monitor, refer to the user manual for specific instructions and troubleshooting tips.
- Update your drivers: Ensure your graphics drivers are up to date. Outdated drivers can sometimes cause display issues.
- Contact ASUS support: If you’re unable to resolve the issue, contact ASUS customer support for assistance.
By following these simple steps and troubleshooting tips, you can ensure your ASUS monitor is powered on and off correctly, providing you with a clear and enjoyable viewing experience.
Preparing to Turn On Your ASUS Monitor
Before powering up your ASUS monitor, it’s crucial to verify the connections and select the right input. These steps ensure a smooth startup and optimal display performance.
Checking Power Connections
Start by inspecting the power cable connection. Make sure the power cord is firmly plugged into both the monitor and the wall outlet. Check for any visible damage to the cable.
If using a surge protector or power strip, confirm it’s switched on. For monitors with external power bricks, verify the connections at both ends.
Test the outlet with another device to rule out electrical issues. If needed, try a different power cord to isolate the problem.
Selecting the Correct Input
Identify the input ports on your ASUS monitor. Common options include HDMI, DisplayPort, and VGA.
Choose the appropriate cable for your device and monitor. Connect one end to your computer or video source and the other to the monitor.
Use the monitor’s input selector button to switch to the correct source. This button is often located on the side or bottom of the screen.
| Input Type | Cable Type | Max Resolution |
|---|---|---|
| HDMI | HDMI | 4K |
| DisplayPort | DisplayPort | 8K |
| VGA | VGA | 1080p |
Double-check that your computer recognizes the monitor in its display settings. Adjust the resolution if needed for the best image quality.
Connecting External Devices to Your Monitor
Connecting external devices to your ASUS monitor expands its functionality and versatility. Different ports offer varying levels of video quality and compatibility with your devices.
Using HDMI for High-Definition Quality
HDMI connections provide high-quality digital video and audio transmission. To connect your ASUS monitor via HDMI:
- Locate the HDMI port on your monitor and device
- Insert one end of the HDMI cable into your device
- Plug the other end into your monitor’s HDMI port
- Turn on both devices
HDMI supports resolutions up to 4K and carries audio signals. It’s ideal for connecting computers, gaming consoles, and streaming devices to your monitor.
Understanding DisplayPort Connections
DisplayPort offers high bandwidth for superior image quality. To use DisplayPort:
- Find the DisplayPort slots on your monitor and device
- Connect the cable to your device
- Attach the other end to your monitor
- Power on both devices
DisplayPort supports higher refresh rates than HDMI, making it perfect for gaming and professional graphics work. It can transmit audio and allows daisy-chaining multiple monitors.
Connecting with VGA and DVI
VGA and DVI are older but still common connection types. For VGA:
- Locate the blue VGA ports
- Plug the cable into your device and monitor
- Tighten the screws on both ends
- Turn on your devices
DVI follows a similar process but uses a different connector shape. Both support analog signals, with DVI also offering digital options. While they don’t match HDMI or DisplayPort quality, they’re useful for older devices.
| Connection Type | Max Resolution | Audio Support | Best For |
|---|---|---|---|
| HDMI | 4K | Yes | General use |
| DisplayPort | 8K | Yes | High-performance |
| VGA | 1080p | No | Legacy devices |
| DVI | 2560×1600 | No | Older computers |
Troubleshooting Common Issues
When your ASUS monitor fails to turn on, several issues may be at play. These can range from simple power problems to more complex display settings conflicts.
Resolving Power Issues
Start by checking the power connection. Ensure the power cable is firmly plugged into both the monitor and the wall outlet. Try a different outlet to rule out electrical issues. If your monitor has an external power brick, inspect it for damage.
Press the power button firmly. Sometimes, the button may be stuck or unresponsive. Hold it for 5-10 seconds to force a restart. If the power light doesn’t come on, the internal power supply might be faulty.
Check for loose connections between your computer and monitor. Unplug and reconnect all cables. Try a different video cable if available. Test the monitor with another device to determine if the problem lies with the monitor or the computer.
Adjusting Display Settings
If your monitor powers on but shows a black screen, adjust the display settings. Press the menu button on your monitor to access on-screen settings. Increase the brightness and contrast.
On your computer, right-click the desktop and select display settings. Ensure the correct resolution and refresh rate are set for your ASUS model. Try lowering these settings temporarily to see if the display appears.
Table: Common Display Issues and Solutions
| Issue | Possible Solution |
|---|---|
| Black screen | Increase brightness, check input source |
| Flickering | Adjust refresh rate |
| Distorted image | Reset to factory settings |
| No signal | Check cable connections, try different ports |
Consulting ASUS Customer Service
If basic troubleshooting doesn’t work, contact ASUS support. Visit the ASUS support website for model-specific guidance. Look up your monitor’s serial number before calling.
ASUS may recommend a factory reset. Follow their instructions carefully, as this will erase all custom settings. If your monitor is under warranty, ASUS might offer repair or replacement options.
For persistent issues, consider professional repair. Authorized service centers have the tools and expertise to diagnose complex problems. Keep your purchase receipt handy for warranty claims.
Advanced Monitor Settings and Updates
Customizing your ASUS monitor’s settings and keeping it up-to-date can greatly enhance your viewing experience. These steps will help you access advanced features, install the latest firmware, and optimize display performance.
Accessing the OSD Menu
The On-Screen Display (OSD) menu is your gateway to advanced monitor settings. To open it:
- Locate the control buttons on your ASUS monitor
- Press the menu button (usually marked with an icon)
- Use the navigation buttons to move through options
- Select settings with the enter or OK button
Common OSD settings include:
- Brightness and contrast
- Color temperature
- Input selection
- GameVisual modes
- Blue light filter
Some ASUS monitors offer shortcut keys for quick access to frequently used settings. Experiment with different options to find your ideal setup.
Updating Monitor Firmware
Keeping your monitor’s firmware current ensures optimal performance and compatibility. To update:
- Visit the ASUS Download Center
- Enter your monitor model number
- Download the latest firmware file
- Connect your monitor to your PC via USB
- Run the firmware update tool
- Follow on-screen instructions
Always read release notes before updating. Some updates may reset your custom settings, so note them down beforehand. If issues occur, you can often revert to a previous firmware version.
Optimizing Display Performance
To get the best image quality from your ASUS monitor:
- Set the correct resolution in Windows Display Settings
- Adjust the refresh rate to match your monitor’s capabilities
- Enable Adaptive-Sync technology if supported
For gaming:
- Use Game Visual modes for genre-specific optimizations
- Enable Ultra-Low Motion Blur for fast-paced games
- Adjust overdrive settings to reduce ghosting
Color calibration can further improve image quality:
- Use built-in color presets or create custom profiles
- Consider a hardware calibration tool for professional work
| Setting | Purpose | Recommendation |
|---|---|---|
| GameVisual | Optimize for game genres | FPS mode for shooters |
| ELMB | Reduce motion blur | Enable for fast games |
| VRR | Smooth frame rates | Use with compatible GPUs |
| HDR | High dynamic range | Enable for supported content |
Regular cleaning and proper placement also contribute to optimal display performance.
Frequently Asked Questions
ASUS monitors can sometimes present challenges when powering on or displaying content. Here are answers to common questions about turning on and troubleshooting ASUS monitors.
How can I power on my ASUS monitor using the keyboard?
Most ASUS monitors can’t be turned on with a keyboard. The power button is usually on the monitor itself. Check the monitor’s back or bottom edge for the power button. Press it to turn the monitor on.
What should I do if my ASUS monitor won’t power on?
First, check the power cable connection. Make sure it’s plugged in firmly at both ends. Try a different power outlet. If that doesn’t work, inspect the power cable for damage. Replace it if needed.
Next, check if the monitor’s power LED is on. If it’s not, the issue may be with the monitor’s internal components. Consider contacting ASUS support for repairs.
How do I resolve a black screen issue on my ASUS monitor?
Start by checking the cable connections between your monitor and computer. Ensure they’re secure. Try a different video cable if available.
Adjust the monitor’s brightness settings. Press the menu button and navigate to the brightness controls. Increase the brightness to see if the display appears.
If these steps don’t work, try connecting the monitor to a different computer. This can help determine if the issue is with the monitor or your PC.
What steps are involved in connecting an ASUS monitor to a PC?
First, identify the video ports on your PC and monitor. Common options include HDMI, DisplayPort, and VGA. Choose the appropriate cable for your setup.
Connect one end of the cable to your PC and the other to the monitor. Plug the monitor’s power cable into an outlet. Turn on your PC, then press the monitor’s power button.
Your PC should detect the monitor automatically. If not, you may need to adjust your display settings in Windows.
What troubleshooting methods can I try if my ASUS monitor is not turning on?
Start with the basics. Ensure the power cable is connected properly and the outlet works. Press the power button firmly.
Check for visible damage on the monitor or cables. Listen for any unusual sounds when trying to power on. These could indicate hardware issues.
Try a factory reset of your ASUS monitor. Consult your user manual for the specific steps, as they vary by model.
How can I fix an ASUS desktop that won’t turn on?
First, check the power supply. Ensure the power cable is connected securely to both the PC and the wall outlet. Try a different power cable if available.
Check if the power supply switch on the back of the PC is in the “on” position. Listen for any fan noise or beep codes when you try to power on.
If there’s no response, the issue might be with internal components. Consider seeking help from a professional technician or ASUS support.
| Troubleshooting Step | Purpose |
|---|---|
| Check power connections | Ensure proper power supply |
| Inspect cables | Identify physical damage |
| Try different ports | Rule out connection issues |
| Factory reset | Resolve software problems |
| Test with another device | Isolate monitor or PC issues |

