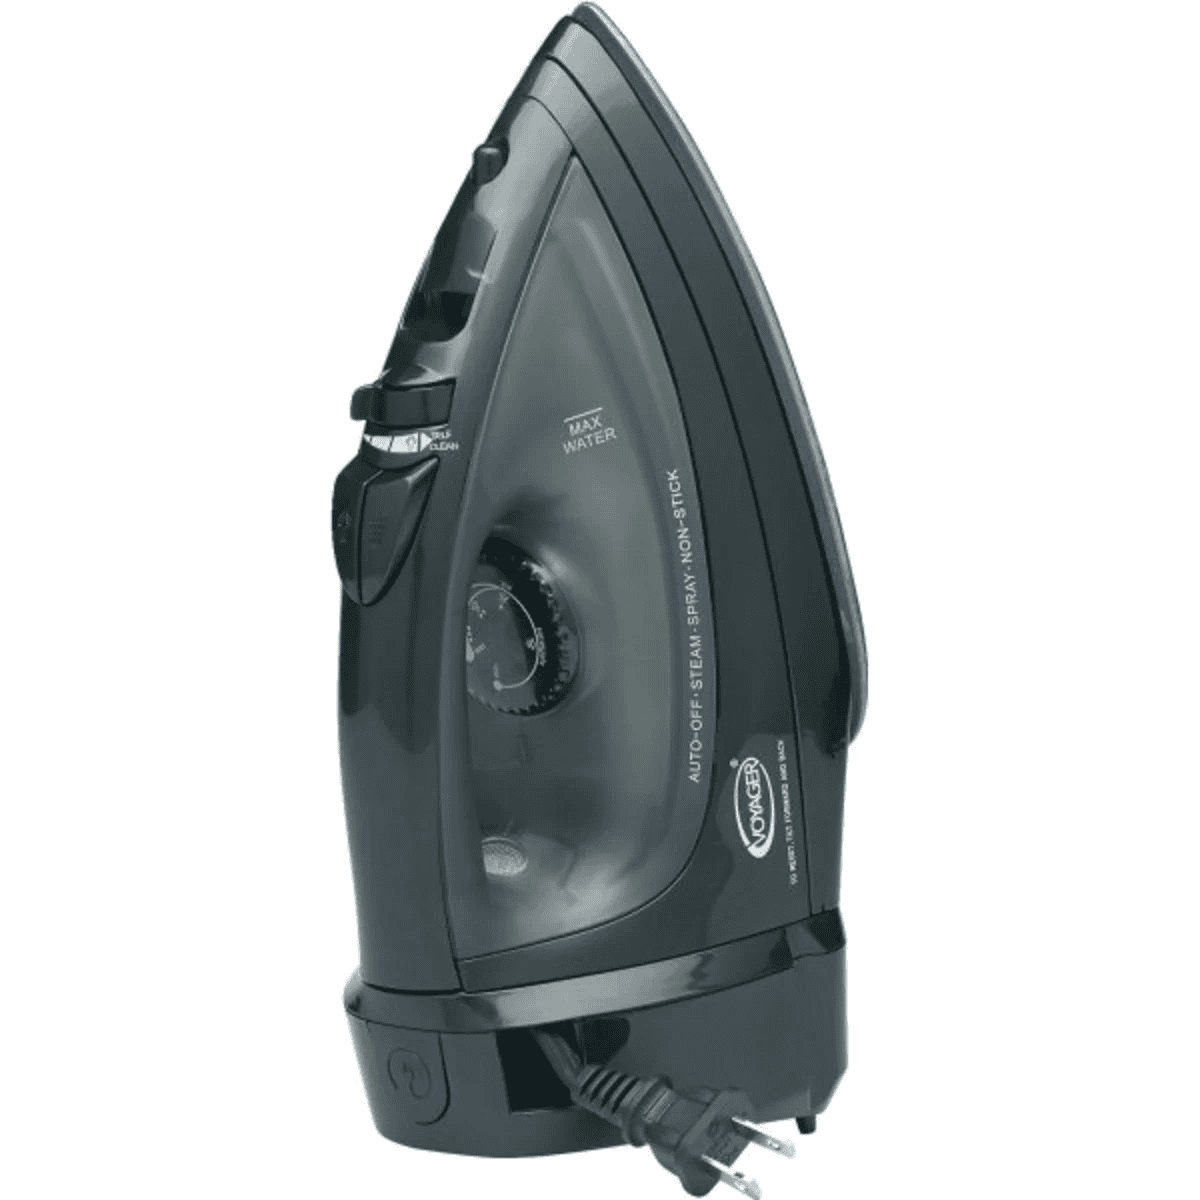
Adding water to your Voyager iron is a simple task that ensures optimal performance. To fill the water tank, unplug the iron, set the temperature slider to “OFF,” and tilt it at a 45-degree angle. Open the water tank tab on the handle and pour in cold, clean water using the measuring cup.
Using the right type of water is key. Distilled water prevents mineral buildup and keeps your iron working well. This helps avoid white spots on your clothes from mineral deposits in regular tap water.
Safety comes first when handling your iron. Make sure it’s unplugged and cool before you add water. This protects you from burns and electrical risks. Once filled, let the iron warm up before you start ironing.
| Water Type | Benefits | Drawbacks |
|---|---|---|
| Distilled | No mineral buildup | May need to purchase |
| Tap | Readily available | Can cause deposits |
| Filtered | Removes some minerals | May not remove all |
Understanding Your Voyager Iron
The Voyager iron offers versatile ironing options. It allows both steam and dry ironing to suit different fabrics and preferences. Proper water use and steam control are key to optimal performance.
Types of Water for Ironing
Distilled water is best for your Voyager iron. It prevents mineral buildup that can clog steam vents. Tap water often contains minerals that leave white spots on fabrics. These deposits can also damage the iron’s internal components over time.
If distilled water isn’t available, use demineralized water. Avoid using perfumed or softened water. These can stain clothes or harm the iron. Fill the iron through the designated opening using the provided measuring cup.
Never overfill the water tank. Leave some space for steam to generate. Empty the tank after each use to prevent water from sitting inside.
Adjusting Steam Control
Your Voyager iron features adjustable steam settings. These let you tailor steam output to different fabric types. The steam control dial typically offers:
- No steam (dry ironing)
- Low steam
- High steam
For delicate fabrics, use low or no steam. Heavier fabrics like denim benefit from high steam. Set the dial to “0” or dry position when filling with water.
Test steam settings on a hidden area of fabric first. This prevents potential damage to visible parts of your garments. Adjust the temperature dial to match the steam level and fabric type.
| Fabric Type | Steam Setting | Temperature |
|---|---|---|
| Silk | No Steam | Low |
| Cotton | Medium | High |
| Linen | High | Max |
Remember to let the iron heat up before using steam. This ensures proper steam generation and prevents water droplets on your clothes.
Preparing to Iron
Proper preparation ensures efficient and effective ironing. Setting up correctly helps protect your clothes and achieve the best results.
Selecting the Right Fabric Settings
Check your garment’s care label for ironing instructions. Match the fabric type to the appropriate heat setting on your iron. Start with lower temperatures for delicate fabrics like silk or synthetic materials. Increase heat for cotton and linen.
Use the iron’s temperature dial to select the correct setting. Allow the iron to heat up or cool down when changing between fabrics. Test the iron on a small, hidden area first to avoid damage.
For mixed fabrics, choose the setting for the most delicate material present. Sort your ironing pile by fabric type to minimize temperature adjustments.
Setting Up the Ironing Board
Place your ironing board on a flat, stable surface. Adjust the height for comfort to reduce strain. Ensure good lighting to spot wrinkles easily.
Cover the board with a clean, heat-resistant pad. This protects your clothes and improves steam distribution. Check that the cover is smooth and taut to prevent imprinting marks on your garments.
Position the iron’s cord so it doesn’t interfere with your movements. Keep a spray bottle of water nearby for stubborn wrinkles. Have hangers ready to store freshly ironed items and prevent new creases.
| Fabric Type | Iron Temperature | Steam Setting |
|---|---|---|
| Silk | Low | No Steam |
| Polyester | Low-Medium | Light Steam |
| Cotton | High | Full Steam |
| Linen | High | Full Steam |
Ironing Techniques
Proper ironing techniques help remove wrinkles and create crisp creases in garments. Mastering these skills ensures your clothes look polished and professional.
Removing Wrinkles from Different Fabrics
Different fabrics require specific ironing methods to remove wrinkles effectively. For cotton, use high heat and steam. Move the iron slowly across the fabric to smooth out creases. Synthetic fabrics need lower temperatures to avoid damage.
Ironing at too high a temperature can cause fabric to stick or dirt to accumulate on the soleplate. Always check garment labels for care instructions.
For delicate fabrics like silk or wool, use a pressing cloth between the iron and garment. This prevents shine marks and protects the fabric. Iron these materials on low heat without steam.
| Fabric Type | Temperature | Steam Setting |
|---|---|---|
| Cotton | High | High |
| Synthetic | Low-Medium | Low |
| Silk/Wool | Low | No Steam |
Achieving Crisp Creases
To create sharp creases in pants or shirts, follow these steps:
- Dampen the fabric slightly with a spray bottle
- Align the edges of the garment precisely
- Press firmly with a hot iron along the desired crease line
- Hold the iron in place for a few seconds before moving
For pants, fold them in half lengthwise and iron along the leg. Dress shirts benefit from creases down the sleeves. Use a sleeve board for best results.
To maintain crisp creases, hang clothes properly after ironing. Allow them to cool completely before wearing or storing.
Maintenance and Troubleshooting
Regular maintenance of your Voyager iron ensures optimal performance and longevity. Clean the soleplate with a damp cloth when cool. Remove mineral deposits by running a water-vinegar solution through the steam vents.
For best results, use distilled or demineralized water to fill the tank. This prevents mineral buildup and prolongs iron life. Avoid overfilling – stop at the MAX line.
Empty the water tank after each use. Store your iron upright to prevent leaks. Check the power cord regularly for damage.
Common issues and fixes:
| Problem | Solution |
|---|---|
| No steam | Check water level, increase temperature |
| Water leaks | Reduce steam, wait for proper heat |
| Mineral buildup | Clean with vinegar solution |
| Soleplate stains | Wipe with damp cloth when cool |
If your iron won’t heat up, ensure it’s plugged in and the temperature dial is set correctly. For persistent issues, consult the user manual or contact customer support.
Remember to unplug the iron before filling the water tank. If you notice any unusual smells or sounds, stop using the iron immediately and seek professional help.
Frequently Asked Questions
Adding water to your Voyager iron is a simple process. These questions cover the key steps and considerations for properly filling and using your iron with water.
How can I add water to my Voyager iron?
Unplug your Voyager iron before adding water. Open the water tank tab on the handle. Use clean cold water and a measuring cup to fill the tank. Don’t overfill. Close the tab securely after filling.
What is the correct procedure to use a Voyager iron with water?
Set the temperature slider to “OFF” before filling. Tilt the iron at a 45-degree angle while adding water. Allow the iron to heat up after plugging it in. Adjust the temperature and steam settings as needed for your fabric.
Where is the water inlet located on a Voyager iron?
The water inlet is typically on the handle of Voyager irons. Look for a small tab or cover that opens to reveal the filling port. The location may vary slightly between models.
Can you provide guidance on filling a Voyager iron with water for optimal steam function?
Use distilled water to prevent mineral buildup. Fill to the indicated maximum line. Don’t overfill as this can cause water to leak during ironing. Ensure the tank is securely closed before use.
What steps should be followed when putting water in a retractable cord Voyager iron?
Fully extend the cord before filling. Unplug the iron and let it cool if recently used. Open the water inlet and add water slowly to avoid spills. Close the inlet and retract the cord after filling.
Are there any specific instructions for adding water to different models of Voyager steam irons?
Check your model’s manual for specific guidance. Most Voyager irons follow similar filling procedures. Some models may have self-cleaning functions requiring special water filling steps. Always use the recommended water type for your model.
| Model | Water Capacity | Recommended Water Type |
|---|---|---|
| Voyager Signature | 300 ml | Distilled |
| Voyager Travel | 200 ml | Distilled or tap |
| Voyager Pro | 400 ml | Distilled |


