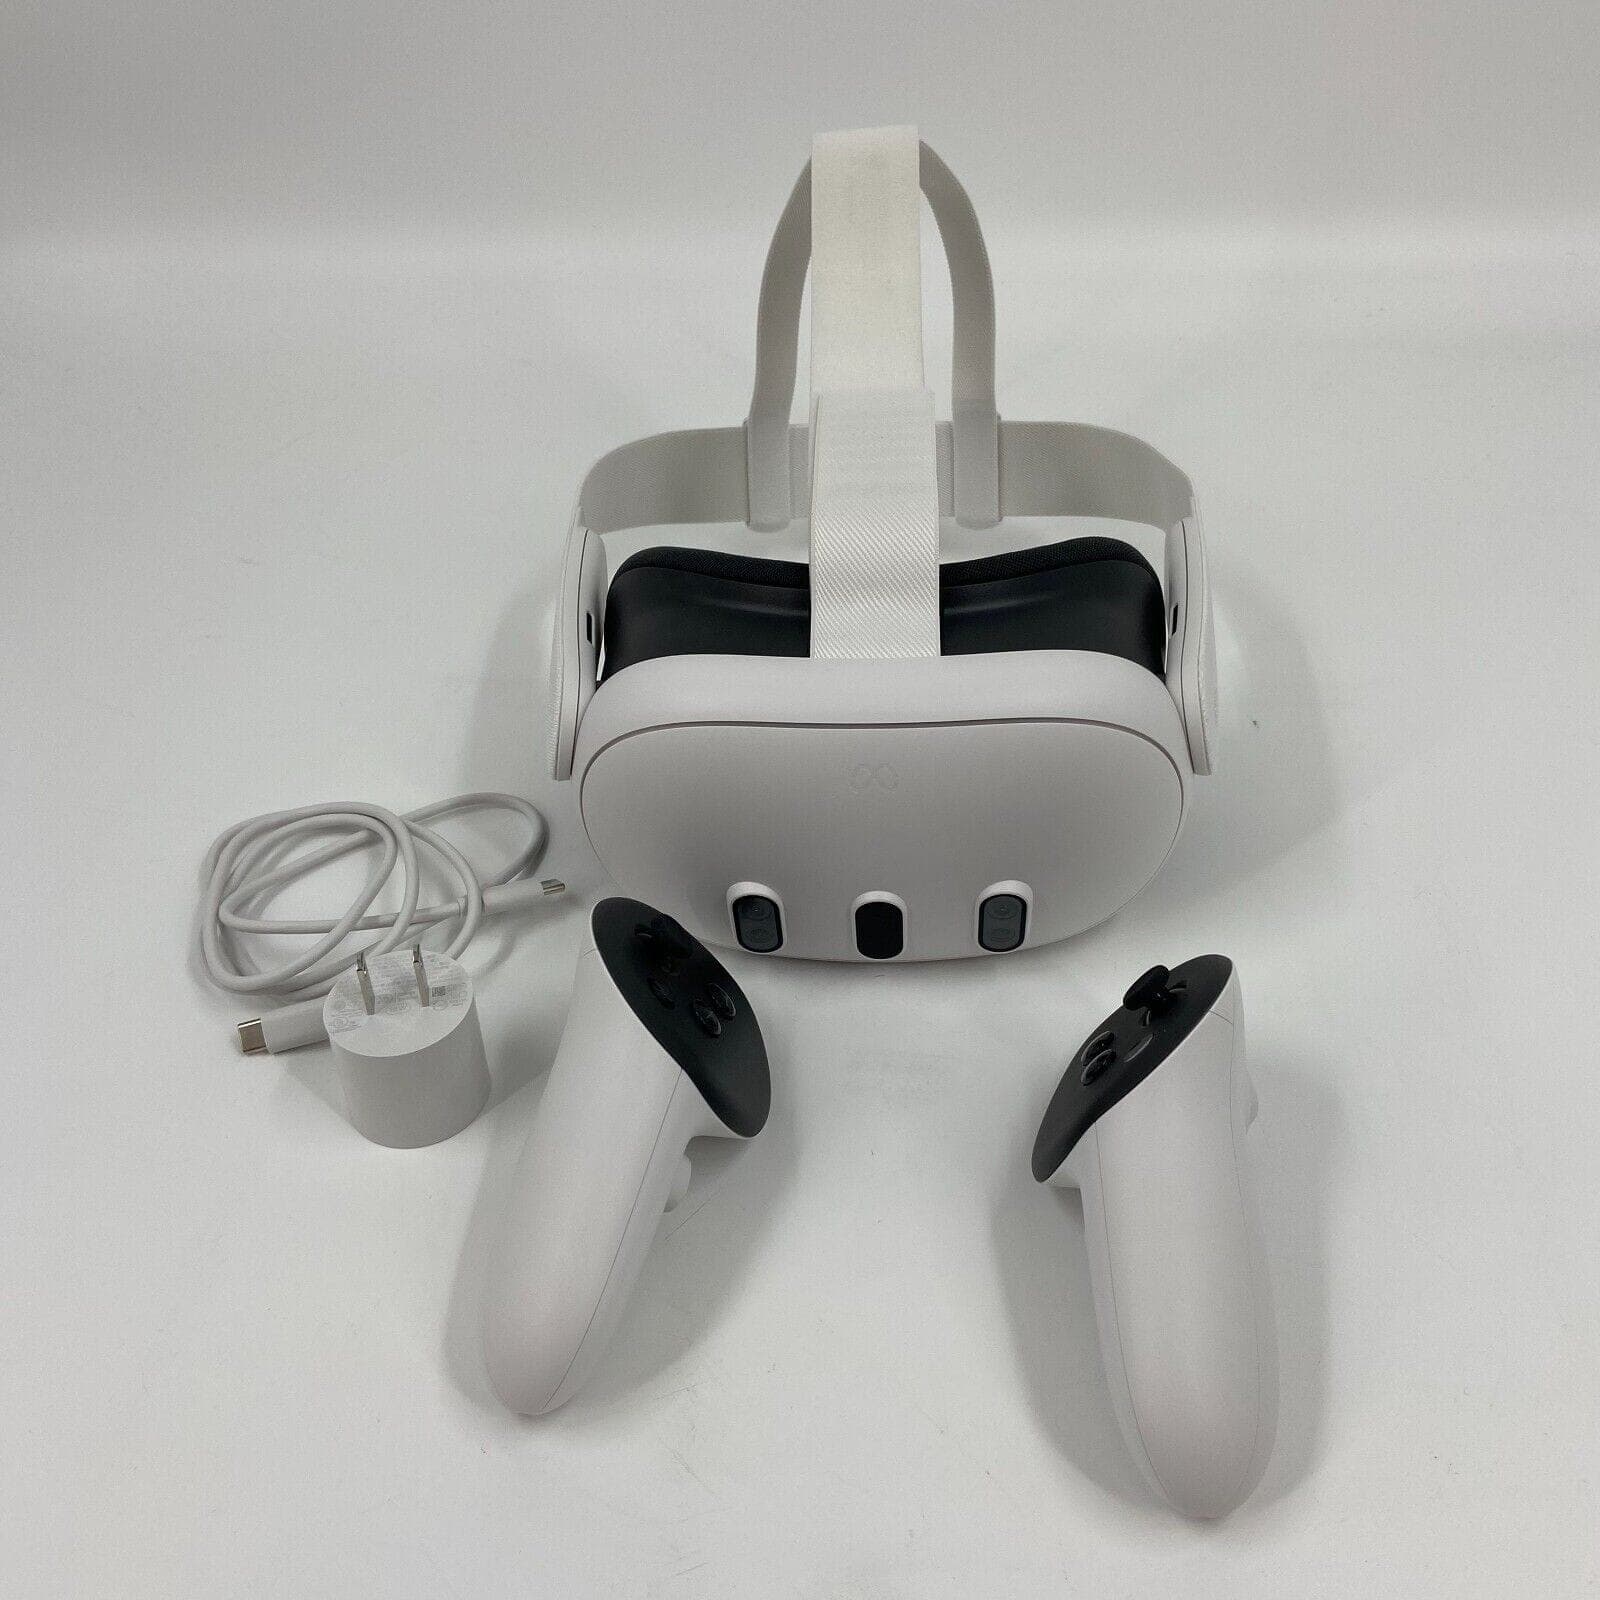
Yes, you can definitely screencast your Meta Quest 3 to your Mac. It’s a great way to share your VR gameplay with others or record videos on your computer. Here’s how to do it.
Screen Casting Your Meta Quest 3 to a Mac
It’s Possible, But Not With Safari
Yes, you can screen cast your Meta Quest 3 to a Mac. However, it’s important to note that this feature is not currently supported by the Safari browser.
Use Google Chrome or Other Browsers
To successfully cast your Meta Quest 3 to your Mac, you’ll need to use a browser like Google Chrome, Firefox, or any other non-Safari browser.

Steps for Screen Casting
- Open the Casting Website: On your Mac, open a compatible browser and go to the Oculus casting website: https://www.oculus.com/casting/
- Log in: Sign in to your Meta Quest account.
- Open the Universal Menu: On your Meta Quest 3 headset, press the Oculus button on your right controller to open the universal menu.
- Select “Camera”: Navigate to the “Camera” option and select it.
- Choose “Cast”: Click on “Cast” and select “Computer” from the list of available devices.
- Start Casting: Your Meta Quest 3 screen should now be mirrored on your Mac’s screen.
Troubleshooting Tips
- Check your Wi-Fi: Ensure both your Mac and Meta Quest 3 are connected to the same Wi-Fi network.
- Update Software: Make sure your Meta Quest 3 software and the browser on your Mac are up to date.
Alternative Casting Methods
If you’re having trouble with browser casting, you can also try using the Meta Quest mobile app for casting to your Mac.
Table: Meta Quest 3 Casting Options for Mac
| Method | Browser | App | Notes |
|---|---|---|---|
| Browser Casting | Chrome, Firefox, etc. | N/A | Requires a compatible browser and Oculus account |
| App Casting | N/A | Meta Quest | Requires the Meta Quest mobile app and connection to the same Wi-Fi |
Sharing Your VR Experience: Casting Meta Quest 3 to Mac
Understanding Your Options
You can share your Meta Quest 3 VR experience on a larger screen by casting it to your Mac. This is useful for sharing gameplay with friends, recording videos, or even using your Quest 3 as a virtual monitor for presentations. There are a few different ways to cast your Quest 3 to a Mac, each with its own advantages.
Casting with the Oculus App
The Oculus app is a convenient way to cast your Quest 3 to your Mac. Here’s how it works:
- Make sure your Quest 3 and Mac are connected to the same Wi-Fi network.
- Download and install the Oculus app on your smartphone (available for iOS and Android).
- Log in to the Oculus app using the same Meta account you use on your Quest 3.
- Open the Oculus app and tap the “Cast” icon.
- Select your Quest 3 headset from the list of devices.
- Choose your Mac as the casting destination.
Casting through a Web Browser
You can also cast your Quest 3 to your Mac using a web browser. This method can be useful if you’re having trouble with the Oculus app. Keep in mind that Safari is not currently supported for this feature.
- Open a compatible web browser on your Mac (Chrome, Firefox, or Edge are recommended).
- Go to the Oculus casting website: https://www.oculus.com/casting/
- Log in with your Meta account.
- Select your Quest 3 headset from the list of devices.
- Start the cast to see your Quest 3 screen mirrored on your Mac.
Using Third-Party Apps
In addition to the methods above, several third-party apps offer casting functionality with added features. These can be particularly useful for specific needs like productivity or gaming.
| App | Features | Best for |
|---|---|---|
| Virtual Desktop | Low latency, good for gaming, supports multiple monitors | Gaming and general screen mirroring |
| Immersed | Flexible virtual work environment, offline mode, multi-monitor support | Productivity and creating a dedicated VR workspace |
| Horizon Workrooms | High-quality screen rendering, designed for collaboration | Virtual meetings and collaborative work |
Troubleshooting Tips
If you encounter any issues with casting, here are some things to check:
- Wi-Fi Connection: Ensure your Quest 3 and Mac are on the same Wi-Fi network and have a strong signal. If your network is dual-band, try connecting both devices to the same frequency (either 2.4 GHz or 5 GHz).
- Restart Devices: Restart your Quest 3, your Mac, and your Wi-Fi router. This can often resolve temporary glitches.
- Update Software: Make sure your Quest 3 and your Mac have the latest software updates installed.
- Browser Compatibility: If using the browser method, try a different browser.
- Mac-Specific Issues: Check your Mac’s firewall settings and browser permissions to ensure they are not blocking the connection. Make sure your graphics drivers are up to date.
Optimizing Your Casting Experience
For the best casting experience, keep these tips in mind:
- Reduce Wi-Fi Interference: Avoid overcrowding your Wi-Fi network with too many devices. Keep your Quest 3 and Mac close to the Wi-Fi router for a stronger signal.
- Manage Expectations: Some latency (delay) is normal when screencasting. The amount of latency will depend on your Wi-Fi network and your Mac’s performance.
- Battery Life: Casting can drain your Quest 3’s battery faster than usual.
Exploring Content and Use Cases
Casting your Quest 3 to your Mac opens up a variety of possibilities:
- Share Gameplay: Let friends and family watch your VR gaming adventures on a bigger screen.
- Record Videos: Capture your VR experiences to share online or create tutorials.
- Give Presentations: Use your Quest 3 as a virtual monitor for immersive presentations.
- Productivity: Access your Mac’s applications in a VR environment for a more immersive workspace.
- Education: Explore educational VR apps and share the experience with others.
Alternatives to Casting
If you’re looking for alternatives to casting, consider these options:
- Recording Directly on Quest 3: Your Quest 3 has built-in recording capabilities. You can record videos and screenshots of your VR experiences directly on the device.
- Connecting to a PC VR-Ready PC: For the most immersive and high-fidelity VR experience, you can connect your Quest 3 to a VR-ready PC using a link cable or wirelessly with Air Link. This allows you to play PC VR games and access a wider range of VR content.
Casting Your Quest 3 Adventures to Your Mac
Requirements
Before you begin, make sure you have the following:
- Meta Quest 3 headset
- Mac computer
- Strong Wi-Fi connection (both the headset and Mac must be on the same network)
- Web browser on your Mac (Chrome or a similar browser is recommended; Safari is not supported)
Troubleshooting Tips
- Check your Wi-Fi: A slow or unstable Wi-Fi connection can cause lag or disconnections.
- Update software: Make sure both your Meta Quest 3 and Mac are running the latest software.
- Try a different browser: If you’re having trouble using Chrome, try a different web browser.
Additional Notes
- Casting can slightly drain your headset’s battery faster than usual.
- You may experience a bit of latency (delay) when screencasting.
Enjoy sharing your Meta Quest 3 experiences with your Mac!
Introduction to Meta Quest 3 and Mac Screen Casting
If you’ve got a Meta Quest 3, you’re holding a powerful virtual reality headset. It’s perfect for gaming, exploring virtual worlds, or watching immersive videos. But what if you want to share the experience, showing what you see inside the headset on a bigger screen? That’s where screen casting comes into play.
Screen casting is a way to mirror the display from one device onto another, and with the Meta Quest 3, you can cast what you see in your VR space to a Mac computer. It lets friends see your virtual antics on a larger display or can be used for presentations.
To get started, you’ll need a couple of things in place:
- Meta Quest 3 headset: That’s your source.
- Mac computer: This will be your target display.
- Casting software: Virtual Desktop and the Meta Quest mobile app are popular choices.
Both your Mac and Meta Quest headset must be connected to the same Wi-Fi network. If your network is dual band, ensure all devices are on the same frequency for a smooth experience.
Here’s a quick checklist to ensure you’re ready to cast:
- Meta Quest 3 headset is charged and turned on.
- Mac and headset are on the same Wi-Fi network.
- Casting app is installed on both devices.
- Devices are logged into the same Meta account for seamless integration.
Remember, while casting, your Meta Quest 3 might have slight performance dips. Be prepared for the occasional stutter or lag if your Wi-Fi isn’t top-notch. Casting from Meta Quest to a Mac is straightforward. It opens up your VR experiences for others to witness and makes VR a shared adventure.
Compatibility and Requirements
When connecting the Meta Quest 3 to a Mac system, be aware that compatibility hinges not just on the headset but also on the Mac’s model and its operating system.
Supported Mac Models
For a seamless experience, ensure your Mac is a recent version capable of running the necessary software. Most MacBook, Mac Mini, and Mac models from the past few years should be compatible.
Required Operating Systems
The Mac device should be running a modern version of macOS to support the software required for screen casting. This ensures the Meta Quest 3 can communicate effectively with your Mac.
Meta Quest 3 Specifications
The Meta Quest 3 headset must have the latest updates installed. It’s essential for the device to be on the same Wi-Fi network as the Mac to enable casting functionality.
Setting Up Your Meta Quest 3
Before diving into virtual reality with the Meta Quest 3, ensuring proper setup is crucial for a smooth experience. The first steps involve downloading the Meta Quest mobile app to a smartphone. The phone should be connected to the same Wi-Fi network as the computer and the headset. This ensures that they can communicate with each other without hiccups.
Downloading Apps:
- Meta Quest mobile app: Essential for casting and headset management.
- Virtual Desktop: Necessary for Mac, needs to be installed on both the Meta Quest 3 and Mac.
Here’s a quick guide:
- Check Wi-Fi Network: Confirm all devices are on the same network.
- Meta Account: Ensure the headset and casting device are using the same Meta account.
- Download Apps: Install relevant apps on both the Meta Quest 3 and the Mac.
Users should be aware that experiences and apps may vary by age group. Meta accounts are designed for different age ranges, with most Quest headsets, including the Meta Quest 2 and 3, requiring users to be aged 13 and over.
Age Consideration for Meta Accounts:
| Quest Version | Age Requirement |
|---|---|
| Meta Quest 2 and 3 | 13+ |
After setting up the accounts and apps, users can explore a wide array of VR experiences and apps. Ensuring the apps are correctly installed and updated helps maintain performance and allows users to get the most out of their Meta Quest 3.
Enabling Screen Casting on Meta Quest 3
To start casting from your Meta Quest 3 to a Mac, you’ll need a strong Wi-Fi connection. Before you begin, make certain that your Mac, Meta Quest 3, and the phone with the Oculus app are all on the same Wi-Fi network. The consistency in the network ensures a smoother casting experience.
Steps to Enable Screen Casting:
-
Install the Oculus App:
First, download the Oculus app onto your smartphone. This app acts as a bridge between your Meta Quest 3 and other devices. -
Connect Devices to the Same Account:
Ensure your Meta Quest headset and the Oculus app are logged into the same Meta account. -
Wi-Fi Band Consistency:
If your Wi-Fi supports dual-band, connect all devices to the same frequency band (either 2.4 GHz or 5 GHz is often recommended for streaming). -
Open the Universal Menu:
Put on your Meta Quest 3 headset and open the universal menu by pressing the Oculus button on your controller. -
Select the ‘Sharing’ Tab:
Look for the ‘Sharing’ option and select ‘Cast.’ -
Choose Your Device:
A list of devices will appear. Select your Mac computer to begin casting. A connection should be established promptly.
Screen casting allows you to share your VR experience with others on a larger screen. Whether you’re playing games, exploring virtual environments, or watching media, these steps will enable you to project your VR journey onto a Mac computer with ease. Remember to follow the steps carefully for a successful setup.
Connecting Meta Quest 3 to Mac
Linking a Meta Quest 3 to a Mac involves a few straightforward steps. The process allows you to mirror your VR display onto your Mac, offering a larger view of what you see in your headset. Here’s how you do it:
Firstly, ensure both your Meta Quest 3 and Mac are connected to the same WiFi network. This is crucial as it enables them to communicate with each other.
When you’re ready, the screen mirroring process typically starts within the Meta Quest 3 headset:
- Press the Oculus button to access the universal menu.
- Find the ‘Sharing’ tab.
- Select ‘Cast’, then choose your computer as the destination for streaming.
On your Mac, you may require specific applications that facilitate this connection. There are a few options available, and the right one for you depends on your needs:
- Immersed: Ideal for flexibility and offline work with multi-monitor support.
- Virtual Desktop: Previously had issues with stuttering but may have improved over time.
- Horizon Workrooms: Offers high-quality screen rendering but with some limitations in screen positioning and frame rates.
Selecting the right application will depend on whether your priority is a smoother framerate for animations and videos or perhaps the ability to have multiple screens visible at once.
It’s worth noting that some users have experienced performance issues when using Mac with Virtual Desktop, so your choice might differ if you need a seamless and fast experience. Lastly, Meta advises against Chromecast for streaming from Quest devices due to potential inconsistencies, so stick to direct connections for the best results.
Screen Casting Methods
Screen casting your Meta Quest 3 to a Mac involves two main methods. Each offers a slightly different approach to sharing the VR experience.
Casting via Oculus App
Using the Oculus app is a straightforward way to start casting. First, ensure both Meta Quest 3 and your Mac are connected to the same Wi-Fi network. The app is available for both iOS and Android devices, meaning it can facilitate screen casting from your headset to your computer regardless of what type of smartphone you have. Here’s what to do:
- Install the Meta Quest mobile app on your smartphone.
- Log into the same Meta account on both your smartphone and Meta Quest 3 headset.
- Tap the casting icon within the app.
- Select your Meta Quest 3 headset.
- Choose your Mac as the target device for casting.
Remember, for a smooth experience, it’s best if your devices are on the same frequency band if your network is dual-band.
Casting via Web Browser
Alternatively, you can cast your Quest 3’s screen through a web browser. This method can sometimes offer better performance if the Oculus app is acting up. It’s key to still have your Meta Quest and Mac on the same network. Simply visit the Oculus casting website and log in with your Meta account credentials. Follow these steps:
- Open a web browser on your Mac.
- Go to the official Oculus casting website.
- Sign in using your Meta Quest account details.
- Select your Meta Quest 3 headset as the source.
- Begin the cast and watch it live on your Mac screen.
Remember, using a modern browser that supports the latest web standards will provide the best results.
Troubleshooting Common Issues
When someone encounters problems while trying to cast their Meta Quest 3 to a Mac, it can be frustrating. But don’t worry; there are some practical steps that can be taken to solve these issues. Here’s a guide to help get back on track.
Check Wi-Fi Connectivity
First, ensure the Meta Quest 3 headset and the Mac are connected to the same Wi-Fi network. A mismatch here could prevent the casting from working.
Restart Devices
Sometimes, the simplest fix is just a fresh start. Restart the Meta Quest 3 headset, the Mac, and the Wi-Fi router. This can clear up any temporary glitches.
Update Software
Outdated software can cause compatibility issues. Check for updates on the Meta Quest headset and the Mac to make sure everything is current.
Support Options
If troubles persist, reaching out to Meta support can provide additional insight. They can guide one through more specific steps tailored to the situation.
- For Wi-Fi router issues, consult the manufacturer’s support.
- For PC-related problems, ensure the browser is compatible and consider updating graphics drivers.
Tips for Smooth Casting:
- Keep devices close to the Wi-Fi router for a strong signal.
- Avoid overcrowding the network with too many devices.
- Restarting devices might sound basic, but it often works wonders.
By keeping these points in mind, most casting troubles with Meta Quest 3 can be tackled effectively.
Best Practices for Screen Mirroring
When screen mirroring the Meta Quest 3 to a Mac, users should follow certain steps to ensure a smooth experience. First, all devices should connect to the same Wi-Fi network. This step is crucial for a stable connection and to minimize lagging or interruptions.
Next, cast from the Meta Quest headset. By pressing the Oculus button, one opens the universal menu, from which the casting option is easily found. This allows what is seen in the headset to be shared on the Mac screen.
Users should also confirm that both devices are logged into the same Meta account. This ensures seamless pairing and functionality between them. Here’s a quick checklist for reference:
- Wi-Fi Connectivity: Ensure all devices are linked to the same network.
- Unified Account: Check if the headset and Mac are using the same Meta account.
It’s also recommended to use Meta Quest’s own casting feature for better compatibility. While Chromecast might also be an option, some users report it’s not fully reliable with Meta Quest.
Avoid using crowded Wi-Fi channels, as these can cause interference and degrade the quality of the screen mirror. If possible, choose a 5GHz Wi-Fi band, which generally provides a faster and more stable connection than the 2.4GHz band.
Lastly, keep the devices within a good range of the router. Too much distance or obstacles like walls can disrupt the connection. Following these steps helps to enjoy an optimal screen mirroring experience with minimal frustration.
Frequently Asked Questions
This section covers common inquiries about connecting and troubleshooting when casting the Meta Quest 3 to Mac computers and other screens.
How can I cast my Meta Quest 3 to a Mac computer?
To cast your Meta Quest 3 to a Mac, you need both devices on the same Wi-Fi network. Use the Meta Quest mobile app on your phone to start the casting process. Ensure your Meta Quest headset and Mac are logged into the same Meta account.
What are the steps to screen mirror from Meta Quest 3 to a TV?
For screen mirroring from a Meta Quest 3 to a TV, confirm that the TV supports casting and is connected to the same network as your headset. Navigate to the sharing settings in your Meta Quest, select ‘Cast’, and choose your TV from the list of available devices.
Are there specific apps required for casting Meta Quest 3 content to a Mac?
Yes, you may need specific apps like the Meta Quest mobile app or a third-party app like Virtual Desktop, which supports Mac screen streaming. Ensure any app you use is compatible with the Meta Quest 3.
What troubleshooting tips are there if Meta Quest 3 casting to a Mac is not working?
Check that your Mac and headset are on the same Wi-Fi network. Restart both devices, and ensure the Meta Quest mobile app is up to date. If issues persist, check for any software updates on your headset.
Can Meta Quest 3 games be streamed to a Mac, and if so, how?
Streaming Meta Quest 3 games to a Mac can be done via the Meta Quest mobile app or third-party apps like Virtual Desktop. The app mirrors what’s displayed in VR directly to your Mac, allowing you to share or record your gameplay.
Is it possible to cast Meta Quest 3 to a PC or Mac without using the official app?
While the official app is the recommended method, third-party apps like Virtual Desktop or streaming via compatible web browsers might also be possible, depending on updates and software compatibility.


