
Setting up your Meta Oculus Quest 2 controllers is part of the process of your VR experience. The pairing process is simple if you need to replace a controller or add another. If you encounter any issues, use this guide to work through them and ensure that your controllers connect seamlessly:
How to Pair New Controllers or Troubleshoot Pairing Issues

How to Pair a New Oculus Quest 2 Controller
- Use the Oculus App: Download the Oculus app on your smartphone and pair it to your headset if you haven’t already.
- Open Devices: In the Oculus app’s menu, tap “Devices.”
- Select “Pair New Controller”: Choose the correct controller (left or right).
- Pair Your Controller: Press and hold the designated buttons on your new controller (usually a combination of the menu, system, and trigger buttons) until the LED light starts blinking. This indicates it’s in pairing mode.
- Confirm on Your Phone: The Oculus app should detect the controller, letting you confirm the pairing.
Troubleshooting Oculus Quest Controller Pairing Issues
If you can’t pair your new controller, try these troubleshooting steps:
| Issue | Possible Solutions |
|---|---|
| Batteries are dead or weak | Replace the batteries with fresh ones. |
| Bluetooth issues on your phone | Turn Bluetooth off and on again. Ensure other Bluetooth devices aren’t interfering. |
| Controller needs a reset | Try resetting your controller. Instructions vary by model, but it usually involves holding a combination of buttons. You can find instructions online. |
| Headset needs a restart | Turn your Oculus Quest 2 off and on again. |
In Case of Further Issues
If none of the above solutions work, consider the following:
- Check for Oculus Updates: Ensure your Oculus Quest 2 headset and the Oculus app are fully updated.
- Factory Reset (Last Resort): This will erase all data. Consult the Oculus support website for instructions.
- Contact Oculus Support: If all else fails, Oculus support may help with more advanced troubleshooting.
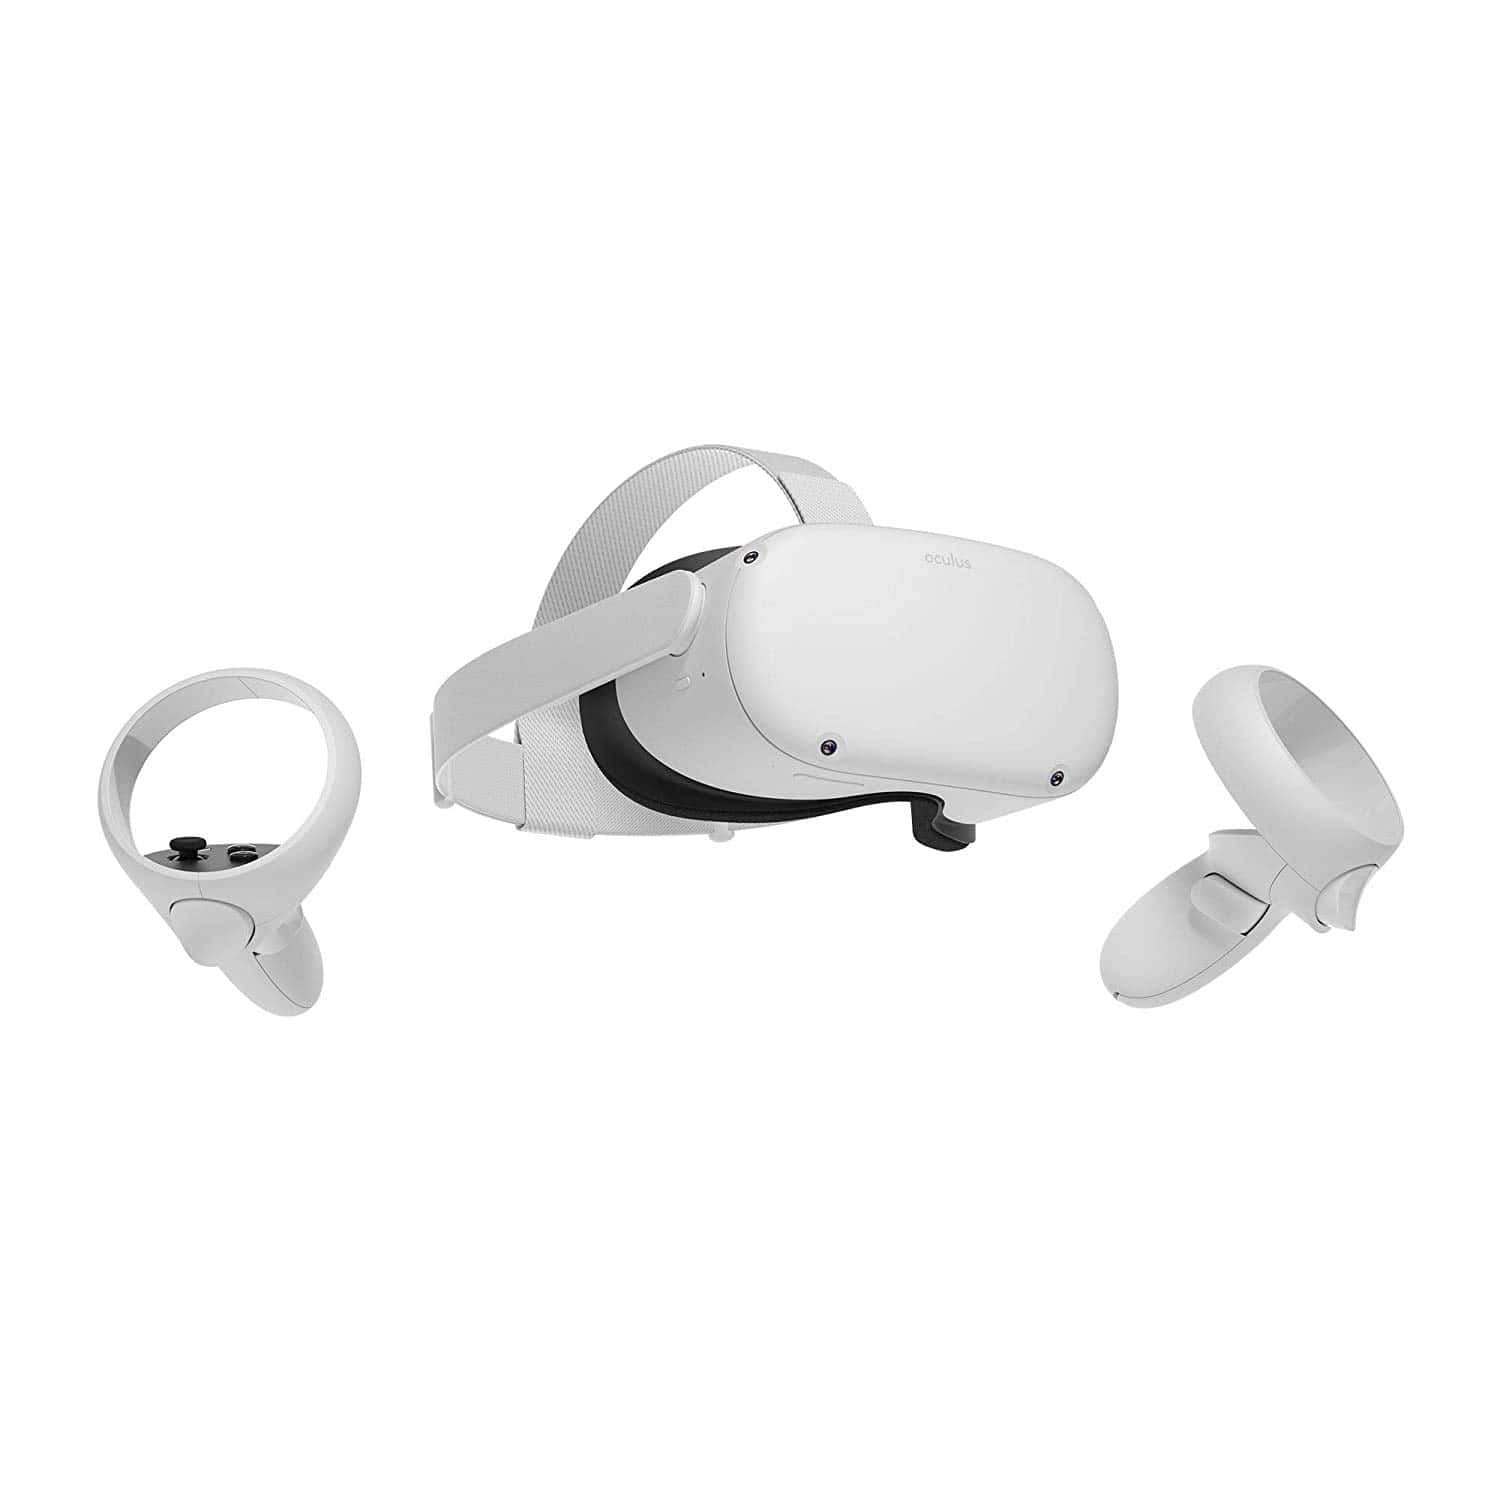
Overview of Oculus Quest 2 Controller Pairing
Pairing the controllers for the Oculus Quest 2, also known as Meta Quest 2, is a straightforward process designed to enhance the virtual reality (VR) experience. The controllers are wireless, which means they communicate with the headset without the need for physical cables.
Initial Pairing:
When first setting up, users must:
- Insert the battery into each controller.
- Turn on the headset.
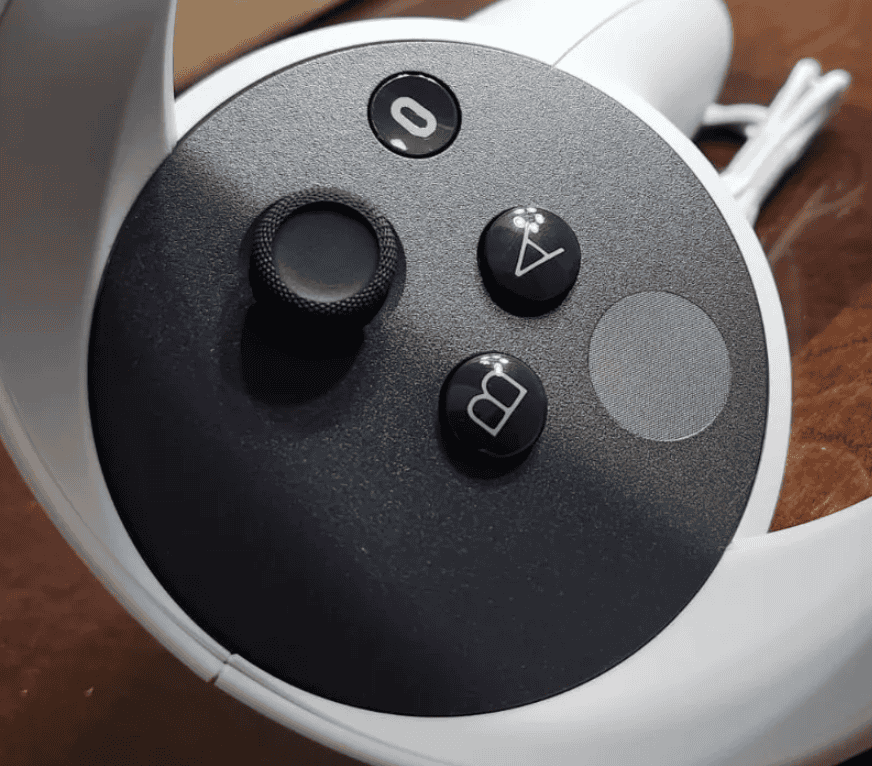
- Hold down the “Oculus” button on the right controller—or the “Menu” button on the left—until the controller LED blinks.
The controllers then connect to the headset, becoming ready for immersive gameplay.
For Unpairing and Re-pairing:
- Users often unpair when encountering connectivity issues, or when introducing new controllers to their system.
- To unpair, access the Oculus mobile app, select “Devices,” then “Controllers” and choose the controller to disconnect.
- To reconnect, simply select “Pair New Controller” within the app and follow the prompts.
Automatic Reconnection:
- Once paired, the controllers are designed to automatically re-establish connection each time the headset is powered on and they are in proximity.
The Oculus Quest 2 controllers are integral to the VR experience, allowing users to interact with virtual environments in a natural and intuitive way. Correct pairing ensures seamless gameplay and a more enjoyable VR encounter.
Initial Setup Process
Pairing the Meta Quest 2 controllers is a straightforward process that involves inserting batteries, turning on the headset, and accessing the right menu.
Inserting Batteries into Controllers
Each controller for the Quest 2 requires a single AA battery. To install, slide the battery cover off by pushing it in the direction of the arrow at the strap’s base. Place the battery into the compartment, ensuring the positive (+) and negative (-) ends match the diagram inside. Then, replace the cover by sliding it back until it clicks into place.
Turning on the Quest 2 Headset
To begin the pairing process, power on your Quest 2 headset by pressing and holding the power button located on the right side of the headset. You’ll know it’s on when the indicator light on the front turns white and you hear a startup sound.
Accessing the Pairing Menu
Open the Meta Quest mobile app on your smartphone, which is necessary for the pairing process. In the app, locate the menu that controls the pairing—it’s usually found in the settings or devices section. From here, you can initiate the pairing process with your Quest 2 headset and controllers. Follow the on-screen instructions to successfully pair your devices.
Pairing Controllers with the Headset
Pairing the Oculus Quest 2 controllers with the headset is straightforward. By following specific steps, users can quickly set up their controllers for an immersive VR experience.
Standard Pairing Procedure
To pair a new controller with the Oculus Quest 2, users should first ensure their headset is on. They need to press and hold the Oval (Oculus) button on the right controller or the Menu button on the left until the controller LED blinks and then remains steadily lit. The light’s steady glow signifies that the pairing is successful. If a controller vibrates, this is a sign that the connection has been made properly between the controller and the headset.
Using the Meta Quest Mobile App
Alternatively, controllers can be paired using the Meta Quest mobile app. After opening the app on a smartphone, users should tap the image of their device at the top-left, select Headset Settings, and then Controllers to add or remove a controller. This method is beneficial as it allows users to manage their devices via a Bluetooth connection.
Confirming Controller Connection
Users should verify that the controllers are connected correctly. This can be done within the headset by navigating to Settings, then Devices, and checking under Controllers. Here, users can see if the controllers are listed and confirm that they are ready to use. If they don’t appear, the standard pairing procedure should be repeated, or the Meta Quest mobile app can be used to troubleshoot the issue.
Troubleshooting Common Pairing Issues
When your Oculus Quest 2 controllers start acting up, don’t fret. The following steps are proven fixes that can get you back into the game without unnecessary stress.
Dealing with Unresponsive Controllers
If you find your controllers unresponsive, start by attempting a simple reset. Remove the batteries for a minute before popping them back in. This can refresh the connection, helping your controller sync up with the headset. Press various buttons on the controller to wake it up. If the controller remains unresponsive, it could signal a deeper issue that may require customer support.
Controller Pairing Errors
During the pairing process, you may encounter errors. First, ensure your controllers are adequately charged and powered on. If one controller—say, the left one—won’t pair, while the right controller works perfectly, it’s possible that there’s a singular issue with the unpaired device. Resetting your headset can sometimes resolve these errors. However, if problems persist, unpairing and then re-pairing the controllers might kickstart the connection.
Replacing Controller Batteries
Weak or dead batteries are often the culprits behind pairing woes. Insert fresh batteries into your controller to ensure that power isn’t the problem. Check that the batteries are seated correctly and that the contacts are clean. If you notice battery life depleting quickly, double-check that nothing’s draining the power, like stuck buttons or environmental factors.
Optimizing Controller Performance
To get the most out of your gaming experience, it’s important to ensure your Oculus Quest 2 controllers are performing at their best. This section covers specific settings and conditions to enhance their accuracy and responsiveness.
Calibrating Controllers for Accuracy
Calibrating your controllers precisely can make a big difference in gameplay quality. To calibrate:
- Go to the Controller Settings in your headset’s menu.
- Follow the on-screen instructions to align your controllers.
Make sure to recalibrate if you encounter tracking issues.
Ensuring Optimal Lighting Conditions
The controllers rely on optimal lighting to track movements accurately. Here’s what to keep in mind:
- Avoid direct sunlight: Direct sunlight can interfere with the infrared sensors.
- Consistent lighting: Make sure the room’s lighting is even, without dark spots or flickering lights.
Hand Tracking Versus Controller Usage
The Oculus Quest 2 offers hand tracking as an alternative to using controllers. Here’s when to use each:
- Use hand tracking for simple navigation and casual apps.
- Switch to controllers for precision in high-paced games.
Adjust the settings in the Device Menu to switch between these modes as needed.
Advanced Controller Settings
Tweaking your Oculus Quest 2 controllers can enhance your VR experience. Let’s explore how to adjust sensitivity, customize bindings, and update firmware for an optimized setup.
Adjusting Controller Sensitivity
The sensitivity of the Oculus Quest 2 controllers can be adjusted to suit the user’s preferences. For games that require quick reflexes or subtler movements, these settings are crucial. To alter sensitivity:
- Open the Oculus mobile app.
- Select Devices and choose your headset.
- Look for Controller Settings.
- Slide the Sensitivity Adjustment bar to your desired level.
This change will help ensure your movements in VR are as responsive as you like them to be.
Customizing Controller Bindings
Custom bindings can streamline how you interact with games and apps. To tweak these settings:
- While in VR, press the Oculus button on your right controller.
- Select Settings and then go to Devices.
- Choose Customize Button Bindings.
- Assign the Y button, B button, or other keys to the actions you prefer.
By customizing these bindings, you set up your controller for quick access to your most-used actions in each app.
Updating Controller Firmware
Keeping your controllers up to date ensures the best performance and accessibility to new features. For firmware updates:
- Make sure your Quest 2 headset and controllers are fully charged.
- Connect to Wi-Fi and open the Oculus mobile app.
- Press the Oculus button to wake up your controllers.
- In the app, select Devices, then choose your headset and look for updates.
Regularly checking for updates can eliminate bugs and keep your controllers working smoothly.
Managing Controllers and Devices
When using a Meta Quest (formerly Oculus), managing the controllers properly ensures a smooth VR experience. Users need to know how to pair and unpair controllers, and how to connect them to different devices.
Unpairing an Oculus Controller
To unpair an Oculus controller, one needs to start with the Meta Quest mobile app:
- Open the Meta Quest app and access the menu.
- Navigate to the Devices section and tap on Controllers.
- Choose the controller to be unpaired and follow the prompts to complete the process.
Pairing New Controllers
Follow these steps to pair a new controller with the Meta Quest:
- Turn on the headset.
- Open the Meta Quest app on a smartphone.
- Tap the image of the Meta Quest device in the app.
- Select Pair New Controller and choose Left or Right accordingly.
Connecting to Different Devices
Connecting the Meta Quest controllers to different devices can enhance the VR experience. It’s essential to ensure the device is compatible and has the Meta Quest app installed:
- Turn on the headset and the secondary device.
- Open the Meta Quest app on the new device.
- Follow the same process for pairing new controllers.
Games and Applications Compatibility
When it comes to pairing your Oculus Quest 2 controllers, there’s a lot of exciting content waiting for you. VR games and apps come alive when matched with the right equipment.
Games specifically designed for the Oculus Quest 2 utilize the controllers to their full potential. You’ll find that they respond accurately to your movements, providing an immersive gaming experience. For instance, actions like throwing a virtual frisbee or swinging a sword feel lifelike because of the precise tracking these controllers offer.
Now, regarding compatibility, most apps created for the Oculus platform work seamlessly with the controllers. They’re your magic wands to interact with menus, select options, or even sketch in a 3D space. Whether you’re exploring educational content or getting fit with a VR workout, the controllers are your bridge to interact with the virtual world.
Here’s a quick glance at controller compatibility in the Oculus universe:
- VR Games: Fully compatible with intuitive controls and motion tracking
- Entertainment Apps: Easy navigation through menus and interactive features
- Educational Content: Hands-on interaction with learning materials
- Fitness Programs: Track movements and provide feedback for an effective workout
Remember, your VR experience largely depends on how well your devices communicate with one another. Oculus controllers are engineered to provide a coherent, responsive, and trouble-free interface with the vast array of games and applications available on the platform.
By staying updated with the latest software, you ensure that your VR journey with Oculus Quest 2 is as smooth as possible. Keep those controllers paired, and get ready to dive into a world where you can do everything from battling aliens to painting masterpieces.
Frequently Asked Questions
When it comes to pairing Oculus Quest 2 controllers, users often have queries. This section aims to address these questions with clear, easy-to-follow guidance.
What steps are required to pair the Oculus Quest 2 controllers with a mobile phone?
To pair Oculus Quest 2 controllers with a mobile phone, turn on the headset and open the Meta Quest mobile app. Select your headset in the app, then follow the prompts to pair your controllers, ensuring Bluetooth is enabled on your phone.
Why might the Oculus Quest 2 controllers fail to pair, and how can this be resolved?
Pairing issues can arise due to outdated app versions or Bluetooth problems. Make sure the Meta Quest app is updated, your phone’s Bluetooth is on, and batteries in your controllers are charged. If issues persist, reboot your headset and try pairing again.
How can you pair the Oculus Quest 2 controllers to a PC?
Currently, you can’t directly pair Oculus Quest 2 controllers with a PC. They must be paired with the headset, which can then be connected to the PC through the Oculus Link software for a seamless VR experience.
What is the process for unpairing the Oculus Quest 2 controllers without using a phone?
Unpairing the Oculus Quest 2 controllers without a phone isn’t possible. The Meta Quest mobile app is necessary for both pairing and unpairing controllers.
How can you connect the Oculus Quest 2 controllers directly to the headset?
Controllers are designed to pair with the headset through the Meta Quest mobile app. Directly pairing controllers to the headset without using the app is not an option.
How can you reset the Oculus Quest 2 controllers if they are not functioning correctly?
If your controllers are acting up, hold down the Oculus and Menu buttons on the left controller or the Oculus and B buttons on the right controller for a few seconds to reset them. If that doesn’t work, consider replacing the batteries or contacting support.


