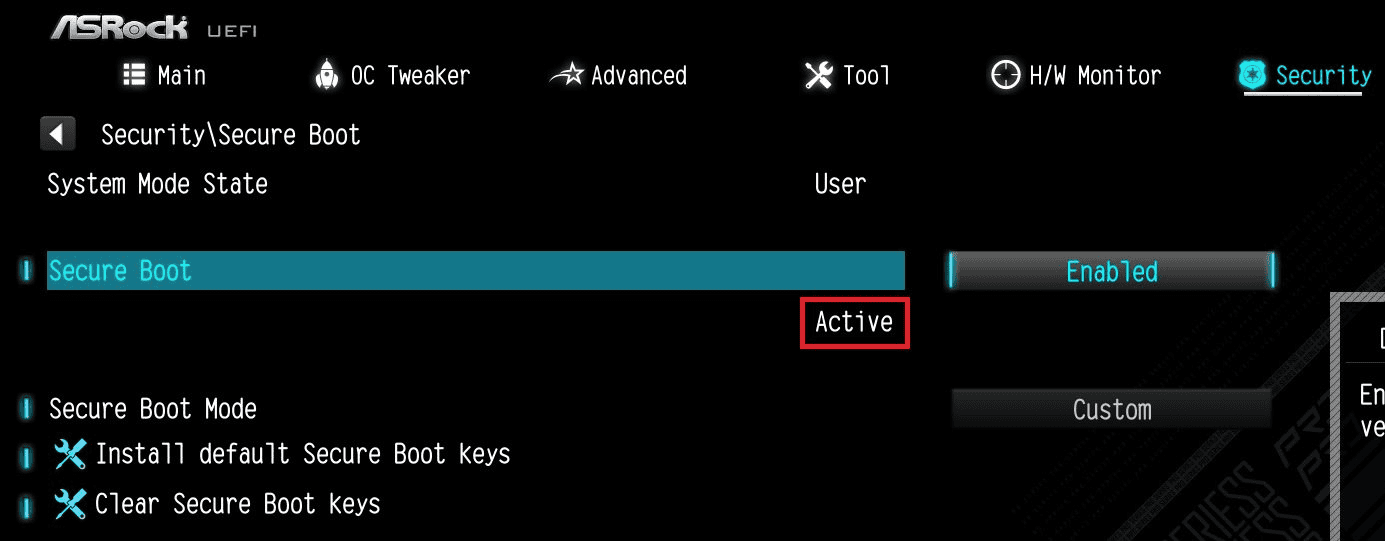
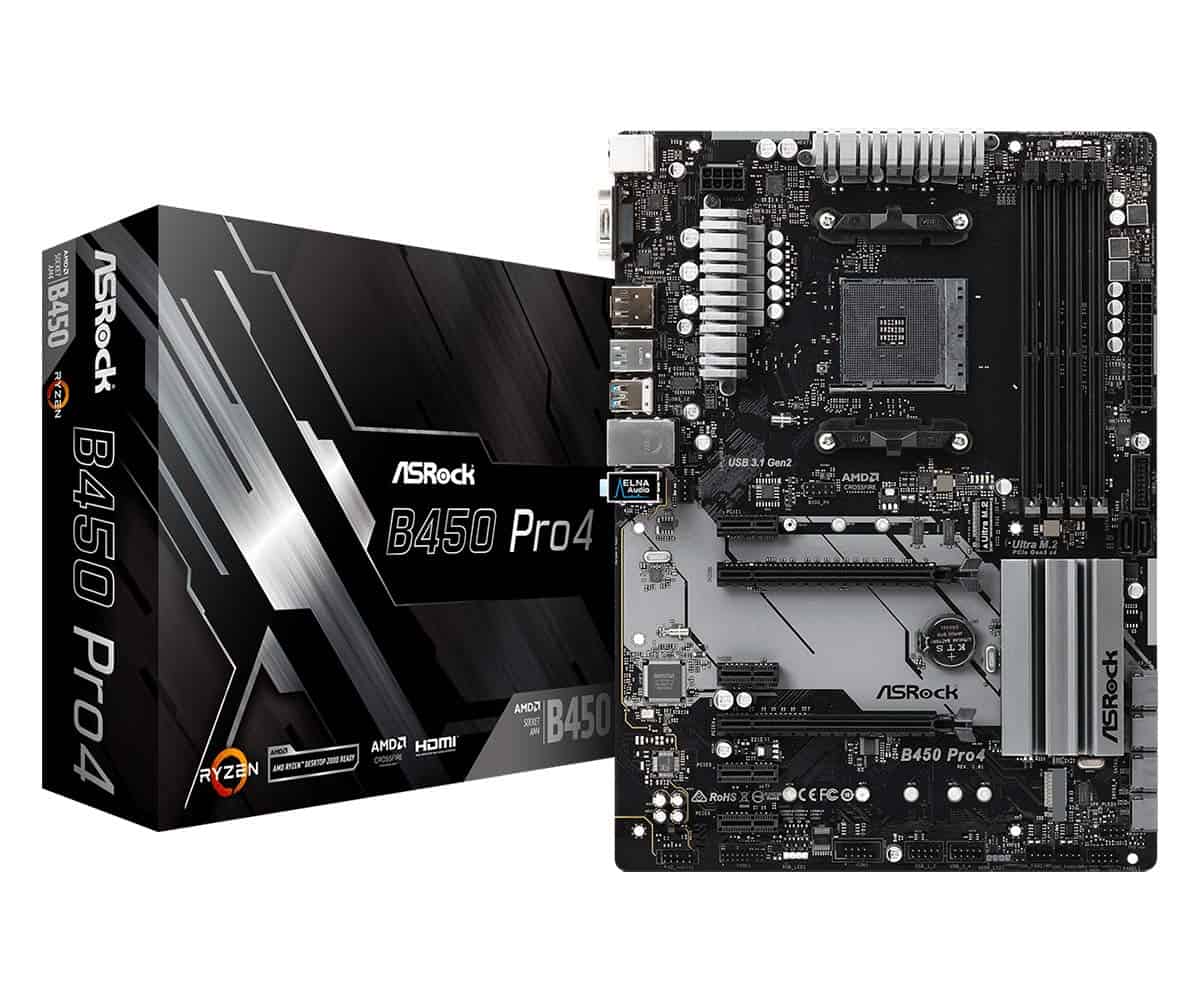
Enabling Secure Boot on your ASRock motherboard can boost your system’s security and ensure Windows 11 compatibility. To enable Secure Boot, enter your BIOS settings, navigate to the Security tab, and set Secure Boot to Enabled. This process may vary slightly depending on your specific ASRock model.
Many users wonder if enabling Secure Boot will impact their computer’s performance. The good news is that Secure Boot has minimal effect on system speed. It mainly works during the boot process to verify that only trusted software is loaded.
ASRock motherboards offer user-friendly UEFI interfaces, making it easy to adjust Secure Boot settings. Before enabling Secure Boot, ensure your operating system is installed in UEFI mode. This step is crucial for avoiding boot issues after the change.

| Secure Boot Feature | Benefit |
|---|---|
| Malware Protection | High |
| Boot Speed Impact | Low |
| Windows 11 Ready | Yes |

Secure Your ASRock Motherboard with Secure Boot
Secure Boot is a valuable security feature that can prevent malicious software from loading when you start your computer. It’s like a gatekeeper that only allows trusted operating system files to run. Here’s how to enable it on your ASRock motherboard:
1. Enter the BIOS Settings
To access your ASRock motherboard’s BIOS settings, follow these steps:
- Restart your computer.
- Press the “Del” or “F2” key repeatedly during startup. (The exact key might differ; check your motherboard manual or the on-screen prompt.)
2. Navigate to Boot Settings
Once you’re in the BIOS, use the arrow keys to find the “Boot” or “Security” section. This is where you’ll find the Secure Boot options.
3. Disable CSM
CSM (Compatibility Support Module) can sometimes conflict with Secure Boot. To disable it:
- Find the “CSM” setting.
- Set it to “Disabled.”
4. Enable Secure Boot
Now, it’s time to turn on Secure Boot:
- Locate the “Secure Boot” option.
- Set it to “Enabled.”
5. Choose Secure Boot Mode (If Needed)
Some ASRock motherboards have different Secure Boot modes, such as “Standard” or “Custom.” Choose the one that matches your operating system. “Standard” is usually the best choice for Windows.
6. Install Default Keys (If Necessary)
If your BIOS prompts you to install default Secure Boot keys, go ahead and do so. This ensures that your system has the necessary keys to verify trusted software.
7. Save and Exit
- Go to the “Exit” section of the BIOS menu.
- Select “Save Changes and Exit.”
8. Confirm Secure Boot
After your computer restarts, you can double-check that Secure Boot is active by entering the BIOS again and making sure the “Secure Boot” setting is still “Enabled.”
| Step | Action |
|---|---|
| 1 | Enter BIOS settings |
| 2 | Go to Boot settings |
| 3 | Disable CSM |
| 4 | Enable Secure Boot |
| 5 | Select Secure Boot mode (if needed) |
| 6 | Install default Secure Boot keys (if necessary) |
| 7 | Save changes and exit |
| 8 | Confirm Secure Boot is enabled |
Why Secure Boot Matters
Secure Boot helps protect your computer from:
- Rootkits: Malware that can take control of your system.
- Bootloader attacks: Attacks that hijack the startup process.
- Other malicious software: Software that can compromise your data or privacy.
By enabling Secure Boot, you add a valuable layer of protection against these threats.
Troubleshooting Tips
If you have trouble starting your computer after enabling Secure Boot, try these tips:
- Check boot order: Make sure your primary hard drive or SSD is at the top of the boot order list in the BIOS.
- Reinstall your OS: If you’re using an older operating system, you might need to reinstall it to ensure compatibility with Secure Boot.
- Consult your manual: For specific instructions or troubleshooting steps for your ASRock motherboard model, refer to your motherboard manual.
Preparing for Secure Boot Activation
Activating Secure Boot on your ASRock motherboard requires a few key steps. These include updating your BIOS, switching to UEFI mode, and converting your disk partition style.
Updating the BIOS
BIOS updates often improve system stability and add new features. To update your ASRock motherboard BIOS:
- Visit the ASRock website
- Find your motherboard model
- Download the latest BIOS version
- Copy it to a USB flash drive
Insert the USB drive into your computer. Restart and enter BIOS setup. Look for the BIOS update option. Select the file from your USB drive. Wait for the update to finish.
Never turn off your PC during a BIOS update. It could damage your motherboard.
Switching to UEFI Mode
UEFI mode is needed for Secure Boot. To switch:
- Restart your computer
- Press F2 or Del to enter BIOS
- Find the boot mode setting
- Change it from Legacy to UEFI
You might see CSM (Compatibility Support Module) options. Disable CSM to use pure UEFI mode.
If Windows doesn’t boot after this change, you may need to convert your disk to GPT.
Converting Disk Partition Style
Windows needs a GPT partition style for UEFI boot. To convert from MBR to GPT:
- Back up your data
- Open Command Prompt as admin
- Type “diskpart” and press Enter
- Enter “list disk”
- Select your disk: “select disk X” (X is the disk number)
- Convert with “convert gpt”
If this fails, you might need to use third-party tools or reinstall Windows on a GPT disk.
| Partition Style | Pros | Cons |
|---|---|---|
| MBR | Works with older systems | Limited to 2TB disk size |
| GPT | Supports large disks | Not compatible with Legacy BIOS |
Remember, converting to GPT will erase all data on the disk. Always back up first.
Enabling Secure Boot on ASRock Motherboard
Enabling Secure Boot on your ASRock motherboard enhances system security. The process involves accessing BIOS settings, configuring the Security tab, and adjusting boot order.
Accessing BIOS Settings
To enable Secure Boot on your ASRock motherboard, start by entering the BIOS. Restart your computer and press F2 or Del when the ASRock logo appears. This action opens the UEFI setup interface.
If you see the EZ Mode screen, press F6 to switch to Advanced Mode. This view gives you more control over system settings.
Navigate using arrow keys. The mouse may also work in some BIOS versions.
Configuring the Security Tab
Once in Advanced Mode, find the Security tab. Use arrow keys to highlight it and press Enter.
Look for the Secure Boot option. Select it and press Enter. Choose “Enabled” from the list.
You might need to load UEFI defaults. This step ensures compatibility with Secure Boot.
| Setting | Options |
|---|---|
| Secure Boot | Enabled/Disabled |
| Secure Boot Mode | Standard/Custom |
Set Secure Boot Mode to “Standard” for most users. “Custom” is for advanced configurations.
Setting Boot Order and Saving Changes
After enabling Secure Boot, check your boot order. Go to the Boot tab in BIOS.
Ensure your main drive is first in the boot sequence. This step prevents boot issues.
Press F10 to save changes and exit. Your system will restart.
Verify Secure Boot is active by checking Windows settings. Open System Information and look for “Secure Boot State.”
If issues occur, return to BIOS and disable Secure Boot. Some older hardware or operating systems may not support it.
Configuring Related Security Features
Enabling TPM 2.0 and activating CPU configuration are crucial steps for enhancing your ASRock motherboard’s security. These features work together with Secure Boot to provide a robust protection system for your computer.
Enabling TPM 2.0
To enable TPM 2.0 on your ASRock motherboard, you’ll need to access the UEFI interface. Restart your computer and press F2 or Del when the ASRock logo appears. Navigate to the Advanced tab and look for the TPM Configuration option.
For Intel CPUs, select PTT (Platform Trust Technology) and set it to Enabled. AMD users should choose fTPM (Firmware Trusted Platform Module) and enable it. After making these changes, save and exit the BIOS.
| CPU Type | TPM Option |
|---|---|
| Intel | PTT |
| AMD | fTPM |
It’s important to note that enabling TPM 2.0 may require a BIOS update. Check your motherboard’s support page for the latest firmware before proceeding.
Activating CPU Configuration
CPU configuration settings can impact security and performance. To access these options, enter the UEFI setup and go to the Advanced tab. Look for CPU Configuration or a similar option.
Enable features like Intel Virtualization Technology (VT-x) or AMD-V. These technologies support hardware-assisted virtualization, which can improve system security when running virtual machines.
You may also find options to enable or disable specific CPU instructions. It’s generally best to leave these at their default settings unless you have a specific reason to change them.
Remember to save your changes before exiting the BIOS. Your system will reboot with the new security features enabled.
Frequently Asked Questions
Enabling Secure Boot on ASRock motherboards involves specific steps in the BIOS settings. Users often encounter challenges related to compatibility and configuration.
What steps are necessary to activate Secure Boot in an ASRock motherboard BIOS?
To enable Secure Boot on an ASRock motherboard, restart your computer and press F2 or Del to enter UEFI setup. Switch to Advanced Mode if needed. Navigate to the Security tab and select Secure Boot. Set it to Enabled and press Enter.
Ensure your operating system is compatible with Secure Boot before enabling it. Some older systems may require updates or configuration changes.
Can Secure Boot be enabled while the system is in User mode on ASRock motherboards?
Secure Boot settings are typically accessed in the BIOS, not in User mode. You need to restart your computer and enter the BIOS to make changes. ASRock motherboards don’t allow Secure Boot modifications from within the operating system.
What is the process to enable Secure Boot for Windows 10 on an ASRock motherboard?
The process for Windows 10 is similar to other systems. Enter the BIOS and locate the Secure Boot option. Enable it and save your changes. Windows 10 is designed to work with Secure Boot, so you shouldn’t face compatibility issues.
Make sure your system is using UEFI boot mode, not Legacy BIOS. This setting is usually found in the Boot tab of your BIOS.
How do you resolve the issue of Secure Boot not being active on ASRock motherboards?
If Secure Boot isn’t active, first check if your BIOS is set to UEFI mode. Legacy mode doesn’t support Secure Boot. Ensure you’ve saved your BIOS changes after enabling Secure Boot.
Update your BIOS to the latest version. Older BIOS versions might have issues with Secure Boot implementation.
Is it possible to enable Secure Boot on an ASRock motherboard for Windows 11?
Yes, it’s possible and required for Windows 11. ASRock motherboards support Secure Boot for Windows 11. Enter the BIOS, navigate to the Security tab, and enable Secure Boot.
Remember to enable TPM 2.0 as well, which is another requirement for Windows 11.
How to configure TPM 2.0 support in the ASRock BIOS for system security?
To configure TPM 2.0, enter your ASRock BIOS. Look for the Security or Advanced tab. Find the TPM Configuration option. Enable it and select TPM 2.0 if prompted.
Some ASRock motherboards might label this as “Intel Platform Trust Technology” or “AMD fTPM”. Save your changes and restart.
| Setting | Location in BIOS | Purpose |
|---|---|---|
| Secure Boot | Security Tab | Prevents unauthorized OS booting |
| TPM 2.0 | Security/Advanced Tab | Enables hardware-based security features |
| UEFI Mode | Boot Tab | Required for Secure Boot functionality |


