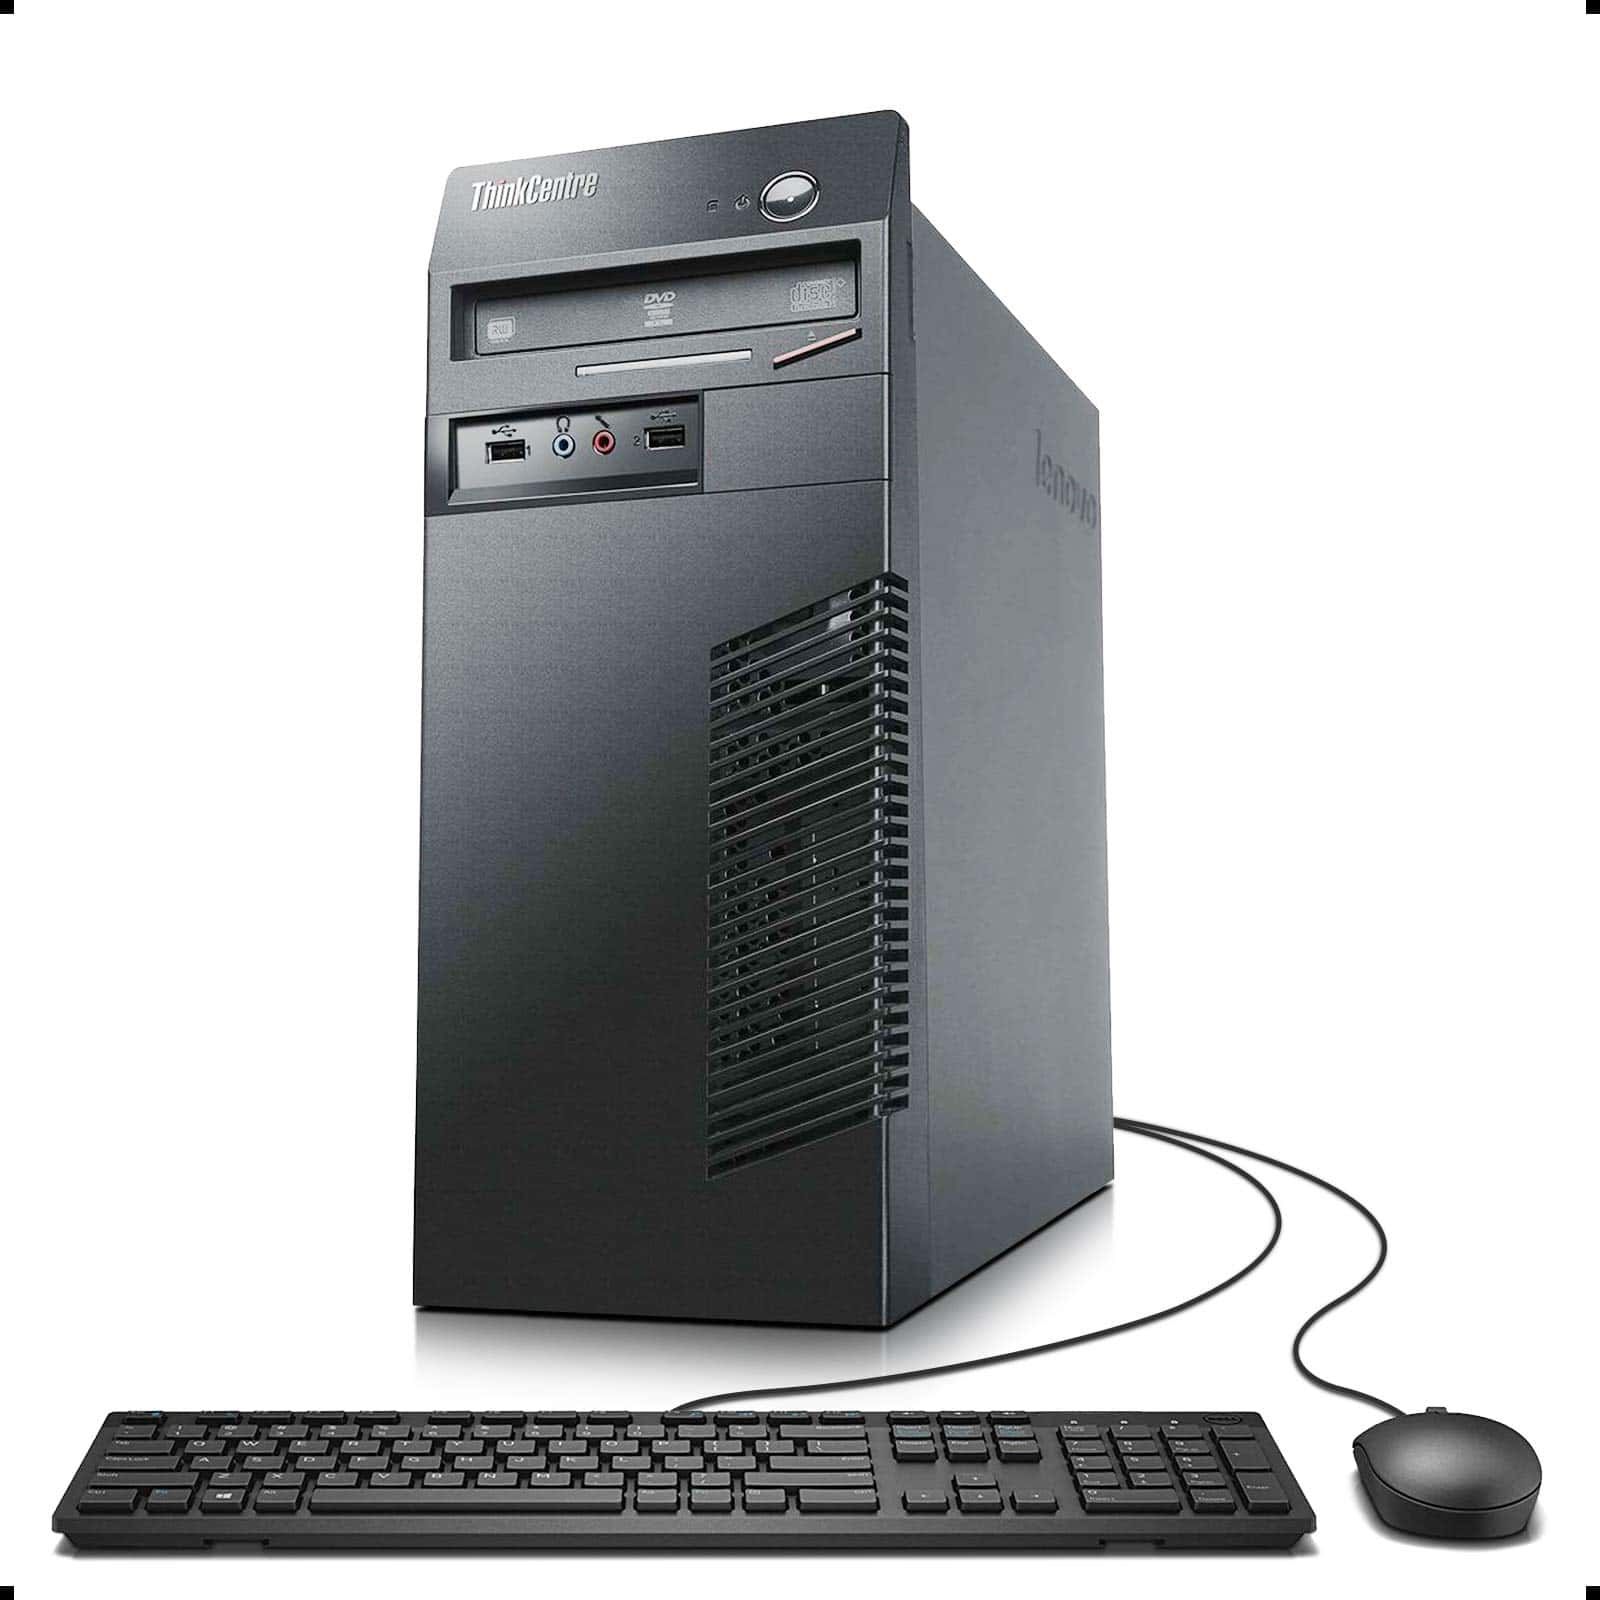
Turning on a Lenovo desktop computer is a simple task that many users perform daily. To power on your Lenovo desktop, locate the power button on the front or top of the tower and press it firmly for about a second. This action initiates the boot process, bringing your computer to life.
Sometimes, your Lenovo desktop may not turn on as expected. If this happens, check that the power cable is securely plugged into both the computer and a working electrical outlet. It’s also wise to ensure the power supply switch on the back of the tower is in the “on” position.
For those new to Lenovo desktops, familiarizing yourself with the location of key components can be helpful. The power button is typically easy to spot, often featuring a circular or rectangular shape with the universal power symbol.
| Common Issues | Quick Fixes |
|---|---|
| No power | Check cables |
| Won’t boot | Hold power button |
| Freezes | Force restart |
Turning your Lenovo desktop computer on and off might seem straightforward, but there are a few nuances depending on the model and situation. Here’s a comprehensive guide:
Turning On Your Lenovo Desktop
- Locate the Power Button: The power button is usually located on the front of the computer case. It often has a universal power symbol (a circle with a line through it).
- Press the Power Button: Press and release the power button. Your computer should start up, and you’ll see the Lenovo logo and the boot process.
Turning Off Your Lenovo Desktop
Normal Shutdown:
- Click the Start Button: This is the Windows logo in the bottom left corner of your screen.
- Choose the Power Icon: It looks like a circle with a short line at the top.
- Select “Shut Down”: This will initiate a normal shutdown process, closing all programs and saving your work.
Alternative Shutdown Methods:
- Keyboard Shortcut: Press Alt + F4 on your keyboard, then press Enter.
- Command Prompt: Open the Command Prompt (search for “cmd” in the Start menu) and type
shutdown /s /t 0then press Enter.
Force Shutdown (Use Only When Necessary):
If your computer is frozen and unresponsive, you can force a shutdown by pressing and holding the power button for several seconds until the computer turns off. Warning: This can potentially cause data loss, so only use it as a last resort.
Additional Tips
- Sleep Mode: Instead of completely shutting down, you can put your computer to sleep. This saves power while allowing you to quickly resume your work. To put your computer to sleep, select “Sleep” from the power options menu.
- Hibernate Mode: Hibernate mode saves your current session to your hard drive and completely powers off your computer. This uses less power than sleep mode. To enable and use hibernate mode, you might need to adjust your power settings.
- Wake-on-LAN: Some Lenovo desktops support Wake-on-LAN, which allows you to turn on your computer remotely over your network. To use this feature, you’ll need to enable it in your BIOS settings.
If you have any issues turning your Lenovo desktop on or off, consult your computer’s user manual or contact Lenovo support for assistance.
Preparing to Power On Your Lenovo Desktop
Before turning on your Lenovo desktop, you need to set up the essential components. This ensures a smooth start-up process and proper functionality of your computer.
Connecting Essential Hardware
Identify the power socket on the back of your Lenovo desktop. It’s usually labeled “Power” or has a power symbol nearby. Connect the power cord securely to this socket.
Plug the other end of the power cord into a grounded power outlet. Use a surge protector for added safety if available.
Connect your monitor to the appropriate port on the desktop. Most models use HDMI or DisplayPort.
Attach the keyboard and mouse to the USB ports. These are typically found on the back of the tower.
Double-check all connections to ensure they’re tight and secure.
Ensure Power Supply Unit (PSU) Functionality
Locate the power supply unit at the back of your desktop. It’s usually near the bottom.
Check if the PSU has a separate power switch. If present, make sure it’s in the “On” position.
| PSU Check | Action |
|---|---|
| Voltage switch | Set to correct voltage (115V or 230V) |
| Fan | Ensure it’s not blocked |
| Power cable | Firmly connected |
Listen for a slight hum when plugged in. This indicates the PSU is receiving power.
If you don’t hear any noise or see any lights, the PSU might be faulty. In this case, contact Lenovo support for assistance.
Starting the Boot Sequence
Turning on your Lenovo desktop initiates a series of steps to start the computer. The power button activates internal components while the BIOS screen displays initial system information.
Activating the Power Button
Locate the power button on your Lenovo desktop. It’s usually on the front or top of the tower. Press it firmly for 1-2 seconds. Listen for fans spinning up and watch for lights turning on. This signals power is flowing to components.
If nothing happens, check these:
- Power cable connection to PC and wall outlet
- Surge protector or power strip switch (if used)
- Wall outlet functionality with another device
Try unplugging the PC for 30 seconds, then plugging it back in. This resets the power supply. Press the button again. If issues persist, contact Lenovo support.
Recognizing the BIOS Screen
After pressing the power button, your screen should light up. The first image is often the Lenovo logo. This indicates the BIOS is starting.
Next, you’ll see the BIOS screen. It displays basic system info:
| Information | Example |
|---|---|
| CPU Type | Intel Core i5 |
| RAM Amount | 8 GB DDR4 |
| Storage | 256 GB SSD |
The BIOS screen appears briefly. It allows access to settings by pressing a specific key (often F1, F2, or Del). For normal startup, no action is needed. The computer will continue booting to your operating system automatically.
Troubleshooting Common Startup Issues
When your Lenovo desktop won’t turn on, several issues could be at play. From power problems to display errors, identifying the root cause is crucial for a quick resolution.
Addressing the No Power Situation
Check if your Lenovo desktop is properly plugged in. Ensure the power cable is securely connected to both the computer and the wall outlet. Try a different power cable or outlet to rule out faulty equipment.
Press and hold the power button for 30 seconds. This can discharge residual power and sometimes resolve startup issues. If the problem persists, unplug the computer and hold the power button for 60 seconds.
Inspect the power supply unit (PSU) for signs of damage. A faulty PSU often prevents the computer from powering on. If you suspect PSU issues, consider replacement or professional diagnosis.
| Component | Check |
|---|---|
| Power Cable | Secure connection |
| Wall Outlet | Functional |
| Power Button | Responsive |
| PSU | No visible damage |
Resolving Screen Display Problems
If your Lenovo desktop powers on but shows no display, check the monitor connections. Ensure the HDMI or VGA cable is firmly plugged in at both ends. Try a different cable or monitor to isolate the issue.
Look for any lights or sounds from the computer. If it’s running but the screen is blank, the problem might be with the monitor or graphics card. Check for any beep codes during startup, as these can indicate specific hardware issues.
For a blue screen of death, note any error codes displayed. These codes can help identify the problem, often related to RAM or drivers. Safe Mode boot can sometimes bypass these issues for further troubleshooting.
Diagnosing Beeps and Errors During Boot-Up
Listen for beep patterns when you start your Lenovo desktop. These sounds are part of the Power-On Self-Test (POST) and can signal specific hardware problems. Consult your computer’s manual to decipher the beep codes.
One beep usually means normal operation. Multiple beeps in a pattern often indicate issues with RAM, motherboard, or other core components. No beeps with a black screen might suggest power supply or motherboard failures.
For persistent beep errors or startup failures, consider seeking help from a professional technician. They can perform advanced diagnostics and repairs beyond basic troubleshooting steps.
Configuring System Setup and Preferences
After turning on your Lenovo desktop computer, you’ll need to configure important system settings. These steps ensure your computer runs smoothly and matches your preferences.
Entering the BIOS Setup
The BIOS (Basic Input/Output System) controls fundamental computer operations. To access it:
- Restart your Lenovo desktop.
- Press the designated key repeatedly during startup. This is often F1, F2, or Enter.
For many Lenovo desktops, you can also enter UEFI firmware from Windows. Here’s how:
- Open Windows Settings
- Go to Update & Security > Recovery
- Click “Restart now” under Advanced startup
- Choose Troubleshoot > Advanced options > UEFI Firmware Settings
In the BIOS, you can adjust various settings like boot order, security options, and hardware configurations.
Adjusting Boot Order Preferences
The boot order determines which devices your computer checks first when starting up. To change it:
- Enter BIOS setup
- Find the “Boot” or “Boot Order” section
- Use arrow keys to select a device
- Press + or – to move it up or down the list
Common boot devices include:
| Device Type | Description |
|---|---|
| SSD/HDD | Main storage |
| CD/DVD | Optical drive |
| USB | External storage |
| Network | Boot from network |
Prioritize your main storage device (SSD or HDD) for faster startup. Place removable media lower if you don’t often boot from them.
Setting Language Preferences
Windows 10 offers multiple language options. To set your preferred language:
- Open Settings > Time & Language > Language
- Click “Add a language” if yours isn’t listed
- Select your desired language
- Click “Options” to download language packs
You can set different languages for display, keyboard, and speech. Windows will apply your choices system-wide.
For non-Unicode programs, go to Control Panel > Region > Administrative. Here you can change the language for non-Unicode programs to ensure compatibility with older software.
Frequently Asked Questions
Lenovo desktop computers may encounter various power-related issues. Here are some common questions and solutions to help you troubleshoot and turn on your Lenovo desktop.
How do I start a Lenovo desktop if the power button isn’t working?
Check the power cable connections first. Ensure it’s firmly plugged into both the computer and the wall outlet. Try a different outlet to rule out electrical issues.
If connections are secure, open the computer case and check the internal power button cable. Reconnect it if loose. As a temporary fix, you can short the power switch pins on the motherboard to start the computer.
What is the location of the power button on a Lenovo desktop?
The power button is usually on the front or top of the computer case. For all-in-one models, it’s often on the side or bottom edge of the screen.
Some Lenovo desktops have a hidden power button. Check your user manual or Lenovo’s support site for your specific model’s power button location.
How do I power on a Lenovo all-in-one desktop?
Locate the power button on your all-in-one. It’s typically on the side or bottom edge of the screen. Press and hold it for a few seconds until you see lights or hear fans.
Make sure the power cable is connected securely to both the computer and wall outlet. Some all-in-one models have an external power brick – check that it’s properly connected too.
What steps are involved in turning on a Lenovo desktop with Windows 10?
- Ensure all cables are connected properly.
- Press the power button once.
- Wait for the Lenovo logo to appear.
- Enter your password or PIN if prompted.
- Windows 10 will load your desktop.
If the computer doesn’t turn on, check the power supply switch on the back. It should be set to the correct voltage for your region.
How can I turn on a Lenovo desktop with Windows 7?
The process is similar to Windows 10:
- Check all connections.
- Press the power button.
- Wait for the Lenovo splash screen.
- Enter your password if required.
Windows 7 may take longer to start up compared to newer versions. Be patient during the boot process.
Why won’t my Lenovo desktop monitor display anything when I power it on?
First, check if the computer is actually on. Look for power lights and listen for fan noise. If it’s on, the issue may be with the monitor or connections.
Ensure the monitor cable is securely connected to both the monitor and computer. Try a different video port if available. Check that the monitor is turned on and set to the correct input source.
If these steps don’t work, try connecting the monitor to another computer to rule out a faulty display.
| Troubleshooting Step | Description |
|---|---|
| Check Connections | Ensure all cables are properly connected |
| Verify Power | Confirm power supply is on and functional |
| Test Monitor | Try the monitor with another device |
| Check Video Ports | Use a different video output if available |
| Listen for Startup | Listen for fan noise or beep codes |

