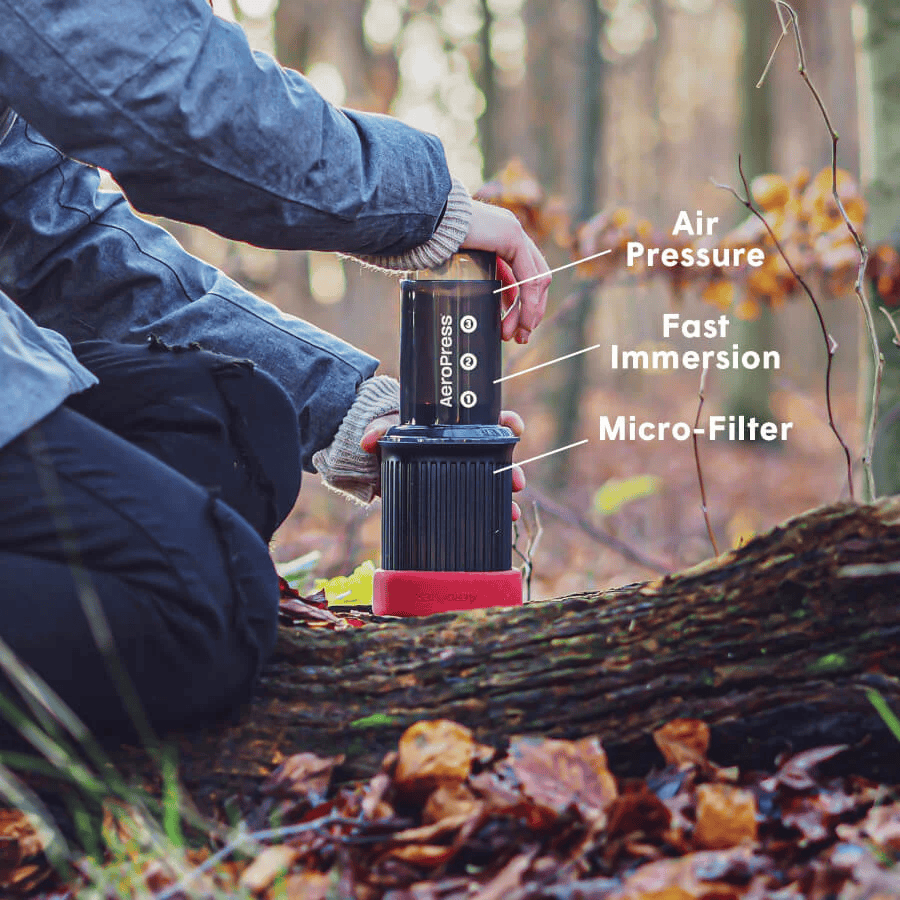
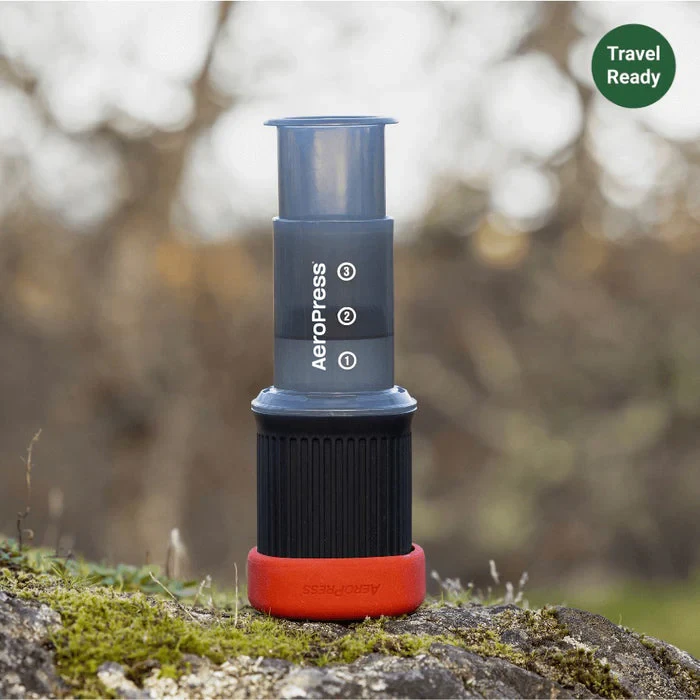
The AeroPress Go is a compact coffee maker perfect for travelers and coffee enthusiasts. It brews smooth, rich coffee in minutes with minimal fuss. You can make great coffee anywhere with the AeroPress Go’s simple process of adding grounds, hot water, stirring, and pressing.
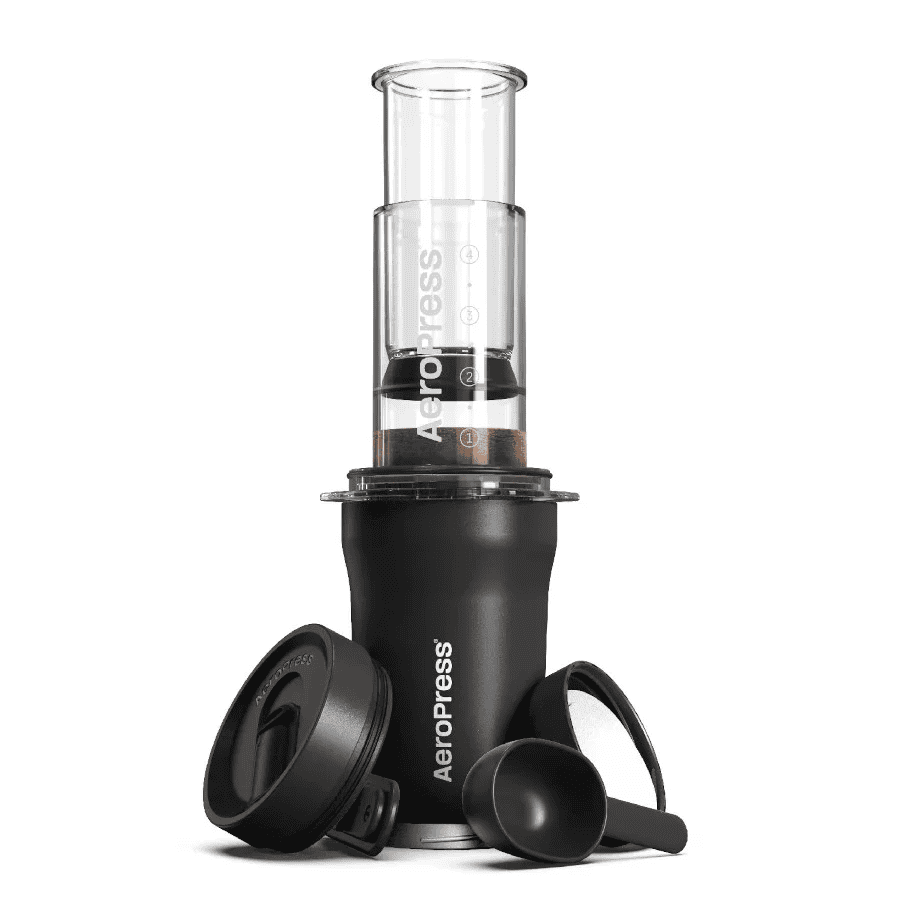
This portable device packs neatly into its own mug for easy transport. The AeroPress Go includes everything needed to brew – plunger, chamber, filters, scoop, and stirrer. Its design allows for quick cleanup, making it ideal for camping trips or hotel rooms.
The AeroPress Go offers versatility in brewing styles. You can make American-style coffee, cold brew, or even a concentrated shot similar to espresso. Experiment with grind size, water temperature, and steep time to customize your perfect cup.
| Feature | Benefit |
|---|---|
| Compact design | Fits in carry-on luggage |
| Quick brew time | Coffee in 1-2 minutes |
| Easy cleanup | Rinse or wipe clean |
| Versatile | Makes hot or cold coffee |

Mastering the AeroPress Go: A Quick Guide
What is the AeroPress Go?
The AeroPress Go is a portable coffee maker. It’s designed for travel, camping, or anyone who wants great coffee on the go. It’s compact, durable, and makes smooth, rich coffee. It is similar to the original AeroPress, but with a smaller, more travel-friendly design.
Setting Up Your AeroPress Go
First, assemble the plunger and chamber. Place a micro-filter in the cap and twist it onto the chamber. The AeroPress Go comes with a scoop and stirrer. These help you measure coffee and stir it evenly. You will also need hot water, ideally just off the boil (around 200°F or 93°C).
Brewing with the AeroPress Go: The Standard Method
This is the most common way to use the AeroPress Go. It’s simple and creates a clean cup of coffee.
- Place the AeroPress Go on top of your mug.
- Add one scoop of finely ground coffee (about 15-17 grams).
- Pour hot water up to the “1” mark (about 235ml).
- Stir for ten seconds.
- Slowly press the plunger down. This should take about 20-30 seconds.
Brewing with the AeroPress Go: The Inverted Method
The inverted method is another popular way to brew. It prevents dripping before you’re ready to press.
- Insert the plunger a little way into the chamber and flip it upside down.
- Add one scoop of finely ground coffee.
- Pour hot water up to the “1” mark.
- Stir for ten seconds.
- Place the cap with the filter on. Carefully flip the AeroPress Go onto your mug.
- Press the plunger down slowly.
Tips for the Best AeroPress Go Coffee
- Use fresh, high-quality coffee beans.
- Grind your beans finely, similar to espresso.
- Experiment with different grind sizes and water temperatures to find your perfect brew.
- Clean your AeroPress Go after each use.

AeroPress Go vs. Other Brewing Methods
The AeroPress Go offers several advantages. It’s portable, durable, and makes a clean cup of coffee with minimal sediment. It’s also faster than many other methods, like pour-over. Below is a quick look at how it stacks up against other popular methods:
| Brewing Method | Portability | Brew Time | Cleanliness | Flavor |
|---|---|---|---|---|
| AeroPress Go | Excellent | Fast (1-2 minutes) | Very Clean | Smooth, Rich |
| French Press | Moderate | Medium (4 minutes) | Some Sediment | Full-bodied |
| Pour Over | Moderate | Medium (2-3 minutes) | Very Clean | Bright, Delicate |
| Drip Coffee Maker | Low | Medium (5-10 minutes) | Clean | Mild |
The AeroPress Go is a great option for coffee lovers who value portability and a clean, flavorful brew. Its simple design and quick brew time make it a convenient choice for any setting.
Understanding the AeroPress Go
The quest for a decent cup of coffee shouldn’t end when you leave your kitchen. Whether you’re setting up camp in the wilderness, staying in a hotel room, or simply want a better brew at the office, portable coffee makers offer a solution. Among these, the AeroPress Go stands out for its compact design and ability to produce rich, smooth coffee comparable to more elaborate brewing methods. This small device has become a favorite for travelers and coffee enthusiasts alike, promising a quality caffeine fix no matter where you are.
The AeroPress Go is a compact coffee maker designed for travel. It brews rich coffee quickly and easily using a unique pressure-based system.
Components and Design
The AeroPress Go consists of several key parts. The brew chamber holds ground coffee and water. A plunger fits inside to create pressure. The filter cap screws onto the bottom and holds a paper or metal filter.
The stirrer helps mix the coffee and water. A scoop measures the right amount of grounds. The Go version includes a mug that doubles as a carrying case. All parts nest together for easy transport.
Table: AeroPress Go Components
| Part | Function |
|---|---|
| Brew Chamber | Holds coffee and water |
| Plunger | Creates brewing pressure |
| Filter Cap | Holds filter in place |
| Stirrer | Mixes coffee and water |
| Scoop | Measures coffee grounds |
| Mug/Case | For drinking and storage |
Comparing to Other Brewing Methods
The AeroPress Go offers several advantages over other portable brewers. It’s faster than pour-over methods, taking only about 2 minutes to brew. The pressure extraction creates a smooth, less acidic cup compared to drip coffee.
Clean-up is quick and easy. Simply push out the used grounds and rinse. The compact size makes it ideal for travel or camping. You can even brew espresso-style coffee with the AeroPress.
It’s more versatile than single-serve pod machines. You control the grind size, water temperature, and brew time. This allows you to fine-tune your coffee to your taste preferences.
Starting with the Basics
The key to a great AeroPress Go brew lies in selecting the right coffee and achieving the perfect grind size and ratio. These factors significantly impact your coffee’s flavor and strength.
Selecting Your Coffee
Choose freshly roasted whole bean coffee for the best AeroPress Go experience. Look for beans with a roast date within the last two weeks. Light to medium roasts often work well, highlighting the coffee’s unique flavors. Consider single-origin coffees to explore distinct taste profiles.
When buying coffee, check the packaging for tasting notes. These can help you pick flavors you enjoy. Arabica beans are typically preferred for their smooth, complex taste. Store your beans in an airtight container away from light and heat to maintain freshness.
Grind Size and Coffee-to-Water Ratio
For AeroPress Go, aim for a medium-fine grind. This consistency resembles table salt. Too fine, and your coffee may taste bitter. Too coarse, and it could be weak.
Use a burr grinder for consistent results. If you don’t have one, ask your local coffee shop to grind for AeroPress.
The standard coffee-to-water ratio is 1:16, but you can adjust to taste. Here’s a simple guide:
| Strength | Coffee (g) | Water (ml) |
|---|---|---|
| Regular | 15 | 240 |
| Strong | 18 | 240 |
| Mild | 12 | 240 |
Measure your coffee with the AeroPress scoop or a scale for accuracy. Experiment with ratios to find your perfect cup.
Brewing Techniques
The AeroPress Go offers two main brewing methods. Each technique produces unique flavors and allows for customization to suit your taste preferences.
Classic Brewing Method
Start by placing a paper filter in the filter cap and rinsing it with hot water. Attach the cap to the chamber and set it on your mug. Add 15-18 grams of medium-fine ground coffee to the chamber.
Pour 240 ml of hot water (80-90°C) over the grounds in a circular motion. Stir gently for about 10 seconds to ensure even saturation. Insert the plunger and press down slowly, taking about 20-30 seconds to complete the process.
The classic method typically results in a clean, bright cup with balanced flavors. It’s quick and easy, making it ideal for beginners.
Inverted Brewing Method
The inverted method starts with the AeroPress Go upside down. Insert the plunger slightly into the chamber. Add 15-18 grams of coffee and pour in 240 ml of hot water.
Stir the mixture and let it steep for 1-2 minutes. Place a rinsed filter in the cap and secure it to the chamber. Carefully flip the AeroPress onto your mug and press down slowly.
This technique allows for longer steep times, resulting in a fuller-bodied cup with more intense flavors. It offers more control over the brewing process but requires practice to master.
| Brewing Method | Steep Time | Flavor Profile | Difficulty |
|---|---|---|---|
| Classic | 10-30 sec | Clean, Bright | Easy |
| Inverted | 1-2 min | Full-bodied | Moderate |
Advanced Tips and Recipes
Elevate your AeroPress Go brewing with these expert techniques. Explore methods for creating espresso-like shots and discover innovative cold brew approaches.
Espresso Style and Variations
The AeroPress Go can produce espresso-style concentrates for various drinks. Use finely ground coffee and less water for a strong base. Aim for a 1:2 ratio of coffee to water.
For a latte, steam or froth milk and add it to your concentrate. Create an Americano by diluting the concentrate with hot water.
Try this recipe:
- Add 18g fine coffee to the AeroPress Go
- Pour 36g hot water (90°C/194°F)
- Stir quickly for 10 seconds
- Press firmly for 20-30 seconds
Experiment with grind size and brewing time to find your perfect balance.
Cold Brew and Long Brew Techniques
The AeroPress Go excels at cold brew methods too. For a refreshing iced coffee:
- Add 30g medium-coarse coffee to the chamber
- Fill with room temperature water
- Stir gently and cap with the plunger
- Let steep in the fridge for 12-24 hours
- Press slowly into a glass with ice
Long brew techniques can enhance flavor extraction. Try the inverted method:
- Insert plunger slightly into the chamber
- Flip AeroPress Go upside down
- Add coffee and water
- Steep for 2-3 minutes
- Flip onto your cup and press
This method allows for longer contact time between coffee and water, resulting in a fuller-bodied brew.
| Brew Method | Coffee (g) | Water (g) | Steep Time | Notes |
|---|---|---|---|---|
| Espresso | 18 | 36 | 30 sec | Fine grind |
| Cold Brew | 30 | 200 | 12-24 hrs | Medium-coarse |
| Long Brew | 15 | 250 | 2-3 min | Inverted method |
Frequently Asked Questions
AeroPress Go users often have questions about brewing techniques, maintenance, and comparisons to the original AeroPress. Let’s address some common queries to help you get the most out of your portable coffee maker.
What are the recommended coffee-to-water ratios for brewing with the AeroPress Go?
The ideal ratio depends on your taste preferences. A common starting point is 15-18 grams of coffee to 200-240 ml of water. This creates a balanced brew that’s neither too weak nor too strong.
Experiment with different ratios to find your perfect cup. Some people prefer a stronger 1:10 ratio, while others enjoy a milder 1:16 ratio.
Can you describe the step-by-step Aeropress Go brewing process?
- Insert a filter into the cap and rinse with hot water.
- Attach the cap to the chamber and place it on your cup.
- Add ground coffee to the chamber.
- Pour hot water (175-185°F) over the grounds.
- Stir gently for about 10 seconds.
- Insert the plunger and press down slowly.
Your coffee is ready to enjoy! The entire process takes about 1-2 minutes.
What are the differences between the original AeroPress and the AeroPress Go?
The AeroPress Go is designed for travel. It’s more compact and comes with a carrying case that doubles as a mug. The Go’s chamber is slightly smaller, brewing up to 8 ounces instead of 10.
Both use the same brewing method and produce similar coffee quality. The Go includes a folding stirrer and a compact scoop for easier packing.
What are some popular AeroPress Go recipes for making espresso-like coffee?
- Inverted method: Use finely ground coffee, steep for 1 minute, then flip and press.
- Double shot: Use 20 grams of coffee with 60 ml of water for a concentrated brew.
- Prismo attachment: This add-on creates pressure for a more espresso-like shot.
These methods produce a strong, concentrated coffee similar to espresso. Experiment to find your favorite technique.
Is there any special maintenance or cleaning process for the AeroPress Go?
The AeroPress Go is easy to clean. After each use:
- Remove the cap and push out the used grounds.
- Rinse all parts with warm water.
- Clean with mild soap and a soft cloth weekly to maintain the device.
Avoid harsh scrubbers that might scratch the plastic. The silicone seal on the plunger may need occasional replacement.
Where can I find the official AeroPress Go brewing instructions in PDF format?
You can find official AeroPress Go instructions on the AeroPress website. They offer detailed guides in multiple languages.
The PDF includes brewing tips, cleaning instructions, and recipe variations. It’s a valuable resource for both new and experienced AeroPress Go users.
| Brewing Method | Coffee Amount | Water Amount | Steep Time |
|---|---|---|---|
| Standard | 15-18g | 200-240ml | 1-2 min |
| Concentrated | 20g | 60ml | 30 sec |
| Cold Brew | 15g | 200ml | 24 hours |


