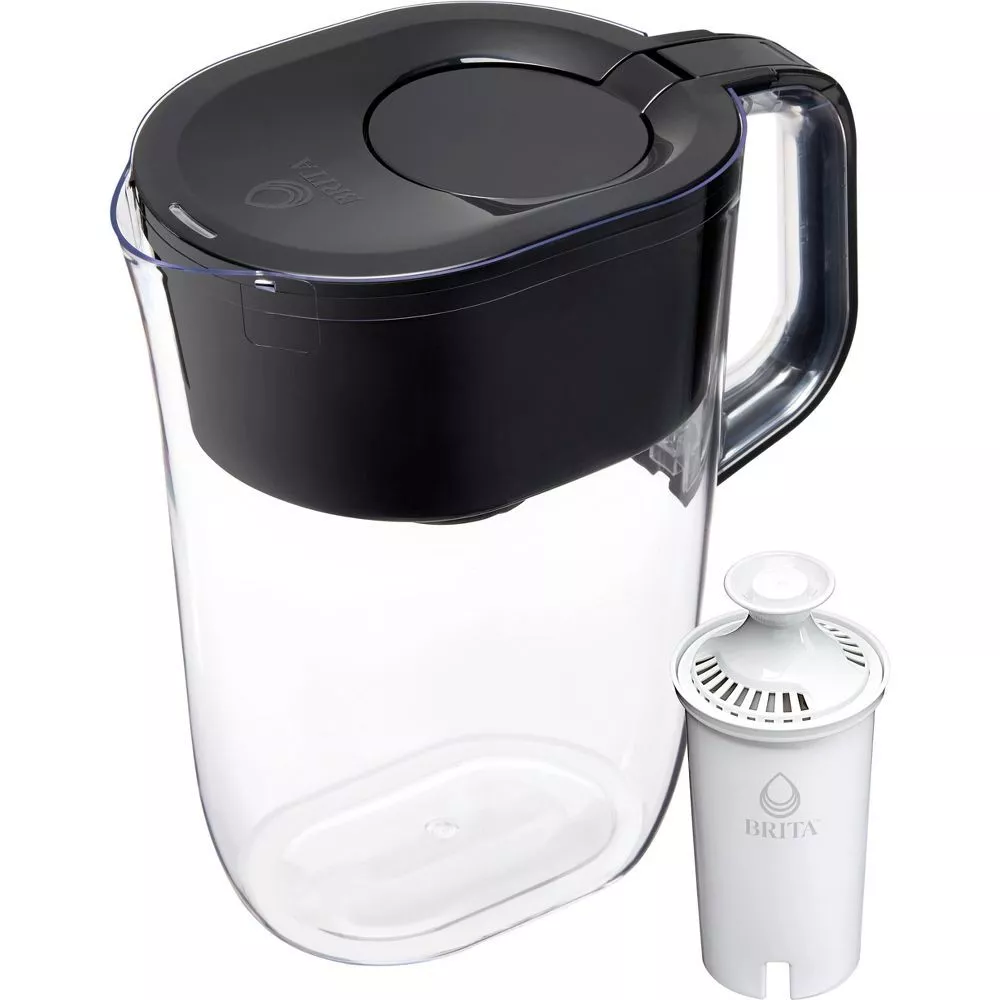
Keeping your Brita filter pitcher clean ensures you always have fresh, great-tasting water. Regular cleaning prevents buildup of mold, mildew, and mineral deposits. To clean a Brita pitcher, disassemble it, wash all parts except the filter with mild soap and warm water, and use a vinegar solution for tough stains.
Cleaning the handle can be tricky, but it’s an important step. The handle often harbors hidden dirt and grime. To clean it thoroughly, you’ll need to remove it from the pitcher. Use a screwdriver to gently pop it off, then wash it separately.
For stubborn mineral buildup or mildew, a mixture of white vinegar and water works wonders. This natural solution is safe and effective. After cleaning, make sure to rinse all parts well and let them air dry before reassembling your pitcher.
Crystal Clear: The Ultimate Guide to Cleaning Your Brita Pitcher and Handle

Brita pitchers are great. They make your water taste better. But they need to be cleaned regularly. This keeps them working well and prevents germs from growing. Here’s how to clean your Brita pitcher and handle the right way.
Cleaning the Pitcher
- Empty the pitcher and remove the filter.
- Wash the pitcher with warm, soapy water. You can use a bottle brush to reach inside the pitcher and clean the hard-to-reach spots.
- Rinse the pitcher thoroughly with clean water.
- If you notice any mineral buildup, you can remove it with a mixture of white vinegar and water. Let it soak for a few minutes, then scrub with a sponge.
Cleaning the Handle
The handle can get grimy, especially if you use it a lot. Here’s how to clean it:
- Wipe the handle with a damp cloth and a bit of dish soap.
- If there are any stubborn spots, you can use a toothbrush to scrub them away.
- Rinse the handle with clean water and dry it with a towel.

Important Tips
- Don’t put your Brita pitcher in the dishwasher. The high heat can damage it.
- Clean your Brita pitcher every 2 weeks, or more often if needed.
- Replace your Brita filter every 40 gallons or 2 months, whichever comes first.
| Pitcher Part | Cleaning Method | Frequency |
| Pitcher (inside and outside) | Warm, soapy water; bottle brush for hard-to-reach areas; white vinegar for mineral buildup | Every 2 weeks |
| Handle | Damp cloth with dish soap; toothbrush for stubborn spots | Every 2 weeks |
| Lid | Warm, soapy water | Every 2 weeks |
| Filter | Replace, do not clean | Every 40 gallons or 2 months |

Key Takeaways
- Clean your Brita pitcher regularly with mild soap and warm water
- Remove the handle for thorough cleaning
- Use a vinegar solution for tough stains and mineral deposits
Understanding Your Brita Filter and Pitcher
Brita pitchers are simple devices that clean tap water. They have a few main parts. Users should know when to clean their pitcher to keep it working well.
Components of a Brita Pitcher
A Brita pitcher has three main parts:
- The reservoir: This top part holds unfiltered water.
- The filter: It removes impurities from water.
- The pitcher: The bottom part stores clean water.
Brita offers different filter types. Standard filters last about 2 months. LongLast filters can work for up to 6 months.
The filter contains activated carbon. This traps chemicals and removes bad tastes. It also has ion exchange resin. This part takes out metals like copper and mercury.
Recognizing Signs of a Dirty Pitcher
Watch for these signs that your Brita pitcher needs cleaning:
- White spots inside the pitcher (limescale)
- Black specks in the water (carbon dust)
- Slimy feeling on surfaces (mold or mildew)
- Bad smell or taste
- Slow filtering
Clean your pitcher if you see these issues. Regular cleaning stops bacteria growth. It also keeps your water tasting fresh.
Check your filter too. A clogged filter won’t work well. Replace it every 2-6 months based on the type you have.
Step-by-Step Cleaning Guide
Cleaning your Brita pitcher is easy and quick. Follow these steps to keep your water fresh and your pitcher in top shape.
Preparing for Cleaning
Take apart your Brita pitcher. Remove the lid and filter. Set the filter aside on a clean surface. You’ll need warm water and mild soap. Don’t use harsh cleaners. They can damage the pitcher.
Get a soft cloth or sponge ready. Avoid scrubbers that might scratch the plastic. Fill your sink with warm water and add a few drops of dish soap. Make sure you have a clean towel for drying.
Washing the Components
Wash each part of the pitcher with soapy water. Use a soft cloth to clean the lid, reservoir, and handle. Pay extra attention to corners and grooves. These spots can trap dirt.
Rinse everything well under running water. Make sure no soap remains. Soap can affect the taste of your water. Dry all parts with a clean towel or let them air dry.
Removing Mineral Build-up
Hard water can leave white spots on your pitcher. This is limescale. To remove it, mix equal parts water and white vinegar. Pour this into your pitcher.
Let it sit for 10 minutes. Then, pour it out and rinse well. For tough spots, use a soft cloth to gently scrub. Rinse again to remove any vinegar smell. Your pitcher should now be sparkling clean.
Reassembling the Pitcher
Make sure all parts are dry before putting them back together. Place the filter back in the reservoir. If it’s old, replace it with a new one. Snap the lid back on.
Fill the pitcher with cold water. Let it run through the filter. This rinses out any leftover cleaning solution. Your Brita pitcher is now clean and ready to use!
Frequently Asked Questions
Cleaning a Brita pitcher properly keeps it working well. Here are some key tips for cleaning and care.
How can one effectively remove mold from a Brita pitcher?
To remove mold, take the pitcher apart. Wash all parts with hot soapy water. Use a soft brush to scrub moldy spots. Rinse well.
For tough mold, soak parts in a mix of water and white vinegar. Let them sit for 15 minutes. Then scrub and rinse.
What steps are involved in disassembling a Brita pitcher for cleaning?
First, empty the pitcher. Remove the filter. Take off the lid.
Next, remove the handle. Use a flat tool to push down on the top gap. Pull up when it pops free.
Last, separate the reservoir from the pitcher base. Now all parts are ready to clean.
Is using vinegar an appropriate method for cleaning a Brita filter and pitcher?
Vinegar works well to clean the pitcher but not the filter. Use vinegar to remove limescale and odors from the pitcher parts.
Mix equal parts water and white vinegar. Soak pitcher parts for 15 minutes. Rinse well after.
Don’t use vinegar on the filter. It can damage it. Just rinse filters with cold water.
How frequently should a Brita pitcher be cleaned to maintain its effectiveness?
Clean your Brita pitcher every 1-2 weeks. This keeps it free of germs and grime.
Wash the lid and reservoir with soap weekly. Rinse the filter monthly.
Replace the filter every 2-6 months. This ensures the best water quality.
What is the process for deep cleaning a Brita water dispenser?
Start by taking the dispenser apart. Remove the filter and all removable parts.
Wash each part with warm soapy water. Use a soft brush for hard-to-reach spots.
For a deeper clean, soak parts in diluted vinegar for 15 minutes. Rinse well after.
Dry all parts before putting the dispenser back together.
Can a Brita water filter be cleaned and reused, and if so, how?
Brita filters can’t be cleaned for reuse. They have a limited lifespan.
You can extend filter life by rinsing it monthly. Use cold water for 15 seconds.
Replace your filter every 40 gallons or 2 months. This ensures clean, fresh-tasting water.


