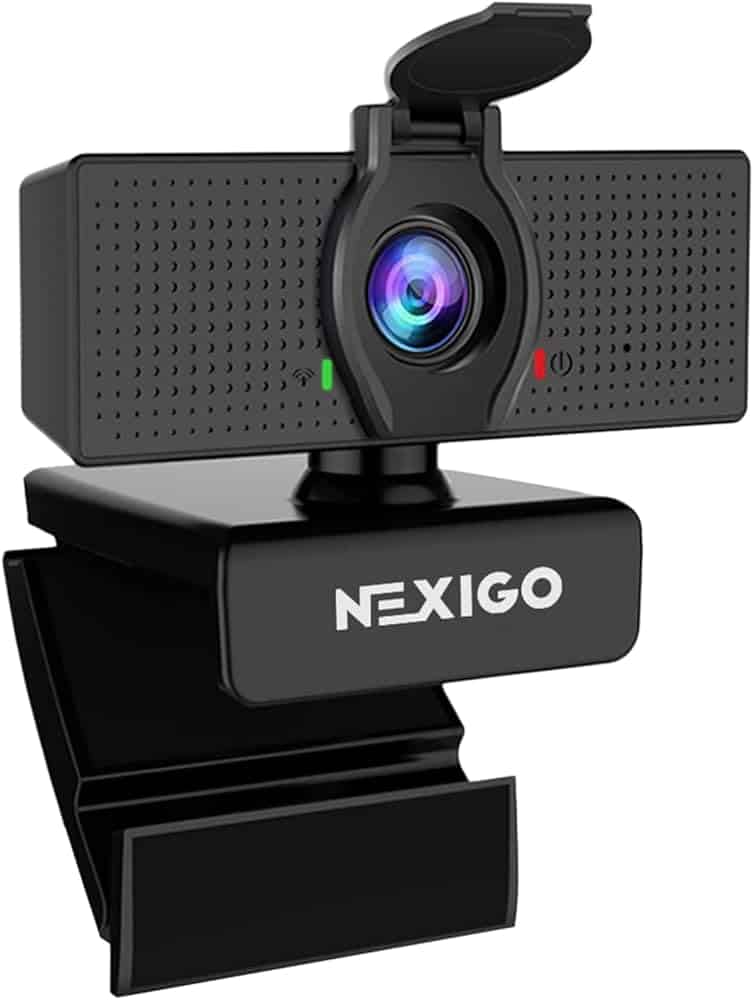
Setting up a NexiGo webcam is a straightforward process that can enhance your video conferencing and content creation experience. To install a NexiGo webcam, simply plug it into an available USB port on your computer and wait for the device to be recognized automatically. Most NexiGo webcams are plug-and-play, meaning they don’t require additional software installation to function.
For optimal performance, you may want to install the NexiGo Webcam Settings software. This software allows you to adjust various settings like brightness, contrast, and focus. It’s available for both Windows and Mac operating systems. If you prefer not to use the official software, you can also use your webcam with popular applications like Zoom, Skype, or OBS Studio.
Before you begin the installation process, ensure your computer meets the system requirements for your specific NexiGo webcam model. Most modern computers are compatible, but it’s always good to double-check. You can find this information in the user manual or on the NexiGo website.
| NexiGo Webcam Installation Steps |
|---|
| 1. Plug webcam into USB port |
| 2. Wait for automatic recognition |
| 3. Install NexiGo software (optional) |
| 4. Adjust settings as needed |
Setting Up Your Nexigo Webcam
Before You Begin
Before you start installing your Nexigo webcam, there are a few things to check:
- Check the Contents: Make sure you have the webcam, any included cables (usually USB), and the user manual.
- Computer Compatibility: Ensure your computer has a USB port and is running a compatible operating system (Windows, macOS, or Chrome OS are typically supported).
Physical Connection
Connecting the webcam is usually very simple:
- Locate a USB Port: Find an available USB port on your computer. It’s best to use a port directly on your computer rather than a USB hub if possible, especially for higher-resolution webcams.
- Connect the Webcam: Plug the USB cable from the webcam into the USB port.
Driver Installation (Usually Automatic)
Most Nexigo webcams are plug-and-play, meaning they don’t require manual driver installation. Here’s what usually happens:
- Automatic Detection: When you plug in the webcam, your computer should automatically detect it.
- Driver Installation (If Needed): In most cases, Windows, macOS, or Chrome OS will automatically download and install the necessary drivers. You might see a notification indicating that new hardware has been detected and drivers are being installed.
- Check Device Manager (Windows): If you’re using Windows and want to confirm the webcam is recognized, you can open the Device Manager (search for it in the Windows search bar). Under “Cameras” or “Imaging devices,” you should see your Nexigo webcam listed.
Using the Webcam
Once the webcam is connected and the drivers are installed (if necessary), you can start using it:
- Open a Video Application: Open a video conferencing app like Zoom, Google Meet, Microsoft Teams, or a recording application like OBS Studio.
- Select the Webcam: In the application’s settings, find the video or camera settings. Select your Nexigo webcam from the list of available cameras.
- Adjust Settings (Optional): Many Nexigo webcams offer software or built-in settings for adjusting brightness, contrast, resolution, and other video parameters. Check the user manual or the webcam’s software (if provided) for details.
Troubleshooting
If you encounter problems, here are some troubleshooting tips:
- Restart Your Computer: A simple restart can often resolve connection issues.
- Try a Different USB Port: Try plugging the webcam into a different USB port on your computer.
- Check for Driver Updates (Windows): In Device Manager, right-click on your webcam and select “Update driver.”
- Check the Nexigo Website: Visit the Nexigo website and look for support or driver downloads for your specific webcam model.
Installation Steps Summary
| Step | Action |
|---|---|
| 1 | Connect the webcam’s USB cable to your computer. |
| 2 | Wait for your computer to automatically install drivers (usually). |
| 3 | Open a video application and select the Nexigo webcam as the camera source. |
| 4 | Adjust settings as needed. |
Preparing for Installation
Before setting up your Nexigo webcam, you need to ensure your system is ready and understand the components. This preparation will make the installation process smoother and more efficient.
Checking System Requirements
Your computer must meet certain criteria to use the Nexigo webcam effectively. Most modern computers will be compatible, but it’s best to verify.
Check that your device has:
- A free USB port (2.0 or higher)
- Sufficient processing power and memory
- An up-to-date operating system (Windows 10 or later, macOS 10.10 or later)
For optimal video calling, you’ll need:
- A stable internet connection (at least 1 Mbps upload speed)
- Adequate lighting in your workspace
| Feature | Minimum Requirement |
|---|---|
| USB | 2.0 or higher |
| OS | Windows 10, macOS 10.10 |
| Internet | 1 Mbps upload |
Unboxing and Understanding the Nexigo Webcam
When you unbox your Nexigo webcam, you’ll find:
- The webcam itself
- A USB cable
- User manual
- Any additional accessories (like a tripod or privacy cover)
Familiarize yourself with the webcam’s features:
- Locate the lens and any built-in microphones
- Check for adjustable elements like focus rings or tilting mechanisms
- Note any indicator lights that show when the camera is active
Read through the user manual to understand any unique features or setup requirements for your specific Nexigo model. This knowledge will help you make the most of your new webcam during installation and use.
Software Setup
Installing and configuring your Nexigo webcam software is crucial for optimal performance. This process involves setting up drivers and adjusting camera and audio settings.
Installing Drivers and Software
To begin, plug your Nexigo webcam into a USB port on your computer. Windows 10 often recognizes the device automatically and installs basic drivers. For full functionality, download the Nexigo Webcam software from the official website.
Run the installer and follow the on-screen prompts. If issues arise, check Device Manager:
- Right-click the Start button
- Select “Device Manager”
- Look for your webcam under “Imaging devices” or “Cameras”
- If you see a yellow exclamation mark, right-click and select “Update driver”
After installation, restart your computer to ensure all changes take effect.
Adjusting Webcam and Microphone Settings
Open the Nexigo webcam application to access advanced settings. You’ll find options to adjust:
- Video resolution
- Frame rate
- Brightness
- Contrast
- Saturation
For audio, click on the microphone settings. Adjust the input volume and enable noise cancellation if available.
| Setting | Recommended Value |
|---|---|
| Resolution | 1080p |
| Frame Rate | 30 fps |
| Brightness | 50% |
| Contrast | 55% |
Test your settings in the camera app. Make final tweaks based on your lighting and background. Remember to check your webcam and mic settings in other applications you use for video calls.
Positioning and Testing the Webcam
Proper placement and thorough testing are crucial for optimal webcam performance. These steps ensure you get the best video and audio quality for your online interactions.
Mounting the Webcam
Flexible clip/base options make positioning your Nexigo webcam easy. Place it on top of your monitor or laptop screen for a natural eye-level view. If you prefer a different angle, use the tripod mount for more versatility.
Adjust the webcam to frame your face properly. Aim for your eyes to be in the upper third of the frame. This creates a flattering and professional look for video calls.
Check the field of view to ensure you’re capturing the desired background. Most Nexigo models offer a wide-angle lens, giving you flexibility in your setup.
Lighting is key. Position yourself facing a natural light source or use soft, diffused lighting to avoid harsh shadows.
Conducting Video and Audio Tests
Start by opening your computer’s default camera app to check the video feed. Look for clear, sharp image quality. Nexigo webcams typically offer 1080p resolution, providing crisp video for your calls.
Adjust settings like brightness, contrast, and saturation if needed. These tweaks can significantly improve your video quality.
Test the frame rate by moving your hand in front of the camera. Smooth motion indicates a good frame rate, usually 30 fps for most Nexigo models.
| Setting | Recommended Value |
|---|---|
| Resolution | 1080p |
| Frame Rate | 30 fps |
| Field of View | 90° |
For audio testing, use your computer’s sound recorder. Speak at a normal volume and play back the recording. Listen for clarity and minimal background noise.
If you encounter issues, check your computer’s audio settings. Ensure the Nexigo microphone is selected as the input device.
Troubleshooting Common Issues
When installing your Nexigo webcam, you may encounter some problems. These can often be resolved with a few simple steps.
Resolving Video and Audio Problems
If your Nexigo N60 isn’t working properly, start by checking the USB connection. Unplug and reconnect the webcam to ensure a secure fit. If issues persist, try a different USB port.
For poor video quality, adjust the webcam settings in your video calling software. Look for options to change resolution or frame rate. The Nexigo N60 supports up to 1080p resolution with its FHD lens.
Color issues can often be fixed by tweaking brightness and contrast settings. Most video call apps let you adjust these. If colors still look off, try resetting to default settings.
Audio problems? Check that you’ve selected the Nexigo webcam as your microphone in your computer’s sound settings. The N60 features a noise reduction microphone for clearer audio.
Enhancing Video Calling Experience
To improve your video calls, position your Nexigo webcam at eye level. This creates a more natural look. Good lighting also helps. Face a window or use a desk lamp for even illumination.
Use the privacy cover when not in video calls. This protects your privacy and keeps the lens clean. Remember to slide it open before your next call.
For the best performance, keep your webcam drivers up to date. Visit the Nexigo support page to download the latest software.
If you’re having compatibility issues, check that your operating system meets the webcam’s requirements. The Nexigo N60 works with Windows, Mac, and Chrome OS.
| Feature | Benefit |
|---|---|
| FHD Lens | Crisp 1080p video |
| Noise Reduction Mic | Clearer audio |
| Privacy Cover | Enhanced security |
| Wide Compatibility | Works on multiple OS |
Frequently Asked Questions
NexiGo webcams offer simple setup and integration across various devices and platforms. Here are answers to common questions about installation and usage.
How can I set up a NexiGo webcam on a Mac?
Connect your NexiGo webcam to an available USB port on your Mac. Most Macs will automatically recognize the device. Open your preferred video application to start using the webcam. If it’s not detected, check System Preferences > Security & Privacy for any blocked permissions.
Where can I find the NexiGo webcam software for installation?
Visit the NexiGo support page to download specific software for your webcam model. Not all NexiGo webcams require additional software, as many are plug-and-play devices.
What are the steps for installing a NexiGo webcam on a Windows PC?
Plug the NexiGo webcam into a USB port on your Windows PC. Wait for Windows to automatically install drivers. Once installed, open your video application to start using the webcam. If needed, adjust settings in Windows Device Manager.
What should I do if my NexiGo webcam is not recognized?
Try these steps:
- Unplug and reconnect the webcam to a different USB port.
- Restart your computer.
- Check for Windows updates or Mac OS updates.
- Download the latest drivers from the NexiGo website.
If issues persist, contact NexiGo support for further assistance.
How can I attach a NexiGo Webcam to my monitor securely?
Most NexiGo webcams come with a clip or mount. Place the webcam on top of your monitor. Adjust the clip to fit snugly. Ensure the webcam is level and pointing at your face. Some models may have adhesive strips for extra stability.
How can I integrate my NexiGo webcam with OBS for streaming?
To use your NexiGo webcam with OBS:
- Open OBS Studio.
- Click the ‘+’ under Sources.
- Select ‘Video Capture Device’.
- Choose your NexiGo webcam from the device dropdown.
- Adjust video settings as needed.
Test your stream to ensure proper integration and video quality.
| NexiGo Webcam Feature | Benefit for Streaming |
|---|---|
| HD Resolution | Clear video quality |
| Auto-focus | Sharp image at all times |
| Low-light correction | Better visibility in dim rooms |
| Wide-angle lens | Captures more of your setup |

