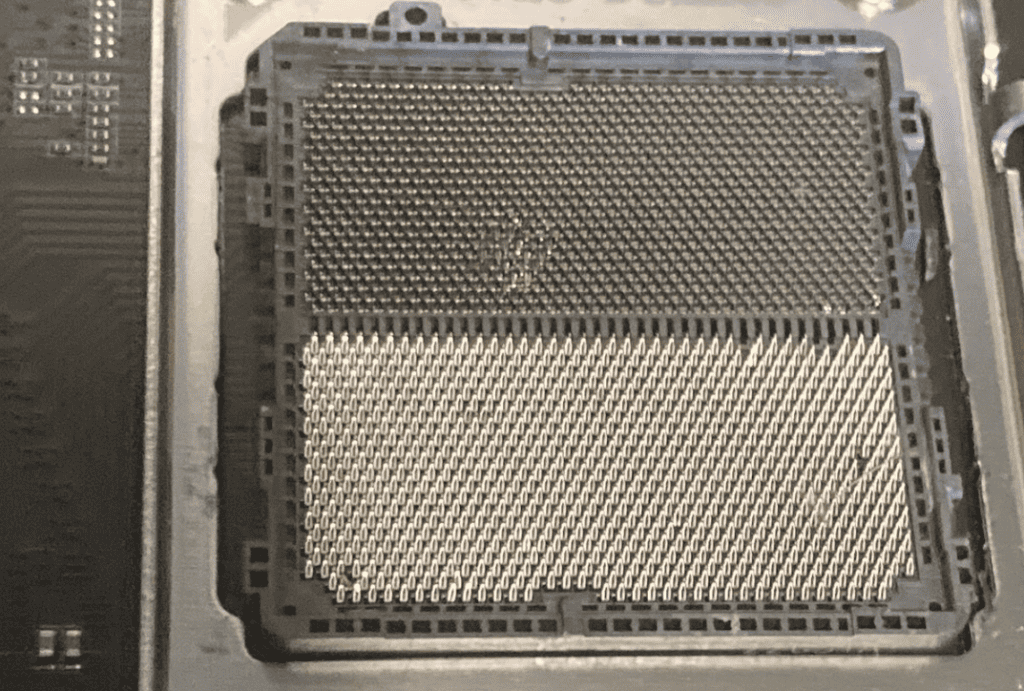
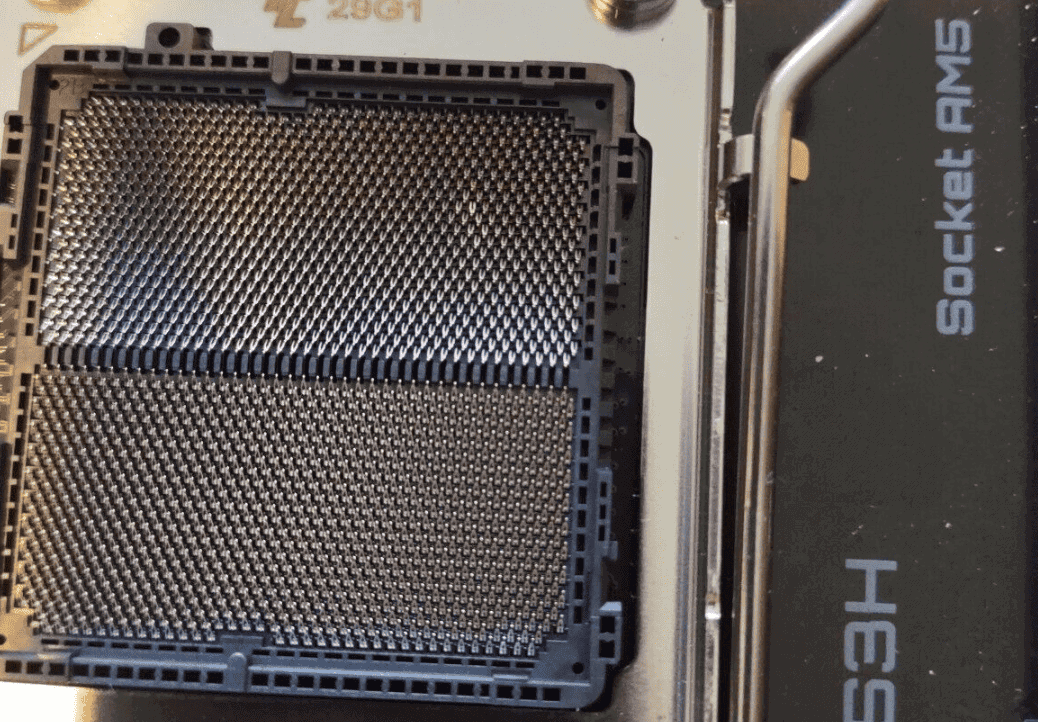
In this guide, we walk you through the steps of troubleshooting and fixing bent pins on an AM5 motherboard. From identifying bent pins to straightening them and preventing future damage, we provide the knowledge and tools you need to get your PC back up and running.
Rescuing Your AM5 Motherboard: A Guide to Fixing Bent Pins
Bent pins on an AM5 motherboard can be a nightmare for PC builders. They can prevent your CPU from working and potentially damage your motherboard. However, don’t despair! With a little patience and the right tools, you can often fix bent pins yourself.

Understanding the AM5 Socket
Before we dive into troubleshooting, let’s understand the AM5 socket. Unlike older AMD sockets, the pins are on the motherboard, not the CPU. This makes the pins more vulnerable to damage but also easier to access for repair.
Identifying Bent Pins
The first step is to identify the bent pins. Carefully examine the socket with a magnifying glass or a macro lens. Look for pins that are out of alignment, tilted, or touching other pins.
Tools for the Job
You’ll need a few tools to straighten the pins:
- Magnifying glass or macro lens: For a clear view of the pins.
- Needle or precision tweezers: To gently manipulate the pins.
- Credit card or thin plastic tool: To help align multiple pins at once.
- Bright light: To illuminate the socket and make the pins easier to see.
Straightening Bent Pins
- Gently lift the pin: Use a needle or tweezers to carefully lift the bent pin back into its upright position. Be gentle to avoid breaking the pin.
- Align the pin: If the pin is tilted, gently nudge it back into alignment with the other pins. You can use a credit card or a thin plastic tool to help align multiple pins at once.
- Check for contact: Once the pin is straightened and aligned, use a magnifying glass to make sure it’s making proper contact with the CPU’s contact pad.
Preventing Bent Pins
Prevention is always better than cure. Here are a few tips to avoid bending pins in the first place:
- Handle the motherboard with care: Avoid touching the socket area.
- Install the CPU correctly: Make sure the CPU is aligned with the socket before applying pressure.
- Don’t force the CPU: If it doesn’t fit easily, double-check the alignment.
When to Seek Professional Help
If you’re uncomfortable fixing the pins yourself or if multiple pins are severely damaged, it’s best to seek professional help. A qualified technician can repair the pins or replace the motherboard if necessary.
Key Takeaways
- Understanding the Issue: Bent pins on AM5 sockets are a common concern, affecting performance and functionality.
- User Experiences: Insights from Reddit users highlight the prevalence and impact of this issue.
- Practical Solutions: Tips and methods for addressing bent pins, with real-world advice and techniques.
- Technological Context: The role of AM5 in the broader tech landscape and its importance in computing.
Fixing Bent Pins On An AM5 Motherboard
Here’s a table troubleshooting bent pins on an AM5 motherboard. Note: This procedure is very difficult and you won’t be successful every time. Always review your warranty options before trying to touch the socket pins as you may void the warranty or make matters worse.
| Step | Description |
|---|---|
| 1. Assess the damage. | Carefully examine the socket to identify the extent of bent pins. Use a magnifying glass and good lighting. Take a clear photo for reference if possible. |
| 2. Gather tools. | You’ll need: – Fine-tipped tweezers or a mechanical pencil – Credit card or similar plastic card – Magnifying glass (optional) – Good lighting – Patience! |
| 3. Straighten bent pins. | Gently try to bend the pins back into place using the tweezers or pencil tip. Work slowly and carefully to avoid breaking pins. Tip: Use a credit card to align multiple pins at once. |
| 4. Verify alignment. | Double-check that the pins are straight and aligned with their corresponding holes in the CPU. Use the magnifying glass and photo for comparison. |
| 5. Test the motherboard. | If you’re confident the pins are properly aligned, install the CPU and attempt to boot the system. If it works, you’ve successfully repaired the bent pins! |
| 6. Seek professional help (if needed). | If you’re unable to repair the pins yourself, or if you’re uncomfortable attempting the repair, seek help from a professional computer technician. They have specialized tools and experience to handle delicate repairs. |
Additional tips:
- Prevention is key: Handle the motherboard and CPU with care to avoid bending pins in the first place.
- Use a mechanical pencil for precision: The fine tip of a mechanical pencil can be more precise than tweezers for straightening delicate pins.
- Work under good lighting: Adequate lighting is essential for accurate pin alignment.
- Be patient and take your time: Rushing the repair process can lead to further damage.
- Consider professional help: If you’re unsure about your abilities or the extent of the damage, it’s best to consult a professional.
Bent pins on AM5 sockets are more than just a minor inconvenience; they can be a total roadblock for PC builders and enthusiasts. This article draws upon a rich blend of user experiences from Reddit, expert advice, and technical knowledge to provide a comprehensive understanding of the issue and practical solutions.
The AM5 Dilemma: Bent Pins and User Frustrations
A Reddit user’s experience with their new Asus 670E-E motherboard brings to light the common issue of bent pins in AM5 sockets. The user faced error codes and a lack of video output, leading to the discovery of bent pins right out of the box. This scenario is not isolated, as other users chimed in with similar experiences, highlighting a pattern of frustration and confusion among AM5 users.
Real-World Insights: User Perspectives and Fixes
The Reddit community’s response to bent pins ranges from advising an immediate return of the product to sharing personal experiences of fixing similar issues. One user noted the fragility of AM5 pins and the challenges in addressing them, while another shared a success story of repairing worse damage. These anecdotes provide a human touch to the technical aspects of dealing with bent pins.

Technical Solutions: Addressing Bent Pins
When it comes to fixing bent pins, precision and patience are key. Here are some steps and tips gathered from various sources, including YouTube tutorials:
- Inspection: Carefully examine the pins to assess the extent of the damage.
- Tools: Use a fine tool like a mechanical pencil or tweezers for realignment.
- Technique: Gently bend the pins back into place, being careful not to apply excessive force.
The Bigger Picture: AM5 in Modern Computing
AM5 sockets are a critical component in modern computing, offering advanced features and compatibility with the latest CPUs. Understanding the intricacies of these sockets, including the common issue of bent pins, is essential for enthusiasts and professionals alike.
User Experiences: A Valuable Resource
The collective wisdom of the Reddit community offers a unique perspective on the issue of bent pins. From troubleshooting tips to shared frustrations, these real-world experiences add depth and relatability to the technical advice.
FAQs
Can bent AM5 pins be fixed at home?
Yes, with the right tools and techniques, it’s possible to fix bent AM5 pins at home. However, it requires patience and precision.
What are the risks of trying to fix bent pins myself?
The main risk is causing further damage to the pins or the motherboard. If you’re not confident in your ability to fix it, it’s better to seek professional help.
Are there any specific tools recommended for fixing bent pins?
Fine tools like a mechanical pencil (without lead) or precision tweezers are commonly recommended for gently realigning bent pins.
How can I prevent bending pins on my AM5 socket in the future?
Careful handling is key. Ensure the CPU is aligned correctly before seating it, and avoid applying uneven pressure.
If I can’t fix the bent pins, what are my options?
If the pins are irreparable, you might need to replace the motherboard or CPU, depending on where the damage is. Check if your warranty covers such damage.


