Updating the BIOS (Basic Input/Output System) is a crucial process for ensuring effective communication between your computer’s motherboard and hardware. The BIOS is firmware that initializes your PC’s hardware when it is powered on, preparing the system for the operating system to take control. Despite its importance, BIOS updates are often overlooked when troubleshooting or upgrading hardware.
However, a BIOS update can bring bug fixes and support for new hardware, ultimately improving your computer’s performance and stability. While updating your motherboard’s BIOS may seem daunting, it is an essential task for maintaining your computer’s performance and stability. Here’s a step-by-step guide to help make the process as smooth as possible:
1. Identify Your Motherboard and Current BIOS Version
- Motherboard Model: This is usually printed on the motherboard itself. You can also find it in your system information (search “System Information” in your Windows search bar).
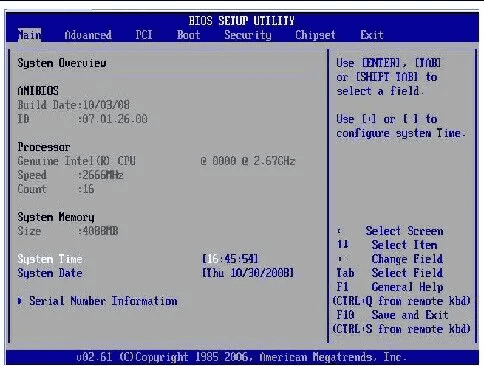
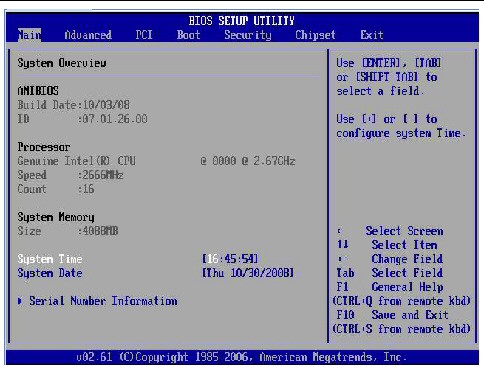
- BIOS Version: You can find this in the BIOS settings (usually accessed by pressing DEL or F2 during startup) or in the System Information tool.
2. Download the Latest BIOS Update
- Manufacturer’s Website: Go to the support section of your motherboard manufacturer’s website (e.g., ASUS, MSI, Gigabyte).
- Locate Your Model: Enter your motherboard model number to find the correct downloads.
- Download the BIOS Update: Look for the latest BIOS version. Make sure to download the correct file for your specific motherboard model.

3. Prepare the Update File
- Extract the Files: BIOS updates often come in a compressed format (like .zip). Extract the contents to a folder.
- Read the Instructions: The downloaded file might include a README file with specific instructions for your motherboard.
4. Update the BIOS
There are a few ways to update the BIOS, depending on your motherboard:
- Within the BIOS:
- Copy to USB Drive: Copy the BIOS update file to a formatted USB drive (FAT32 format is usually recommended).
- Access the BIOS: Restart your computer and enter the BIOS settings by pressing the appropriate key (DEL, F2, or the key indicated on your motherboard’s splash screen).
- Update Utility: Look for a BIOS update utility within the BIOS settings (e.g., EZ Flash, Q-Flash).
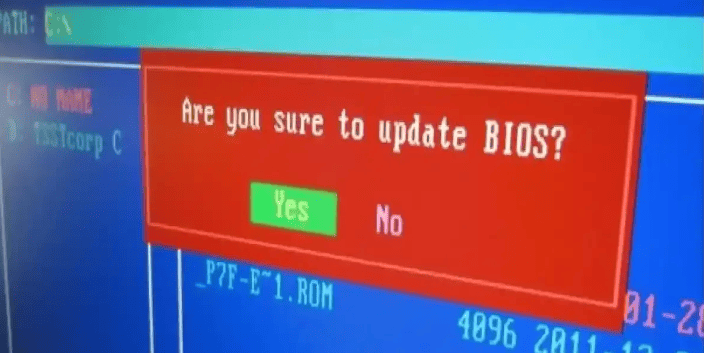
- Select the File: Use the utility to navigate to your USB drive and select the BIOS update file.
- Follow the Prompts: Confirm the update and follow any on-screen instructions.
- Using a Windows Utility:
- Manufacturer’s Utility: Some manufacturers provide Windows-based utilities for updating the BIOS. Check your motherboard’s support page.
- Run the Utility: Download and run the utility, and follow the instructions to select and install the BIOS update.
- BIOS Flashback (for some motherboards):
- Copy to USB Drive: Copy the BIOS update file to a formatted USB drive.
- Plug into Dedicated Port: Insert the USB drive into a specific USB port on the motherboard (often labeled “BIOS Flashback”).
- Press the Flashback Button: Press and hold the BIOS Flashback button on the motherboard for a few seconds.
- Wait for the Update: The process will usually be indicated by flashing lights. Do not interrupt the process.
Important Notes:
- Backup Your Data: Although rare, BIOS updates can sometimes go wrong. Back up important data before proceeding.
- Don’t Interrupt: Never interrupt the BIOS update process. Power outages or turning off the computer can corrupt the BIOS and render your computer unusable.
- Check the Manual: If you’re unsure about any steps, consult your motherboard’s manual for specific instructions.
Updating your BIOS can provide benefits like improved system stability, support for new hardware, and enhanced performance. By following these steps carefully, you can successfully update your BIOS and keep your system running smoothly.
How to Update Your BIOS
| Step | Description |
|---|---|
| 1 | Identify Your Motherboard and Current BIOS Version: Find your motherboard model (printed on the board or findable through system info tools) and the current BIOS version (in the BIOS setup menu). |
| 2 | Download the Latest BIOS Update: Visit your motherboard manufacturer’s website and locate the support/downloads section for your model. Download the latest BIOS file and any accompanying instructions. |
| 3 | Backup Your Current BIOS (Optional): Many motherboards have a “save current BIOS” feature as a safety precaution. |
| 4 | Prepare the Update: Follow the specific instructions from the manufacturer. This might involve: * Formatting a USB drive to FAT32 * Extracting the BIOS update file onto the drive * Renaming the BIOS update file if needed |
| 5 | Perform the Update: Methods vary, but common ones include: * Within BIOS: Enter BIOS setup, find the update utility, and select the update file from your USB drive. * Manufacturer utility: Some offer a tool that runs within Windows to handle the update. * BIOS Flashback: Some high-end boards have a dedicated button and USB port for updates, even if the PC won’t boot. |
Important Considerations:
- Why Update? Updates often fix bugs, improve compatibility, or add features. Only update if you have a specific reason or are advised by the manufacturer for critical issues.
- Risks: Incorrect updates can “brick” your motherboard. Follow instructions exactly and don’t interrupt the process.
- Power: Ensure a stable power supply (use a UPS if possible) as interruptions during the update can be disastrous.
Before embarking on an update, it’s important to know why and when such an action is required. Manufacturers release BIOS updates to fix problems, add support for new technologies, and make your computer run more smoothly. However, updating your BIOS should be done with caution because an incorrect update can render your computer inoperable. Thus, it’s crucial to confirm the need for an update, usually available through your motherboard manufacturer’s website, and to follow a specific set of steps with care.
Key Takeaways
- BIOS updates can enhance computer stability and hardware compatibility.
- Carefully prepare for a BIOS update by verifying the necessity and backing up settings.
- Execute the update following the motherboard manufacturer’s detailed instructions.
Preparing for BIOS Update
Before updating your BIOS, getting everything in order is essential. This includes confirming your current BIOS version, making sure that your motherboard has support available, and securing a backup to prevent any loss of data.
Identifying Your BIOS Version
First, it’s necessary to know your system’s current BIOS version. This can be found by accessing the System Information on your Windows PC.
- Press Windows+R keys to open the Run dialog.
- Type
msinfo32and hit Enter. - Locate the BIOS Version/Date in the list.
Write this information down for future reference. Knowing your current BIOS version is important to determine if an update is needed.
Checking Motherboard Manufacturer’s Support
Next, visit the motherboard manufacturer’s support page specific to your PC. Checking for BIOS updates is done as follows:
- Find the support page of your motherboard manufacturer.
- Enter the model number of your motherboard to find the support.
- Look for BIOS updates in the support options.
Only download BIOS updates from the official support page to avoid potential harm to your computer.
Creating a Backup
Lastly, protect your data by creating a backup before updating the BIOS.
- Use a USB flash drive to create this backup.
- Make sure the flash drive has enough space for a full backup.
Remember, updating your BIOS can be risky and having a backup will keep your data safe in case of any issues.
Executing the BIOS Update
Updating your computer’s BIOS can be a critical step in ensuring that the system runs efficiently and securely. This section will guide you through the BIOS update process, from using Windows Update to manual installation from a USB and final steps after installation.
Using Windows Update for BIOS Installation
For some systems, updating the BIOS can be as simple as running Windows Update. This utility checks for all available updates, including software, drivers, and occasionally the BIOS. To use Windows Update:
- Open Settings by pressing the Windows key + I.
- Go to Update & Security.
- Select Windows Update, and click Check for updates.
If a BIOS update is available, it will appear here. Confirm the installation and the system will handle the rest, including the reboot.
Flashing BIOS from USB
If Windows Update doesn’t offer a BIOS update, you’ll have to do it manually:
- On another computer, visit your motherboard manufacturer’s website.
- Locate the support page, and download the latest BIOS version for your specific motherboard model.
- Format a USB drive to FAT32 and extract the downloaded file onto it.
- Insert the USB into the target computer and reboot.
- During startup, press the BIOS key (often F2, Delete, or Esc) to enter the BIOS/UEFI environment.
- Find the flash utility within the BIOS menu – the name varies by manufacturer but it’s typically labeled as EZ Flash, M-Flash, or similar.
- Select the BIOS file from the USB and initiate the update process.
Finalizing Installation and Rebooting
After flashing the BIOS:
- The system will likely reboot automatically.
- Enter the BIOS again to confirm the BIOS version has updated.
- Review settings to ensure they meet your preferences, as updates can reset some options.
- Save changes and restart your computer.
The computer should now start with the new BIOS version installed.
Update BIOS To Support A CPU When The Factory BIOS Version Doesn’t Support It
Updating your BIOS to support an incompatible CPU can be tricky, but here’s a breakdown of the methods and considerations:
1. Check for Initial Support
- Double-check: Carefully review your motherboard’s support page. Sometimes, a newer BIOS release existing at the time of your CPU’s release might support it, even if the original BIOS doesn’t.
2. Methods for Updating
If your current BIOS truly doesn’t support the CPU, you have a few options:
- Using an Older, Supported CPU:
- This is the most reliable way if you can borrow a compatible CPU (even an old, cheap one from the same generation).
- Install the old CPU, boot into BIOS, perform the update with your new BIOS file, then swap back to your new CPU.
- BIOS Flashback (If Available): See Below
- Some modern motherboards have a “BIOS Flashback” button.
- This allows updating the BIOS without a CPU or even RAM installed.
- Check your manual and follow the specific procedure using a USB drive with the BIOS file.
- Local PC Shop:
- If you’re not comfortable with the above, a local PC repair shop might be able to update the BIOS for you for a fee. They would likely have a compatible CPU to do this.
3. Using BIOS Flashback
Prerequisites:
- Compatible USB Thumbdrive: Check your motherboard manual for size and formatting requirements.
- Latest BIOS Update File: Download the correct file for your specific motherboard model from the MSI website.
- Motherboard Manual: Refer to it for the exact steps, button location, and supported file naming.
Steps:
- Format USB Drive:
- Format the USB drive as FAT32 with MBR partitioning. (Right-click the drive in Windows Explorer and choose “Format…”)
- Download and Prepare BIOS File:
- Download the latest BIOS file for your motherboard model from the MSI website.
- Rename the downloaded file to “MSI.ROM” (or whatever your motherboard manual specifies).
- Copy the renamed BIOS file to the root directory of your formatted USB drive.
- Initiate BIOS Flashback:
- Disconnect all components from your motherboard (RAM, CPU, etc.). Only leave the power supply connected.
- Locate the BIOS Flashback button on your motherboard’s I/O panel (usually near the USB ports). Refer to your manual for confirmation.
- Insert the USB drive into the designated BIOS Flashback USB port (may also be marked in your manual).
- Press and hold the BIOS Flashback button for a few seconds as instructed by your manual.
- Wait for Completion:
- An LED near the button will usually indicate the flashing process. Do not interrupt the process or turn off the power.
- The flashing process can take several minutes (5-10+). Wait patiently.
- The LED will usually turn off or change its behavior when the update is complete.
- Verify (Optional):
- Once done, if you have a compatible CPU, you can install it, RAM, and other components to power on the system and check the BIOS version to confirm the update.
Important Notes
- Manual is Key: Always follow instructions in your motherboard manual as procedures may slightly differ between models.
- Power Stability: Ensure an uninterrupted power supply during the update to prevent corruption.
- Compatibility: Double-check that the BIOS update supports your intended CPU before proceeding.
4. Short Term Processor Loan Boot Kit
AMD will offer affected and qualified users (as described below) an AMD Athlon 200GE Processor, including thermal solution, for short-term use (“boot kit”) to perform the BIOS update on their motherboard.
This short-term processor loan or boot kit is offered through AMD warranty services and is available only for qualified users that:
- Have made a valid purchase of a 3rd Gen Ryzen™ Desktop Processor and;
- Are unable to boot that processor because the user’s current X470/B450 BIOS must be upgraded first.
This service is free of charge with the following condition:
Once you have submitted your claim for a processor loan boot kit, AMD will require pictures of your 3rd Gen Ryzen™ Desktop Processor and AMD Socket AM4 400 Series motherboard, which clearly shows the model numbers and unique serial numbers as well as a copy of the purchase invoice(s) to authorize the request. Additionally, a summary or copy of communication with the motherboard manufacturer is requested to indicate why support from the Original Design Manufacturer (ODM) is not suitable.
Once the RMA request is approved, the AMD Athlon 200GE processor will be sent with pre-paid return shipping. The processor is provided as a temporary loan to you for the sole purpose of updating the BIOS and must be returned within 10 business days of receipt. It is not necessary to return the provided thermal solution.
To obtain the boot kit, please carefully follow these instructions:
- Go to the AMD online warranty claims page: https://www.amd.com/en/support/kb/warranty-information/rma-form
- Fill in your full contact and product details (3rd Gen Ryzen Processor OPN number and serial number)
- In the Problem Description field enter “Boot kit Required” (without quotes)
NOTE: The product must be a valid AMD processor with authentic OPN and serial number.
Once the claim is received and approved, confirmation details and boot kit instructions will be provided in a follow up email.
Frequently Asked Questions
When updating the BIOS on a Windows PC, ensuring you have the correct file and method is essential. This section answers common questions to guide you through BIOS updates.
What is the procedure for updating BIOS on a Windows 10 system?
To update BIOS on a Windows 10 system, first, identify your BIOS version by opening System Information. Download the proper update from your motherboard manufacturer’s website. Follow the instructions provided, usually involving running an executable file from within Windows or updating from the BIOS interface during boot.
How can I tell if my BIOS needs an update?
Check your current BIOS version in the System Information window. Compare this version to the latest one listed on your motherboard manufacturer’s website. If the website version is newer, an update might be necessary, especially if it offers performance improvements or security patches.
Is it possible to update the BIOS on my own, and how do I do it?
Yes, you can update the BIOS on your own. After downloading the update from the manufacturer’s website, you can usually update via a Windows application or from the BIOS/UEFI screen itself. Always follow the manufacturer’s instructions carefully to avoid issues.
What steps should I follow to update the BIOS on an HP computer?
For an HP computer, visit HP’s official website and locate your computer’s model to find the correct BIOS update. Download the file, and follow HP’s guidelines, often involving running a utility that automates the update process.
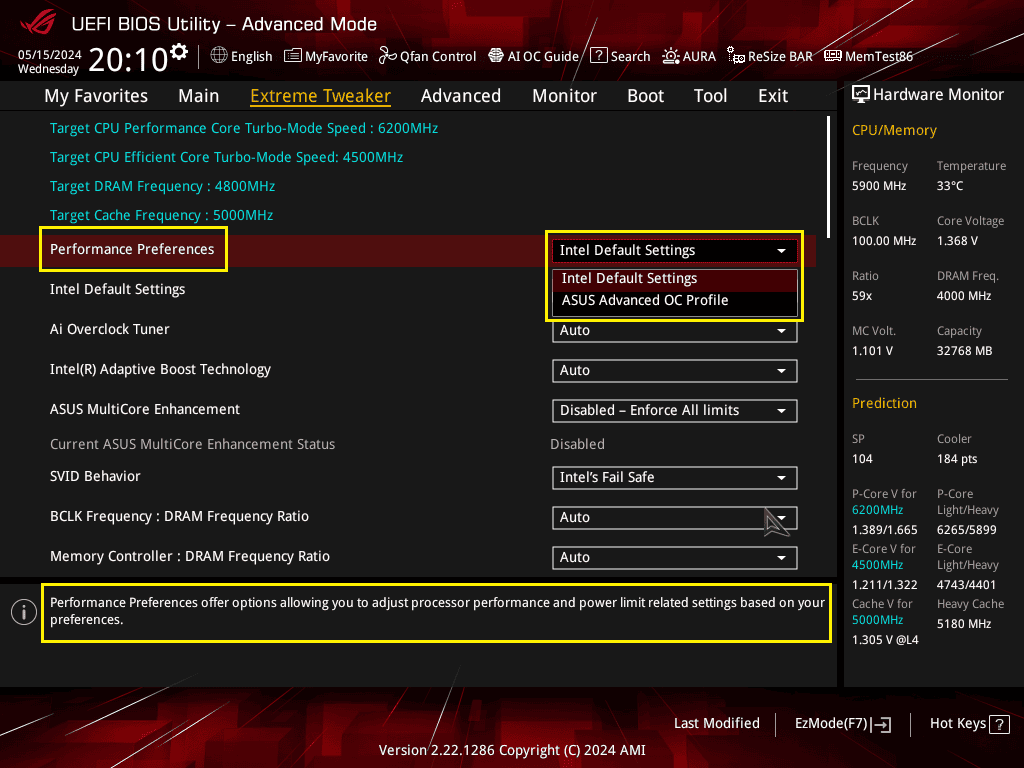
How do I perform a BIOS update for an ASUS motherboard?
For an ASUS motherboard, go to ASUS support, find your motherboard model, and download the latest BIOS file. Copy the file to a USB drive, reboot the PC, enter the BIOS, and use the ASUS EZ Flash Utility to locate and install the BIOS update.
Does the BIOS update process differ for Gigabyte motherboards?
The process for updating a Gigabyte motherboard’s BIOS may vary from other manufacturers. Check Gigabyte’s support pages for your specific motherboard model. Their updates are typically applied using a utility called @BIOS or through the Q-Flash tool within the BIOS setup.