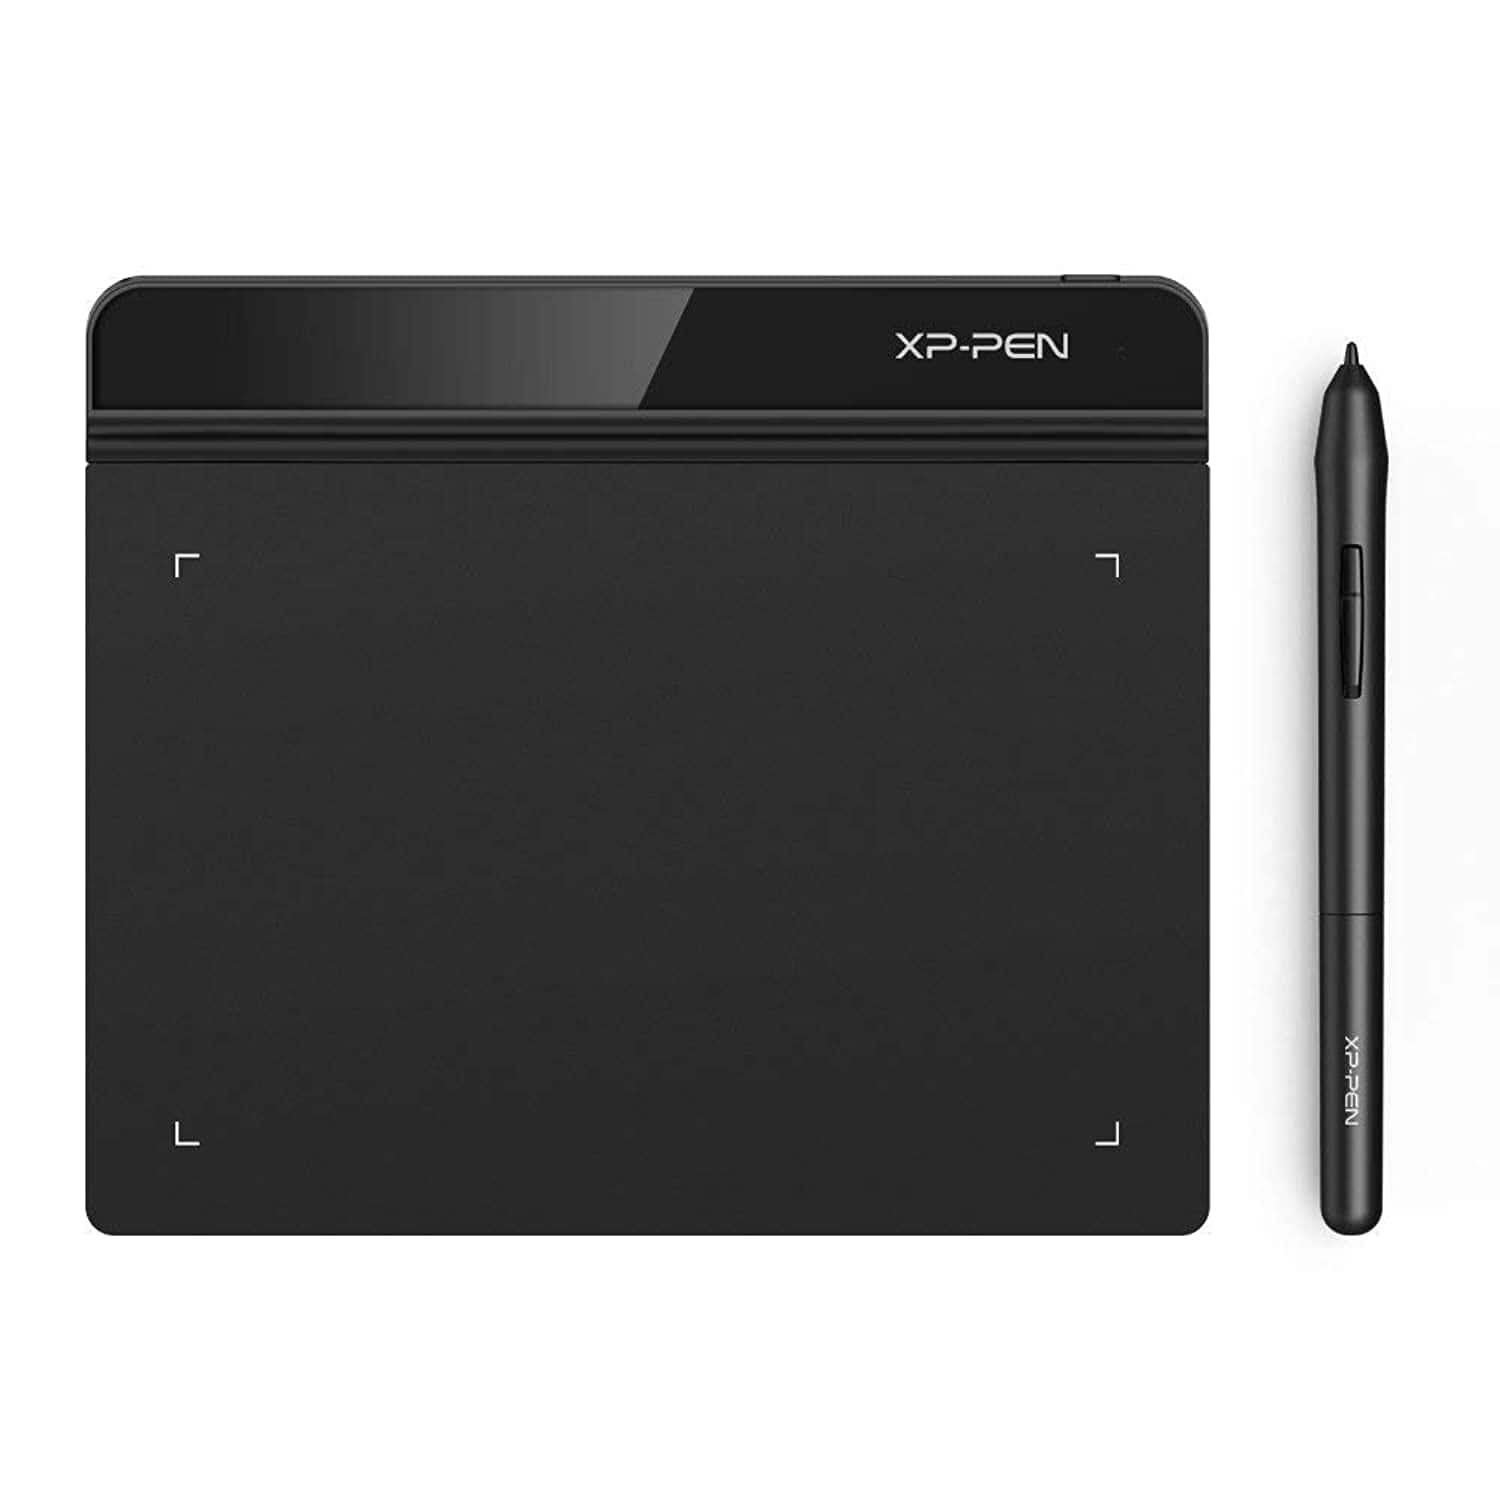
XP-Pen tablets offer digital artists a powerful tool to enhance their creative workflow. These devices can transform your computer into a digital canvas, but first you need to know how to turn them on. To power up your XP-Pen tablet, simply press the power button until the indicator light turns blue.
Getting started with your new XP-Pen tablet is easy. Once you’ve connected it to your computer, you’re ready to bring your digital art to life. The tablet’s standby mode is indicated by an orange light, so you’ll know when it’s ready for action.
For a smooth drawing experience, make sure you’ve installed the latest drivers for your XP-Pen model. This ensures all features work correctly and you can take full advantage of the tablet’s capabilities.
| XP-Pen Tablet Setup Steps |
|---|
| 1. Connect to computer |
| 2. Press power button |
| 3. Install latest drivers |
| 4. Start creating |
Getting Started with Your XP-Pen Tablet
XP-Pen makes great drawing tablets. They are popular with artists and designers. This guide will help you get started with your new XP-Pen tablet. We’ll cover the basics, like turning it on and connecting it to your computer. We’ll also show you how to use the pen and troubleshoot common problems.
Turning On Your Tablet
- Connect your tablet to your computer using the included USB cable.
- Press the power button on your tablet. The location of the power button varies by model, so check your user manual if you can’t find it.
Installing the Driver
- Download the latest driver from the XP-Pen website. Make sure you choose the correct driver for your tablet model and operating system.
- Run the driver installation file and follow the on-screen instructions.
- Restart your computer when prompted.
Connecting Your Tablet
- Once the driver is installed, your tablet should be recognized by your computer.
- Open your preferred drawing software.
- You should now be able to use your pen to draw on the tablet surface.
Using the Pen
- Hover: Hold the pen slightly above the tablet surface to move the cursor.
- Draw/Click: Touch the pen tip to the tablet surface to draw or click.
- Pressure Sensitivity: Most XP-Pen tablets have pressure sensitivity. This means you can control the thickness or opacity of your lines by pressing harder or softer.
- Express Keys: Many tablets have express keys that you can customize for shortcuts.
Troubleshooting
- Pen not working: Make sure the pen is properly connected to the tablet. Try replacing the pen nib.
- Cursor not moving: Make sure the driver is installed correctly. Check for updates to the driver.
- Tablet not recognized: Try a different USB port or cable. Restart your computer.
Tips for Using Your XP-Pen Tablet
- Calibrate your tablet: This will ensure accurate cursor positioning.
- Customize express keys: Set up shortcuts for your most-used functions.
- Adjust pressure sensitivity: Find the right pressure sensitivity setting for your drawing style.
- Practice regularly: The more you use your tablet, the better you will become.
Tablet Care and Maintenance
- Keep your tablet clean. Use a soft cloth to wipe down the surface.
- Avoid using harsh chemicals or abrasive cleaners.
- Store your tablet in a safe place when not in use.
- Protect your tablet screen with a screen protector.
Choosing the Right Drawing Software
Many great drawing software options are available for use with your XP-Pen tablet. Here are a few popular choices:
- Adobe Photoshop: Industry-standard software for image editing and digital painting.
- Clip Studio Paint: Powerful software with features specifically for comics and manga.
- Krita: Free and open-source software with a wide range of features.
- Autodesk Sketchbook: User-friendly software with a focus on sketching and drawing.
Consider your budget, experience level, and specific needs when choosing drawing software. Many programs offer free trials, so you can experiment before buying.
Setting Up Your XP-Pen Tablet
Setting up your XP-Pen tablet involves a few key steps. You’ll need to unbox the device, install the necessary drivers, and connect it to your computer.
Unboxing and Initial Setup
Open the box and remove all components carefully. You’ll find the XP-Pen tablet, stylus, USB cable, and user manual. Check the manual for a list of included items to ensure nothing is missing.
Place the tablet on a flat surface near your computer. The active area is the part you’ll draw on. It’s usually marked with corner indicators or a subtle texture difference.
Remove any protective film from the tablet surface. This helps ensure smooth stylus movement.
Driver Installation
Visit the XP-Pen website to download the latest drivers for your tablet model. Choose the correct version for your operating system (Windows or macOS).
Run the installer and follow the on-screen prompts. You may need to restart your computer after installation.
Open the XP-Pen software. Here you can customize stylus pressure sensitivity, button functions, and active area mapping.
Connecting to Your Computer
Most XP-Pen tablets connect via USB. Plug the USB cable into your tablet’s USB-C port and the other end into your computer.
Some models offer wireless connectivity. For Bluetooth-enabled tablets, turn on Bluetooth on your computer and pair the devices.
| Connection Type | Steps |
|---|---|
| USB | 1. Plug USB-C into tablet 2. Connect USB-A to computer |
| Bluetooth | 1. Turn on tablet Bluetooth 2. Pair with computer |
Once connected, your computer should recognize the tablet. Open a drawing program to test the stylus and pressure sensitivity.
Configuring the Tablet Settings
Proper configuration enhances your XP-Pen tablet’s performance and customizes it to your needs. Adjusting pen sensitivity and setting up shortcut keys can greatly improve your workflow.
Adjusting Pen Settings
Open the XP-Pen driver software on your computer. Navigate to the Pen Settings tab. Here you can fine-tune your pen’s pressure sensitivity. A slider usually controls this setting. Move it left for a lighter touch or right for a firmer press.
Test different pressure levels to find what works best for you. Some artists prefer a soft touch while others like more resistance. Calibrate your pen to ensure accuracy across the tablet surface.
Check if your model allows customization of pen buttons. You can often assign functions like right-click or eraser to these buttons. This saves time during your creative process.
Customizing Shortcut Keys
Many XP-Pen tablets feature programmable shortcut keys. These buttons can speed up your workflow significantly. To set them up, locate the Shortcut Keys section in your tablet’s driver software.
Click on a key to assign a function. Common options include:
- Undo/Redo
- Brush size adjustment
- Zoom in/out
- Canvas rotation
You can also set keys to launch specific programs or execute complex macros. Tailor these shortcuts to the software you use most often.
| Shortcut Key | Recommended Function |
|---|---|
| Key 1 | Undo |
| Key 2 | Brush Size Increase |
| Key 3 | Color Picker |
| Key 4 | Layer Creation |
Remember to save your settings after making changes. Test each shortcut to ensure it works as intended in your drawing software.
Achieving Optimal Performance
Proper configuration enhances your XP-Pen tablet’s functionality. Adjusting pressure sensitivity and screen mapping optimizes your drawing experience.
Managing Pressure Sensitivity
XP-Pen tablets offer customizable pressure sensitivity for precise control. Access the XP-Pen settings app to adjust your stylus response. A softer setting requires less force for full pressure, while a firmer setting demands more.
To fine-tune pressure:
- Open the XP-Pen software
- Navigate to the “Pressure Sensitivity” tab
- Use the slider to adjust sensitivity
- Test settings in the pressure test area
Adjusting pen pressure in compatible drawing software further refines your experience. Many programs like Photoshop have built-in pressure controls.
| Pressure Setting | Best For |
|---|---|
| Soft | Sketching, light linework |
| Medium | General drawing, painting |
| Firm | Detailed work, heavy shading |
Screen and Monitor Mapping
Proper screen mapping ensures your tablet area corresponds accurately to your display. This alignment is crucial for precise cursor movement and drawing.
To set up monitor mapping:
- Open XP-Pen settings
- Select “Monitor Mapping”
- Choose full or partial screen mapping
- Adjust the active area if using partial mapping
For multi-monitor setups, assign your tablet to a specific display. This prevents cursor jumps between screens.
Color temperature adjustment on drawing displays improves visual comfort. Cooler settings reduce eye strain during long sessions. Warmer tones are ideal for evening work.
Troubleshooting Common Issues
When your XP-Pen tablet won’t turn on, a few key issues often arise. These typically involve connectivity problems or driver-related complications.
Resolving Connectivity Problems
Check your USB cable connections first. Ensure the cable is firmly plugged into both the tablet and your computer. Try different USB ports on your computer to rule out faulty ports. If using a USB hub, connect directly to your computer instead.
For Bluetooth-enabled models, pairing issues can prevent the tablet from turning on. Remove the device from your Bluetooth settings and re-pair it. Make sure Bluetooth is enabled on your computer.
Inspect the power button. It may be stuck or unresponsive. Gently press and hold it for 10 seconds to force a restart.
Verify your tablet’s battery charge. Connect it to power and leave it charging for at least 30 minutes before trying to turn it on again.
Handling Driver Issues
Outdated or corrupted drivers often cause tablets to malfunction. Uninstall the current XP-Pen drivers from your computer. Then download and install the latest version from the official XP-Pen website.
Restart your computer after driver installation. This ensures all changes take effect.
Check for conflicts with other tablet software. Uninstall any old or unused drawing tablet drivers from other brands.
| Operating System | Driver Download Location |
|---|---|
| Windows | XP-Pen.com/download |
| macOS | XP-Pen.com/download |
| Linux | GitHub XP-Pen drivers |
If issues persist, contact XP-Pen support. They can provide specific troubleshooting steps for your tablet model.
Frequently Asked Questions
XP-Pen tablets can be tricky to set up and use. Here are answers to common questions about connecting, powering, and troubleshooting these devices.
What steps are required to connect an XP-Pen tablet to a computer?
To connect your XP-Pen tablet, plug the USB cable into your computer. Install the latest XP-Pen drivers from the official website. Restart your computer after installation.
Make sure the tablet is recognized in your computer’s device manager. Open a drawing program to test if the pen and tablet are working correctly.
How can I use the XP-Pen Artist 12 without accessing a power button?
The XP-Pen Artist 12 doesn’t have a physical power button. It turns on automatically when connected to a power source and your computer. Simply plug in the USB and HDMI cables to get started.
Ensure your computer detects the tablet as a second display. You may need to adjust your display settings to use the tablet screen.
Why is my XP-Pen tablet not powering on, and how can I troubleshoot it?
If your XP-Pen tablet won’t power on, check the USB connection. Try a different USB port or cable. Ensure your computer is on and not in sleep mode.
Verify that the drivers are installed correctly. Uninstall and reinstall the latest drivers if needed. If problems persist, contact XP-Pen support for further assistance.
What should I do to properly install XP-Pen tablet drivers?
Download the latest drivers from the official XP-Pen website. Close all drawing programs before installation. Run the installer as an administrator.
Follow the on-screen instructions carefully. Restart your computer after installation. Open the XP-Pen software to customize settings if needed.
Is there a specific way to turn off an XP-Pen tablet?
Most XP-Pen tablets don’t require manual shutdown. They enter sleep mode when your computer is turned off or the USB cable is unplugged.
For tablets with screens, like the Artist series, closing the display settings on your computer will turn off the screen. Always unplug the tablet when not in use for extended periods.
Where can I find the settings app for my XP-Pen tablet?
The XP-Pen settings app is usually installed with the drivers. Look for the XP-Pen icon in your system tray or applications folder.
Open the app to adjust pressure sensitivity, express keys, and other tablet functions. If you can’t find the app, reinstall the drivers from the XP-Pen website.
| Feature | Location | Purpose |
|---|---|---|
| Pressure Sensitivity | XP-Pen Settings App | Adjust pen pressure |
| Express Keys | XP-Pen Settings App | Customize shortcut buttons |
| Driver Updates | Official XP-Pen Website | Get latest features and fixes |
| Troubleshooting | XP-Pen Support Page | Solve common issues |

