Keeping your graphics card clean is crucial for optimal performance and longevity. Dust and debris can clog fans and heatsinks, leading to overheating and reduced efficiency. To clean your graphics card, power off your PC, remove the card, and use compressed air to blow away dust from its components.
You might wonder if cleaning is really necessary. The answer is yes. A clean graphics card runs cooler and performs better. Regular maintenance can prevent costly repairs or replacements down the line.
For a deeper clean, you can carefully disassemble the card and clean each part individually. This process requires more time and skill but can yield excellent results. Remember to handle components gently and reassemble everything correctly.
Cleaning Method | Difficulty | Effectiveness | Time Required |
---|---|---|---|
Compressed Air | Easy | Good | 5-10 minutes |
Deep Clean | Advanced | Excellent | 30-60 minutes |
Understanding Your Graphics Card
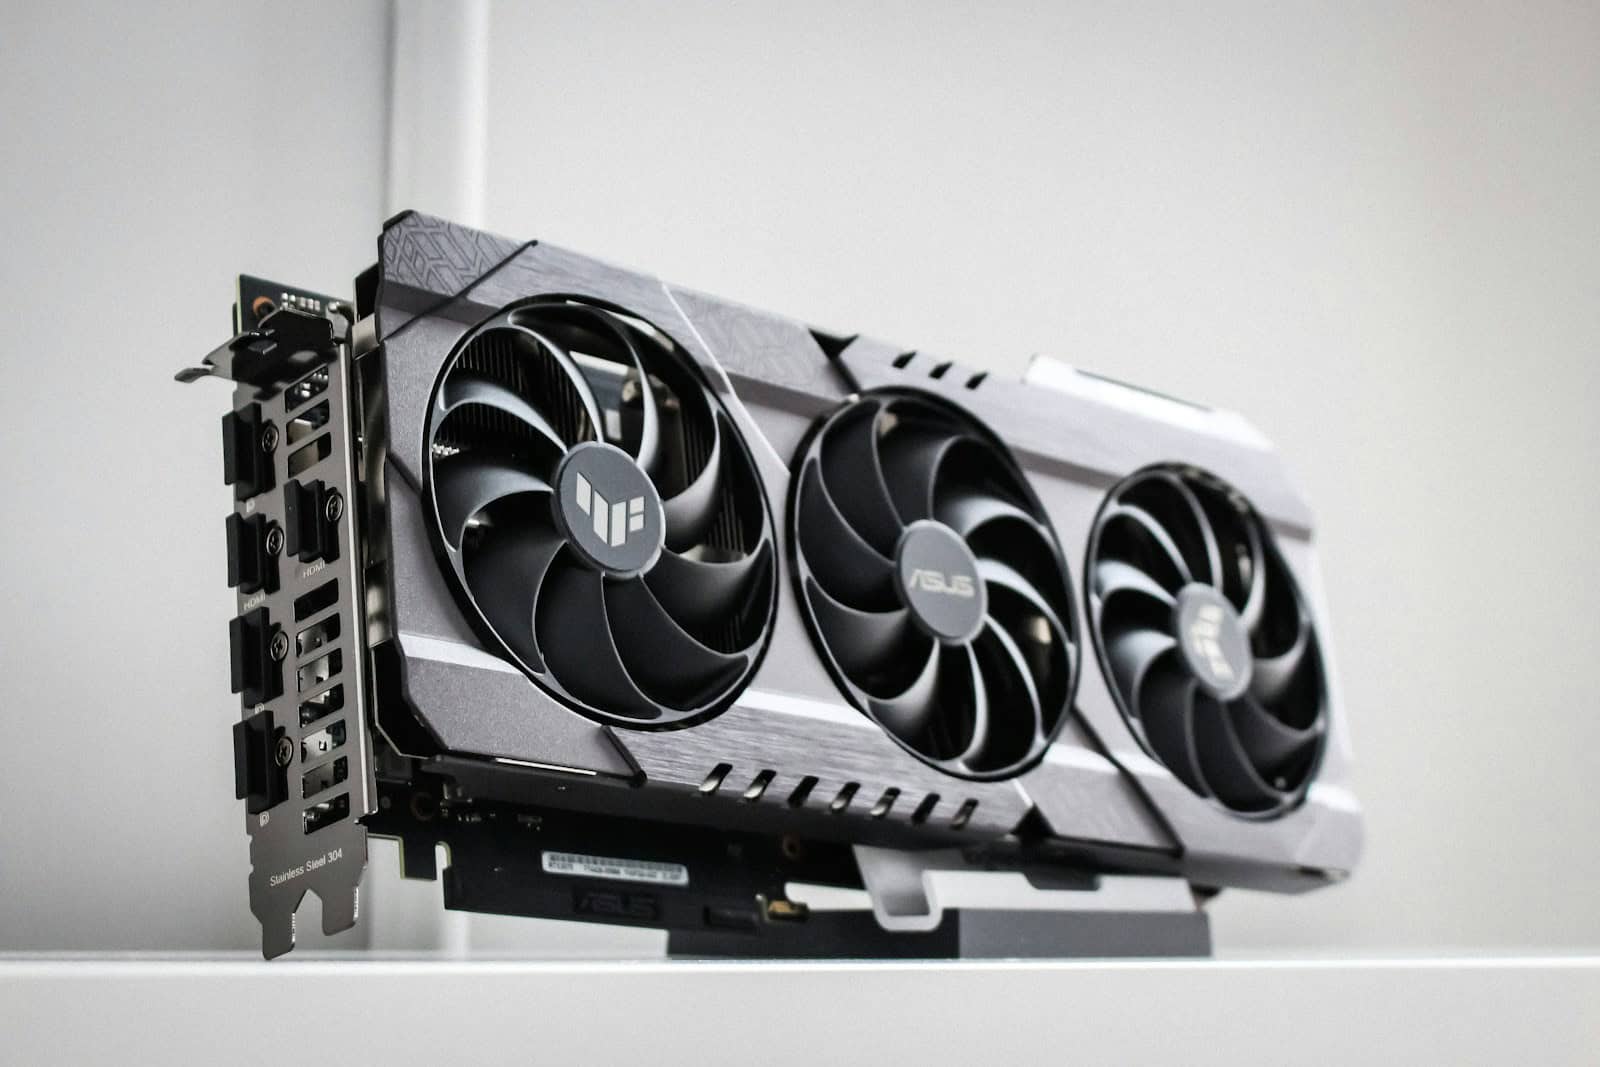
Graphics cards are complex components with various parts that work together to render images. Knowing these parts and recognizing signs of dust buildup can help you maintain your GPU’s performance.
Components and Their Functions
The GPU is the core of your graphics card. It processes visual data and creates images on your screen. The GPU sits on a printed circuit board (PCB) which holds other crucial components.
Memory chips store data the GPU needs for quick access. The BIOS chip contains firmware that controls the card’s basic functions.
Heatsinks and fans are vital for cooling. The heatsink absorbs heat from the GPU, while fans blow hot air away. Some high-end cards use liquid cooling instead.
Power connectors supply electricity to the card. Display outputs like HDMI or DisplayPort connect to your monitor.
Component | Function |
---|---|
GPU | Processes graphics data |
Memory | Stores data for quick access |
Heatsink | Absorbs heat from GPU |
Fans | Blow away hot air |
Power connectors | Supply electricity |
Display outputs | Connect to monitor |
Signs of Dust Accumulation
Dust buildup can harm your graphics card’s performance. Watch for these warning signs:
- Increased fan noise: Fans work harder to cool a dusty GPU.
- Higher temperatures: Dust acts as insulation, trapping heat.
- Thermal throttling: Your GPU slows down to prevent overheating.
- Visual artifacts: Unusual patterns or glitches on your screen.
- System crashes: Overheating can cause your PC to shut down.
Regular cleaning helps maintain good airflow and heat dissipation. This keeps your GPU running cooler and more efficiently. Check your card every few months, especially if you notice any of these signs.
Preparation for Cleaning
Before cleaning your graphics card, proper preparation is essential. This involves taking safety precautions and gathering the necessary tools and materials.
Safety Precautions
Turn off your computer and unplug it from the power source. Ground yourself by touching a metal object or wearing an anti-static wristband. This prevents electrostatic discharge that could damage your GPU.
Remove the graphics card from your PC carefully. Refer to your motherboard manual if unsure how to do this. Place the GPU on a clean, flat surface.
Avoid touching the card’s electrical components. Handle it by the edges or heatsink only. Work in a well-ventilated area to disperse fumes from cleaning products.
Tools and Materials Needed
Gather these items before you start:
- Compressed air can or electric air blower
- Isopropyl alcohol (90% or higher)
- Microfiber cloth
- Cotton swabs
- Lint-free cloth
- Thermal paste (if replacing)
Tool | Purpose |
---|---|
Compressed air | Remove loose dust |
Isopropyl alcohol | Clean stubborn dirt |
Microfiber cloth | Wipe surfaces gently |
Cotton swabs | Clean tight spaces |
Ensure your workspace is clean and well-lit. Have a small container ready to hold screws if you need to remove the GPU‘s cooler.
Cleaning the Graphics Card
Proper cleaning extends your graphics card’s lifespan and maintains peak performance. Regular maintenance prevents overheating and ensures smooth operation.
Removing Dust and Debris
Start by using compressed air to blow out loose dust and debris. Hold the can upright and spray in short bursts. Focus on the heatsink fins and fan blades.
For stubborn dust, use a soft brush. Gently sweep away particles from surfaces and crevices. Be careful not to damage delicate components.
Vacuum the area around your workspace to collect dislodged dust. This prevents it from settling back onto the card.
Cleaning the GPU Fans
Unplug the graphics card before cleaning the fans. Use a cotton swab dipped in isopropyl alcohol to wipe each fan blade.
Hold the fans steady while cleaning to avoid spinning them. This prevents damage to the bearings.
For thorough cleaning, remove the fan shroud if possible. Follow your GPU model’s instructions for safe disassembly.
Clean both sides of the fan blades. Don’t forget the hub and surrounding areas where dust often accumulates.
Applying Isopropyl Alcohol for Stubborn Grime
For tough dirt, use 90% or higher isopropyl alcohol. Apply it to a microfiber cloth and gently wipe the card’s surfaces.
Clean the PCB, heatsink, and metal components. Avoid getting alcohol on capacitors or other sensitive parts.
Use cotton swabs for hard-to-reach areas. Ensure you remove all residue.
Allow the card to dry completely before reinstalling. This usually takes about 10-15 minutes.
Cleaning Tool | Best Used For |
---|---|
Compressed Air | Loose dust removal |
Soft Brush | Stubborn dust in crevices |
Microfiber Cloth | General surface cleaning |
Cotton Swabs | Hard-to-reach areas |
Isopropyl Alcohol | Removing stubborn grime |
Post-Cleaning Operation and Maintenance
After cleaning your graphics card, proper reassembly and airflow optimization are crucial. These steps ensure your GPU functions at its best and maintains peak performance.
Reassembling the Graphics Card
Start by reapplying thermal paste to the GPU chip. Use a pea-sized amount and spread it evenly. Replace any thermal pads you removed during cleaning.
Carefully reattach the heatsink and fan assembly. Tighten screws in a cross-pattern to ensure even pressure. Don’t overtighten, as this may damage components.
Reconnect all power cables and PCIe connections. Double-check that everything is secure before powering on your system.
Test your GPU after reassembly. Run a benchmark or game to verify proper function and temperature levels.
Ensuring Optimal Airflow
Position your graphics card in the top PCIe slot for best airflow. This slot typically has direct access to cool air from case fans.
Clean dust filters in your case regularly. This prevents dust buildup and maintains good airflow.
Consider adding case fans if temperatures remain high. Aim for positive air pressure by having more intake than exhaust fans.
Airflow Tips | Benefits |
---|---|
Cable management | Reduces obstruction |
Proper fan placement | Directs cool air to GPU |
Regular dust removal | Prevents heat buildup |
Monitor GPU temperatures using software like MSI Afterburner. Ideal temperatures under load should be below 80°C (176°F).
Adjust fan curves if needed to balance noise and cooling performance. Gradually increase fan speed as temperature rises for optimal heat dissipation.
Frequently Asked Questions
Cleaning a graphics card requires careful handling and specific techniques. Safety precautions and proper tools are essential for maintaining your GPU’s performance and longevity.
What is the recommended method to clean a GPU without disassembling it?
You can clean your GPU without disassembly using compressed air and microfiber cloths. Gently blow dust from the fans and heatsink. Wipe external surfaces with a cloth. Avoid touching internal components.
What steps should be followed to clean the memory on a graphics card?
Cleaning GPU memory involves removing dust from the card’s surface. Use compressed air to blow out particles. Wipe gently with a microfiber cloth dampened with isopropyl alcohol. Let it dry completely before reinstalling.
How can one effectively clean the fan on a graphics card?
To clean GPU fans, use compressed air to remove loose dust. Hold the fan in place to prevent over-spinning. Gently wipe blades with a microfiber cloth. For stubborn dirt, use cotton swabs lightly moistened with isopropyl alcohol.
What is the proper technique for using compressed air to clean a GPU?
Hold the can upright and use short bursts. Keep the nozzle 2-3 inches away from components. Spray at an angle to blow dust out, not further in. Avoid tilting the can to prevent liquid propellant from escaping.
What are the alternatives to using compressed air when cleaning a GPU?
Alternatives include electric air dusters, soft brushes, and vacuum cleaners with brush attachments. Microfiber cloths can wipe surfaces. Cotton swabs reach tight spaces. Always be gentle to avoid damaging components.
Is it safe to use water for cleaning a graphics card, and if not, what are the alternatives?
Water is unsafe for cleaning graphics cards. Use isopropyl alcohol instead. It evaporates quickly and doesn’t leave residue. Apply with microfiber cloths or cotton swabs. Ensure the card is completely dry before use.
Cleaning Tool | Best Use | Safety Precaution |
---|---|---|
Compressed Air | Removing dust | Keep nozzle distance |
Microfiber Cloth | Wiping surfaces | Use gentle pressure |
Isopropyl Alcohol | Stubborn dirt | Ensure full evaporation |
Soft Brush | Delicate areas | Avoid static buildup |
Electric Duster | Dust removal | Control air pressure |