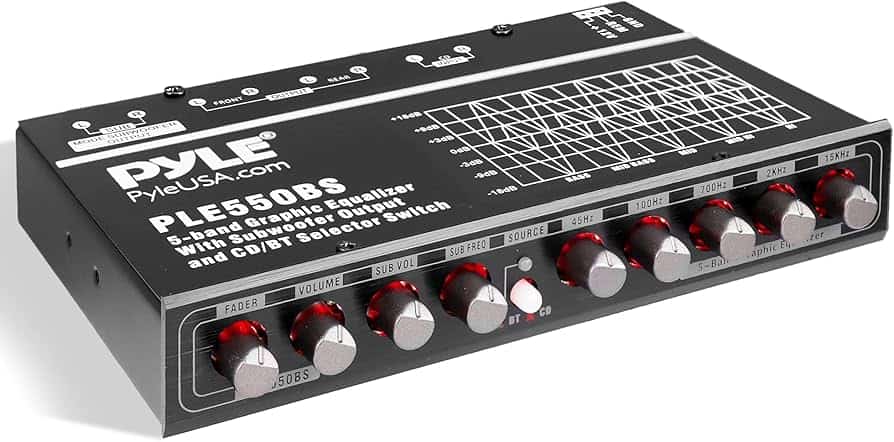
Connecting an equalizer to an amplifier can enhance your audio setup. This process involves a few simple steps and the right cables. Connecting the equalizer to the amplifier requires RCA cables to link the output of the equalizer to the input of the amplifier.
You’ll need to connect the left and right channels correctly. This setup allows you to fine-tune your sound before it reaches the speakers. With the right wiring, you can adjust frequencies to your liking.
Here’s a quick guide to the key components:
| Component | Function |
|---|---|
| Equalizer | Adjusts audio frequencies |
| Amplifier | Boosts audio signal |
| RCA Cables | Connects components |
| Speakers | Produces sound |
Connecting Your Equalizer to Your Amplifier for Enhanced Audio
An equalizer can dramatically improve your audio experience by fine-tuning the frequencies of your sound system. But connecting it to your amplifier can sometimes be confusing. Here’s a clear guide to help you get it set up:
Understanding the Connections
Before you start, it’s essential to identify the correct output on your source device and the input on your amplifier. Common connection types include:
- RCA Cables: These are the most common for home audio setups. They have red and white connectors for stereo audio.
- 3.5mm (AUX) Cable: This is a common headphone jack-style connector, often used for portable devices.
- Digital Connections (Optical/Coaxial): These offer higher-quality audio but may not be compatible with all equalizers.
Connection Methods
There are two main ways to connect an equalizer to an amplifier:
- In-Line with the Source:
- Connect the output of your source device (e.g., CD player, media streamer) to the input of the equalizer.
- Connect the output of the equalizer to the input of your amplifier.
- Through the Amplifier’s Tape Loop:
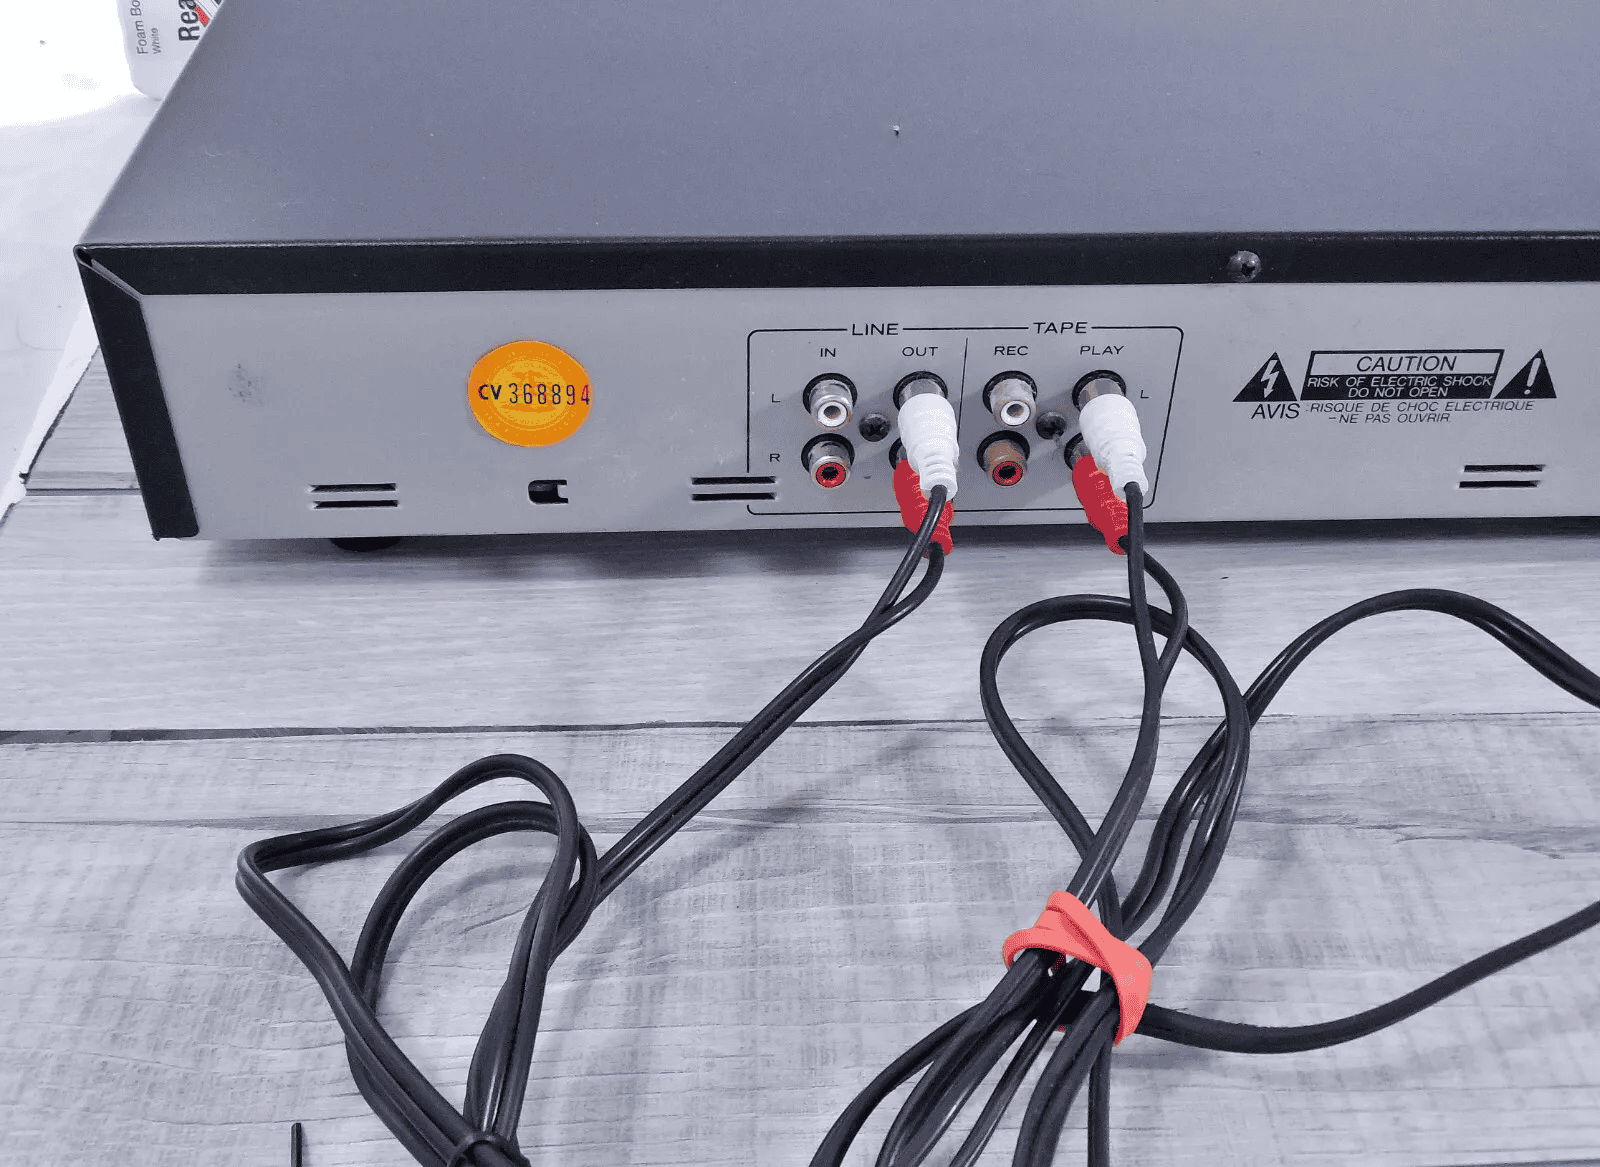
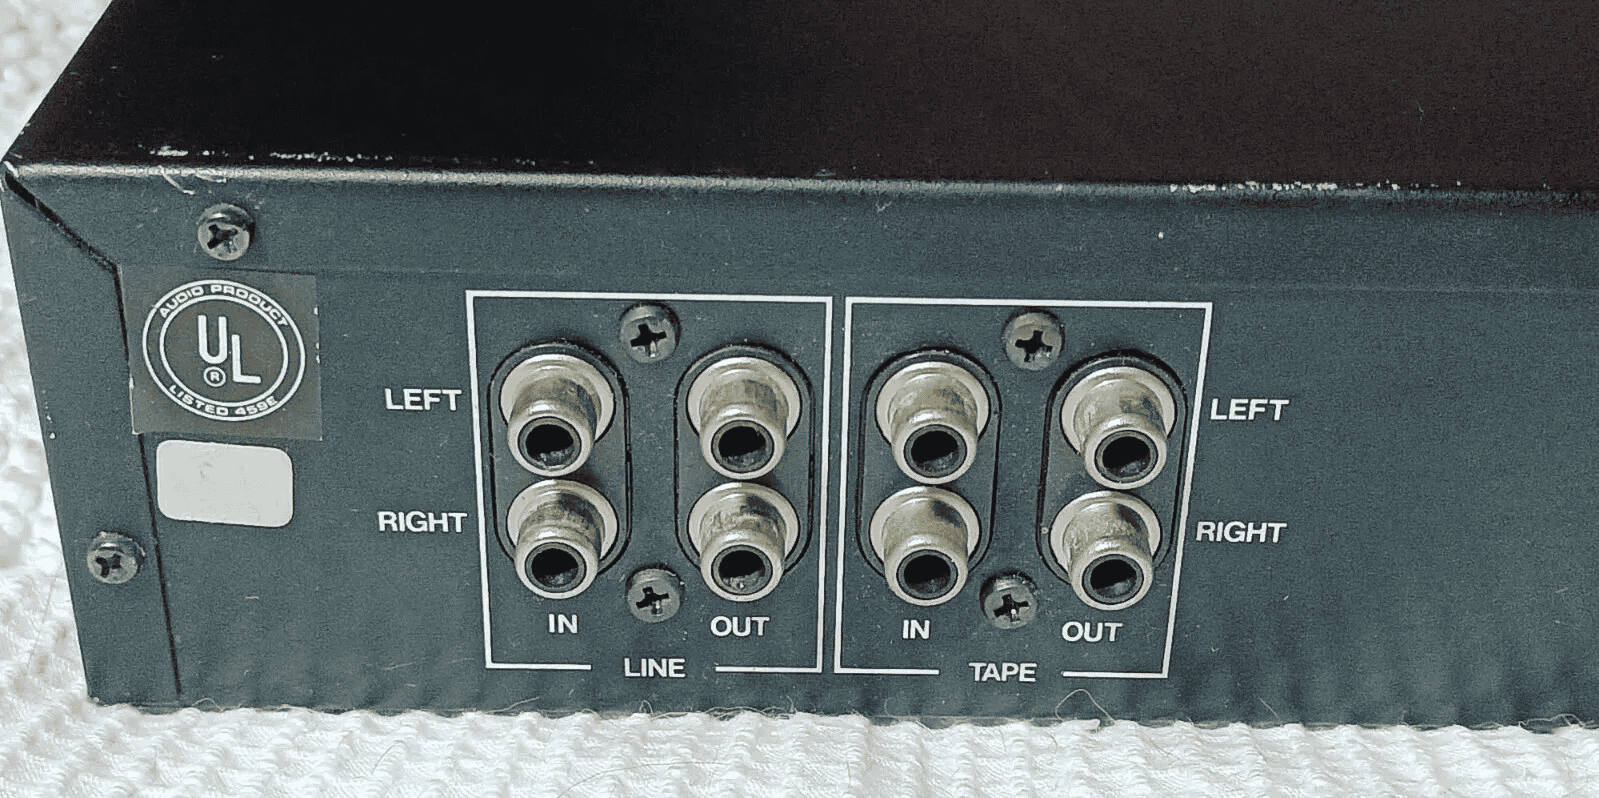
- If your amplifier has a “Tape Monitor” or “Tape Loop” feature, connect the output of the equalizer to the “Tape In” jacks.
- Connect the “Tape Out” jacks to the input of your amplifier.
- Select “Tape Monitor” on your amplifier to route the audio through the equalizer.
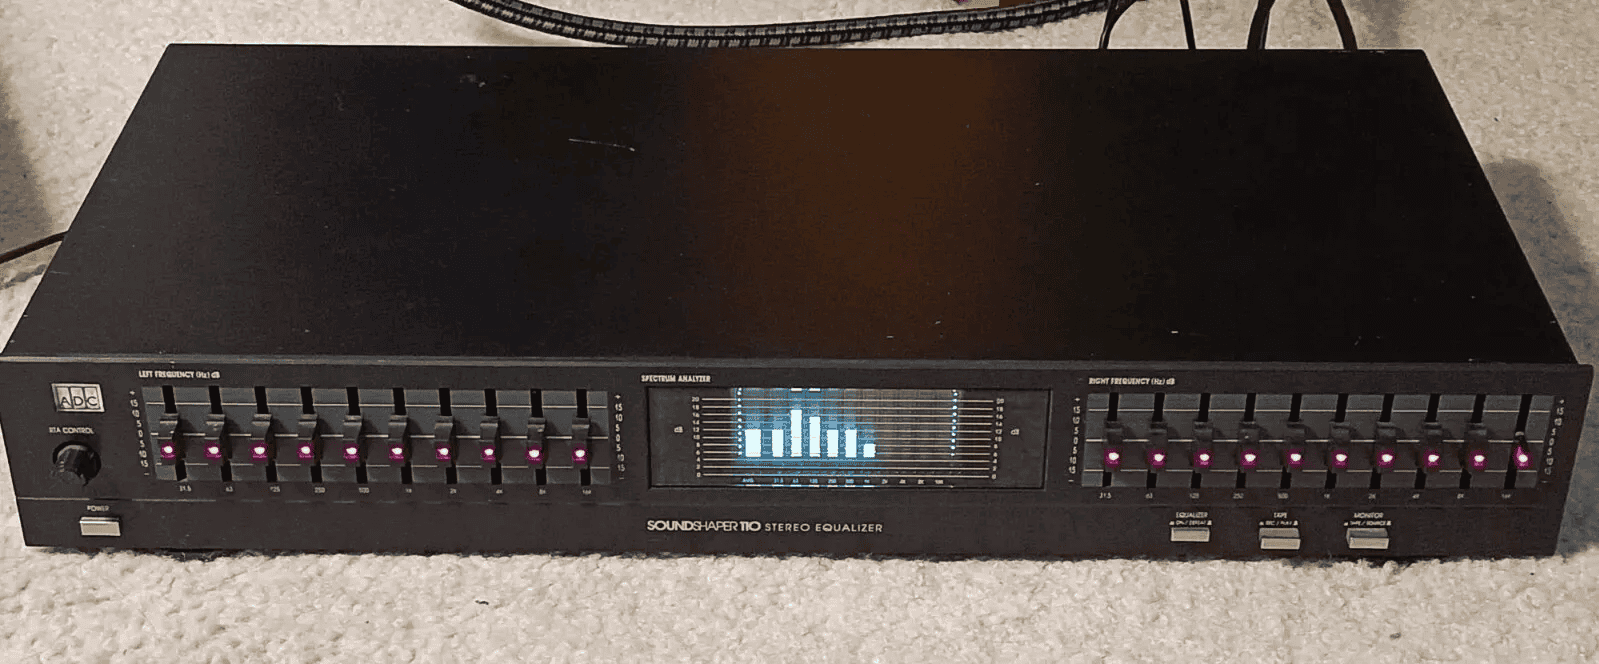
Step-by-Step Guide (Using RCA Cables)
- Power Off: Turn off all devices (source, equalizer, amplifier) to avoid damage.
- Connect Source to Equalizer: Using RCA cables, connect the audio output of your source device to the “Input” of the equalizer. Match the colors (red to red, white to white).
- Connect Equalizer to Amplifier: Connect the “Output” of the equalizer to the “Input” of your amplifier using another set of RCA cables. Again, match the colors.
- Power On: Turn on your source, equalizer, and amplifier in that order.
- Select Input: On your amplifier, select the input that corresponds to the equalizer connection.
- Adjust Equalizer: Start with the equalizer’s settings at neutral (flat) and adjust the frequency bands to your preference.
Troubleshooting
- No Sound: Check all connections and ensure the devices are powered on. Verify the correct input is selected on your amplifier.
- Distortion: Lower the volume on your source or equalizer to reduce distortion. Check for loose connections or damaged cables.
- Humming: Ensure your equalizer is properly grounded. Try using different power outlets or a power conditioner.
Additional Tips
- Equalizer Placement: Place your equalizer in a location where you can easily access the controls.
- Experiment: Don’t be afraid to experiment with different equalizer settings to find the sound you like best.
- Room Acoustics: Remember that your room’s acoustics can also affect the sound. Consider room treatments to improve sound quality.
Understanding Equalizer Controls
Equalizers typically have a series of sliders or knobs that control different frequency bands. Here’s a basic overview:
| Frequency Band | Description |
|---|---|
| Low Frequencies | Bass and sub-bass. Adjust these for warmth and impact. |
| Mid Frequencies | Vocals and instruments. Adjust these for clarity and presence. |
| High Frequencies | Treble and cymbals. Adjust these for brightness and detail. |
By understanding these controls, you can fine-tune your audio and create a more balanced and enjoyable listening experience.
Understanding Equalizers and Amplifiers
Equalizers and amplifiers are essential components in audio systems. They work together to shape and boost sound signals for optimal listening experiences.
Purpose and Function of an Equalizer
An equalizer adjusts the balance between frequency components in an audio signal. It allows you to boost or cut specific frequency ranges to tailor the sound to your preferences or room acoustics.
Graphic equalizers use sliders to adjust fixed frequency bands. They’re intuitive and great for quick adjustments.
Parametric equalizers offer more precise control. You can adjust the center frequency, bandwidth, and gain of each band.
Equalizers help compensate for room acoustics or speaker deficiencies. They’re useful for creating custom sound profiles for different music genres or enhancing vocals in recordings.
Types of Equalizers
Graphic EQs are the most common. They typically have 5 to 31 frequency bands with sliders for each.
Parametric EQs offer more flexibility. You can adjust the center frequency, Q factor, and gain for each band.
Semi-parametric EQs combine features of both. They have fixed bands like graphic EQs but allow Q factor adjustments.
Digital equalizers in modern audio equipment often combine multiple EQ types. They offer presets and customizable options.
| EQ Type | Bands | Control | Best For |
|---|---|---|---|
| Graphic | Fixed | Sliders | Quick adjustments |
| Parametric | Adjustable | Knobs | Precise tuning |
| Semi-parametric | Mixed | Mixed | Versatility |
Role of the Amplifier in Audio Systems
Amplifiers boost weak electrical signals from audio sources to power speakers. They’re crucial for delivering clear, loud sound in home stereos and live performances.
Power amplifiers increase the amplitude of audio signals. This allows them to drive speakers effectively.
Preamplifiers boost low-level signals from sources like turntables or microphones. They prepare the signal for the power amplifier stage.
Integrated amplifiers combine preamp and power amp functions in one unit. They’re popular in home audio setups for their convenience and space-saving design.
Types of Amplifiers
Solid-state amplifiers use transistors. They’re reliable, efficient, and produce clean sound.
Tube amplifiers use vacuum tubes. Audiophiles often prefer them for their warm, rich sound character.
Class A amplifiers offer high sound quality but are inefficient. They’re found in high-end audio gear.
Class D amplifiers are highly efficient. They’re compact and run cool, making them ideal for portable audio devices.
Hybrid amplifiers combine tube and solid-state technology. They aim to blend the best qualities of both types.
Preparing for Installation
Before connecting your equalizer to your amplifier, proper preparation is essential. This involves identifying the correct equipment connections, selecting appropriate cables, and taking necessary safety precautions.
Identifying Equipment Connections
Start by examining your amplifier and equalizer. Look for the preamp output on your amplifier. This is where you’ll send the audio signal to the equalizer. On the equalizer, find the input connections. These are typically labeled as “input” or “in.”
Next, locate the output connections on your equalizer. These send the processed signal back to your amplifier. Your amplifier should have corresponding input connections, often labeled “aux in” or “line in.”
If your amplifier has a tape monitor loop, you can use this for connecting the equalizer. The tape monitor output sends the signal to the equalizer, while the tape monitor input receives the processed signal back.
Selecting Appropriate Cables
For most setups, you’ll need RCA cables. These have red and white (or black) connectors on each end. You’ll need two pairs: one for sending the signal from the amplifier to the equalizer, and another for returning it.
Ensure the cables are long enough to reach between your devices comfortably. Avoid excess length, as this can introduce noise into your system.
If your equipment uses different connectors (like XLR or 1/4″ jacks), you may need adapters or specialized cables. Check your device manuals for specific requirements.
| Cable Type | Connector Color | Typical Use |
|---|---|---|
| RCA | Red | Right channel |
| RCA | White/Black | Left channel |
| XLR | N/A | Professional audio |
| 1/4″ TS | N/A | Instrument/mono signals |
Safety Precautions
Always unplug your equipment before making connections. This prevents electrical shocks and protects your devices from potential damage.
Ensure your workspace is clean and dry. Avoid working near liquids that could spill onto your equipment.
Check your power cables for any signs of wear or damage. Replace them if necessary to prevent electrical hazards.
If your setup includes a separate ground wire, make sure it’s properly connected to reduce noise and ensure safety.
Lastly, keep your cables organized and avoid tangling them. This not only looks neater but also prevents tripping hazards and makes troubleshooting easier if issues arise.
Connecting an Equalizer to an Amplifier
Connecting an equalizer to an amplifier enhances your audio system’s sound quality. The process involves two main methods: standard connection and tape monitor loop integration.
Standard Connection Method
To connect your equalizer to an amplifier using the standard method:
- Gather your equipment: equalizer, amplifier, and RCA cables.
- Locate the line-level inputs and outputs on both devices.
- Connect the audio source to the equalizer’s input using RCA cables.
- Link the equalizer’s output to the amplifier’s input with another set of RCA cables.
- Ensure left and right channels are correctly matched.
This setup allows the audio signal to pass through the equalizer before reaching the amplifier. It gives you control over the sound’s frequency balance.
For remote-mount equalizers, you’ll need longer cables to reach your desired location.
Integrating a Tape Monitor Loop
Some stereo receivers or integrated amplifiers offer a tape monitor loop for equalizer connection:
- Connect the receiver’s tape monitor output to the equalizer’s input.
- Link the equalizer’s output back to the receiver’s tape monitor input.
- Use the tape monitor switch on your receiver to activate the equalizer.
This method lets you easily bypass the equalizer when needed. It’s ideal for systems with limited input options.
| Connection Type | Pros | Cons |
|---|---|---|
| Standard | Direct signal path | May require additional cables |
| Tape Monitor Loop | Easy to bypass | Not available on all receivers |
Choose the method that best fits your stereo system’s setup and your sound adjustment needs.
Optimizing Audio Performance
Proper equalization and frequency balancing are crucial for achieving optimal sound quality. These techniques allow you to fine-tune your audio system for the best listening experience.
Setting Up EQ Levels
Start by setting all EQ bands to neutral (0 dB). Play music you’re familiar with through your system. Adjust each frequency band slowly. Boost or cut in small increments of 2-3 dB at a time. Listen for changes in clarity and balance.
Focus on problem areas first. Cut frequencies that sound harsh or muddy. Boost frequencies that seem lacking. Pay attention to how adjustments affect the overall sound. Avoid excessive boosts as they can introduce distortion.
Create a custom EQ preset for different music genres. This allows quick switching between optimized settings. Remember, less is often more with EQ adjustments.
Balancing Sound Frequencies
Aim for a balanced frequency response across the audio spectrum. Low frequencies (20-250 Hz) provide bass and warmth. Midrange frequencies (250-4000 Hz) carry most musical information. High frequencies (4000-20000 Hz) add clarity and air.
Use a real-time analyzer (RTA) app to visualize frequency balance. This helps identify peaks or dips in the response. Adjust EQ to smooth out these irregularities.
Consider room acoustics when balancing frequencies. Hard surfaces can cause reflections and peaks in certain ranges. Soft furnishings may absorb high frequencies. Adjust EQ to compensate for these room effects.
| Frequency Range | Sound Characteristics | EQ Adjustment Tips |
|---|---|---|
| 20-250 Hz | Bass, warmth | Cut if boomy, boost if thin |
| 250-4000 Hz | Vocals, instruments | Adjust for clarity, avoid muddiness |
| 4000-20000 Hz | Treble, air | Boost for brightness, cut if harsh |
Frequently Asked Questions
Connecting an equalizer to an amplifier involves specific wiring methods and considerations. The process can vary depending on your audio setup and equipment.
How do you integrate an equalizer into an existing car stereo amplifier setup?
To add an equalizer to a car stereo system, connect it between the head unit and amplifier. Use RCA cables to link the head unit’s preamp outputs to the equalizer’s inputs. Then connect the equalizer’s outputs to the amplifier’s inputs.
Ensure proper grounding of the equalizer to prevent noise issues. Mount the unit securely to avoid vibration damage.
What are the necessary steps to connect an equalizer to a home stereo receiver?
For home stereo setups, use the tape monitor loop if available. Connect the receiver’s tape output to the equalizer’s input. Then link the equalizer’s output to the receiver’s tape input.
If your receiver lacks a tape loop, use the pre-out/main-in connections. This method may require removing jumpers on the receiver.
Can an equalizer be connected to an amplifier that does not have a tape monitor input?
Yes, you can still connect an equalizer without a tape monitor input. Use the pre-out/main-in method. Connect the amplifier’s pre-out to the equalizer’s input. Then link the equalizer’s output to the amplifier’s main-in.
Some integrated amplifiers may need internal modifications for this setup. Consult a professional if unsure.
What is the proper method for connecting an equalizer to an amplifier using RCA cables?
Use two sets of RCA cables for a proper connection. Connect one set from the amplifier’s output to the equalizer’s input. Use the second set to link the equalizer’s output to the amplifier’s input or speakers.
Ensure left and right channels match. White or black connectors typically indicate left channels, while red connectors are for right channels.
Is a crossover required when installing an equalizer into a car audio system?
A crossover is not always necessary when adding an equalizer. However, it can improve sound quality by directing specific frequencies to appropriate speakers.
If using a crossover, place it after the equalizer in the signal chain. This setup allows the equalizer to adjust the full-range signal before frequency separation.
Where can I find a comprehensive wiring diagram for installing an equalizer to an amplifier?
Detailed wiring diagrams are available online. Audio equipment manufacturers often provide diagrams in user manuals or on their websites.
For complex setups, consider consulting a professional audio installer. They can provide custom diagrams tailored to your specific equipment and needs.
| Connection Point | Cable Type | Destination |
|---|---|---|
| Amplifier Output | RCA | Equalizer Input |
| Equalizer Output | RCA | Amplifier Input or Speakers |
| Head Unit Output | RCA | Equalizer Input (Car Audio) |
| Receiver Tape Out | RCA | Equalizer Input (Home Audio) |

