Exiting the BIOS on an MSI motherboard can be tricky if you’re not familiar with the process. To exit the MSI BIOS, press the F10 key and select ‘Yes’ to save changes and exit. This simple step will return you to your normal boot sequence.
For those new to BIOS settings, it’s the firmware that initializes hardware during the boot process. MSI’s BIOS interface offers many options for tweaking system performance. But once you’ve made your changes, it’s crucial to exit properly to ensure they take effect.
Sometimes, the F10 key might not work. In such cases, look for an ‘Exit’ or ‘Save & Exit’ option in the BIOS menu. You can navigate to this using your keyboard arrows and press Enter to select it. Remember, always save your changes before exiting to apply any new settings.
| Key | Function |
|---|---|
| F10 | Save and Exit BIOS |
| Esc | Exit without saving |
| F6 | Load optimized defaults |
| F7 | Load previous values |

Exiting BIOS on an MSI Motherboard
You’ll need to access your BIOS to change important settings. This could be for your boot drive or system clock. Knowing how to exit is important. Here’s how to do it on an MSI motherboard:
Using Keyboard Shortcuts
There are a few ways to exit BIOS on an MSI motherboard. These are the most common:
- F10: This usually saves your changes and exits.
- ESC: This might ask if you want to exit without saving changes.
Navigating the BIOS Menu
You can also exit through the BIOS menu.
- Find the “Save & Exit” tab: This is usually on the right side of the screen.
- Select “Save Changes and Exit”: This saves your settings and restarts your computer.
- Select “Discard Changes and Exit”: This exits BIOS without saving any changes you made.
Important Notes
- Read the prompts: The BIOS will usually ask if you want to save your changes before exiting.
- Don’t make changes unless you’re sure: Changing BIOS settings can affect how your computer works.
Understanding BIOS Settings
BIOS stands for Basic Input/Output System. It’s the first software your computer runs when you turn it on. It controls many things, like:
- Boot order: This tells your computer which drive to start from.
- System clock: This keeps track of the date and time.
- Hardware settings: This lets you change settings for your CPU, RAM, and other devices.
Most people don’t need to change BIOS settings often. But it’s useful to know how to access and exit the BIOS if you need to.
Exiting the BIOS on an MSI motherboard is a straightforward process that can be accomplished using keyboard shortcuts or through the BIOS menu. By understanding these methods and exercising caution when making changes to BIOS settings, you can ensure a smooth and trouble-free experience when configuring your system’s core settings.
Accessing BIOS on MSI Motherboards
MSI motherboards offer easy BIOS access for system configuration. The BIOS interface provides essential settings and hardware monitoring options.
Entering BIOS Setup
To access the BIOS on MSI motherboards, press the Delete key during system startup. This action opens the BIOS setup screen. Some MSI models may use F2 instead of Delete.
If you miss the initial prompt, restart your computer and try again. Press the key repeatedly as soon as you see the MSI logo.
For Windows 10 users, an alternative method exists. Go to Settings > Update & Security > Recovery. Under Advanced startup, click “Restart now.” Choose Troubleshoot > Advanced options > UEFI Firmware Settings.
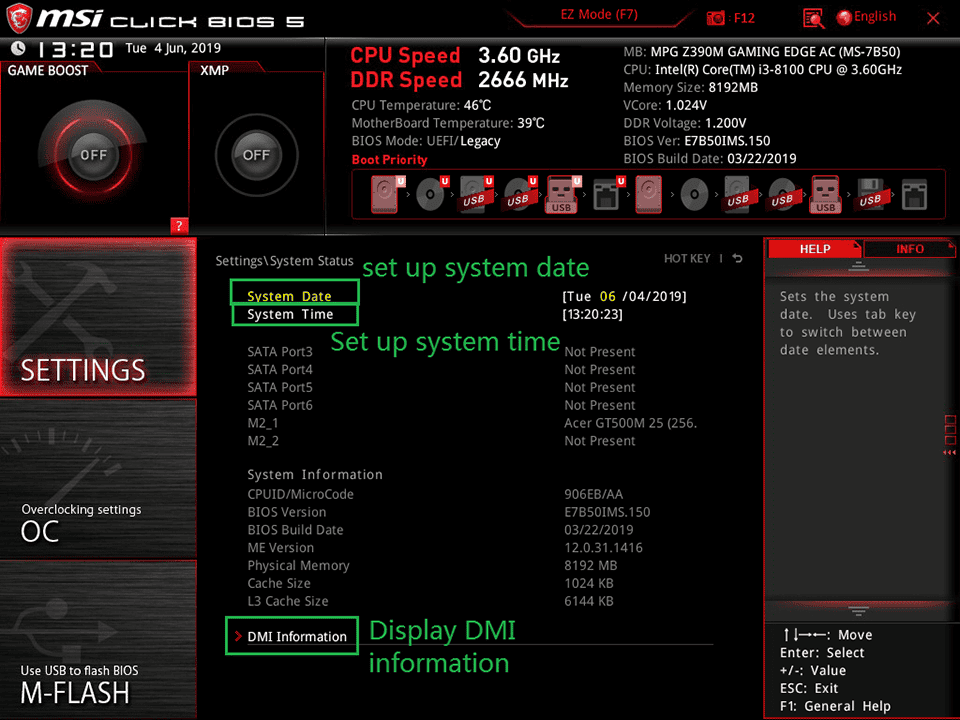
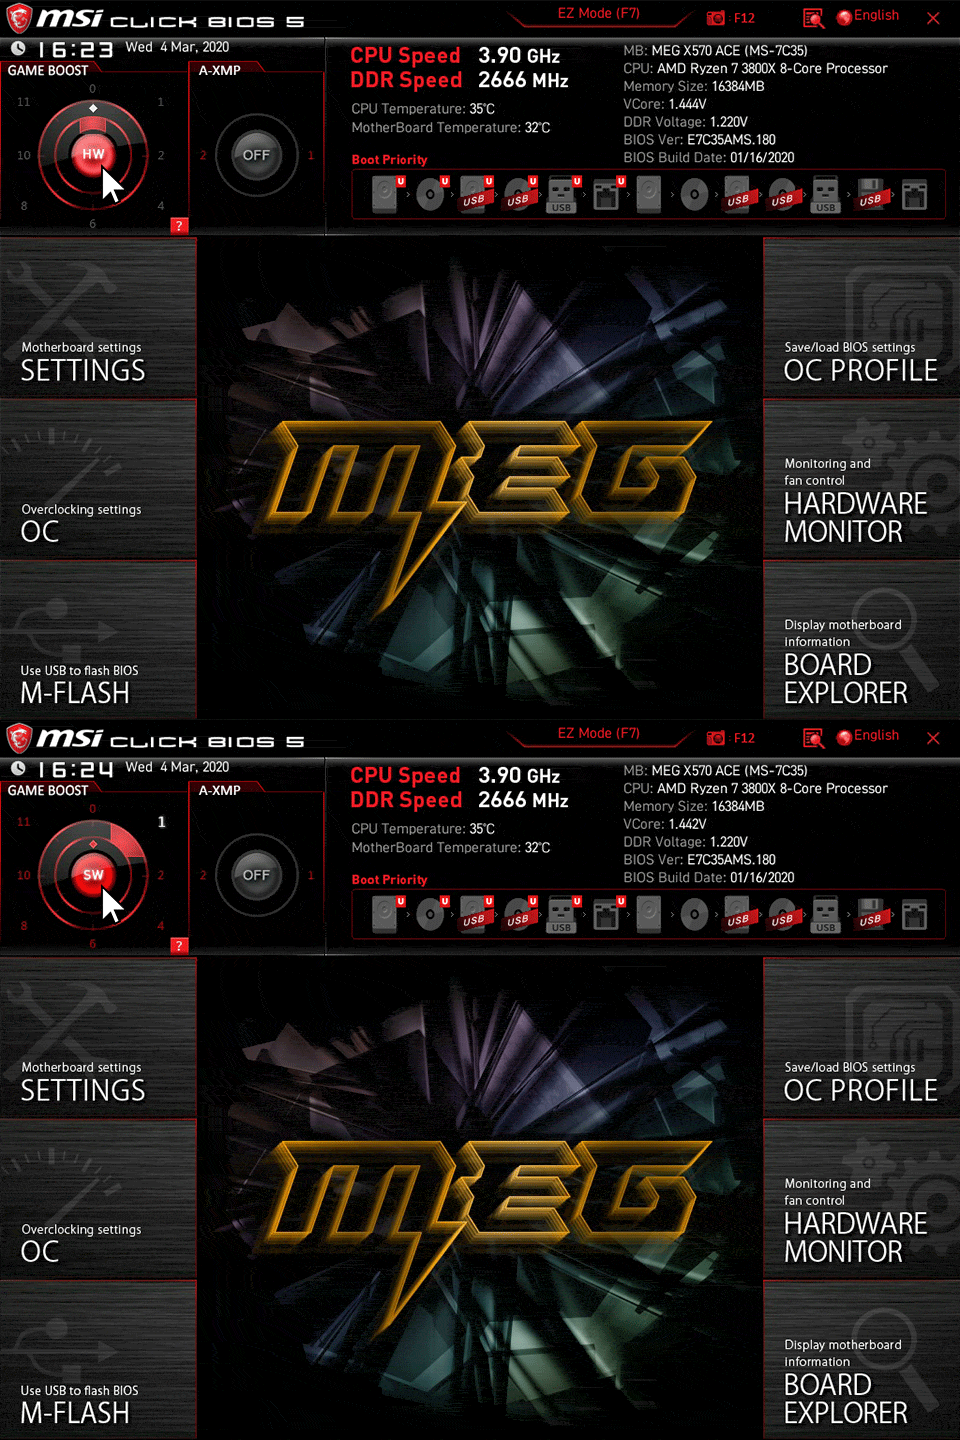
Navigating MSI Click BIOS 5
MSI Click BIOS 5 offers two main interfaces: EZ Mode and Advanced Mode.
EZ Mode displays key system information at a glance. It shows CPU temperature, memory capacity, and boot device priority. You can adjust fan speeds and enable XMP profiles here.
Advanced Mode provides more detailed options. It includes:
- Settings: Configure boot options, security features, and power management
- OC: Adjust CPU and memory frequencies for overclocking
- M-FLASH: Update BIOS firmware
- Hardware Monitor: View temperatures and control fan speeds
- Board Explorer: Examine connected hardware components
Use the mouse or keyboard arrow keys to navigate. Press Enter to select an option. F7 toggles between EZ and Advanced modes.
| Mode | Features | Best For |
|---|---|---|
| EZ | Basic info, simple adjustments | Beginners |
| Advanced | Detailed settings, overclocking | Experienced users |
Remember to save changes before exiting BIOS. Press F10 and confirm to save and restart your system.
Modifying BIOS Settings
Adjusting BIOS settings is crucial for optimizing your MSI motherboard’s performance. You can customize boot priority and enable compatibility features to suit your needs.
Configuring Boot Priority
To set your boot priority in MSI BIOS:
- Enter the BIOS setup by pressing Del or F2 during startup
- Navigate to the “Boot” tab
- Select “Boot Option Priorities”
- Choose your preferred boot device order
You can set your SSD or NVMe drive as the first boot option for faster startup. This ensures your system loads from the fastest storage device. If you have multiple drives, arrange them in order of preference.
To save changes:
- Press F10
- Select “Yes” when prompted
Enabling Compatibility Support Module
The Compatibility Support Module (CSM) allows older hardware and operating systems to work with UEFI BIOS. To enable CSM:
- Access the BIOS setup
- Go to the “Boot” or “Advanced” tab
- Find “CSM” or “Compatibility Support Module”
- Set it to “Enabled”
Enabling CSM can help if you’re using legacy hardware or encountering boot issues. It’s especially useful for older graphics cards or operating systems.
Note: Enabling CSM may disable Secure Boot. If you need Secure Boot for certain software or security features, you might need to keep CSM disabled.
| Setting | Enabled | Disabled |
|---|---|---|
| CSM | Supports legacy hardware | Improves security, faster boot |
| Secure Boot | Enhances system security | Allows non-signed drivers |
Exiting BIOS after Configuration
Exiting the BIOS correctly is crucial to ensure your changes take effect. There are two main ways to exit: saving your changes or discarding them.
Saving Changes with F10 Key
To save your BIOS configurations and exit, press the F10 key on your keyboard. This action brings up a confirmation prompt. Select “Yes” to save and exit.
After pressing F10, your MSI motherboard will restart. The new settings will apply during this boot process.
Some MSI models may use a different key. Check your motherboard manual if F10 doesn’t work.
| Key | Action |
|---|---|
| F10 | Save and Exit |
| Esc | Exit without Saving |
Discarding Changes and Exiting
If you want to exit without saving changes, press the Esc key. This action will discard any modifications you made during your BIOS session.
A confirmation dialog will appear. Choose “Yes” to exit without saving.
Your system will reboot with the previous BIOS settings intact. This option is useful if you made unwanted changes or just want to check current settings.
Remember, discarding changes means any adjustments you made won’t take effect. Double-check your decision before confirming.
Frequently Asked Questions
Exiting the MSI BIOS correctly is crucial for saving changes and ensuring proper system boot. These common questions address key concerns when leaving BIOS settings.
What steps are required to exit the MSI Click BIOS 5 after making changes?
To exit MSI Click BIOS 5, press the F10 key. This brings up a prompt asking if you want to save changes and exit. Select “Yes” using the arrow keys and press Enter. Your system will then restart with the new settings applied.
How does one properly save and exit from an MSI BIOS setup?
To save and exit MSI BIOS, navigate to the “Save & Exit” tab using the arrow keys. Select “Save Changes and Reset” or a similar option. Press Enter to confirm. Your computer will restart, applying the new BIOS settings.
What should be done when a computer is continuously booting into MSI’s Click BIOS instead of Windows?
If your computer keeps booting into MSI Click BIOS, check if the boot order is correct. Ensure your Windows drive is set as the first boot device. Save these changes and exit BIOS. If the issue persists, reset BIOS to default settings.
What actions can be taken if one is stuck on the ‘Entering Setup’ screen in MSI BIOS?
When stuck on the ‘Entering Setup’ screen, try pressing the Esc key to exit. If unsuccessful, perform a hard reset by holding the power button for 10 seconds. If the problem continues, clear the CMOS by removing the motherboard battery for a few minutes.
Is there a correct method to exit BIOS mode after post-installation edits?
After making post-installation edits, exit BIOS by pressing F10. Choose “Save Changes and Reset” when prompted. This ensures your changes are applied and allows your system to boot normally with the updated settings.
What troubleshooting steps can be followed when a system will not boot past the MSI BIOS screen?
If your system won’t boot past the MSI BIOS screen, try these steps:
- Reset BIOS to default settings
- Check all hardware connections
- Remove any newly installed components
- Update BIOS to the latest version
- Clear CMOS if other methods fail
If issues persist, consult MSI support for further assistance.


