Charging your Apple Pencil is crucial for uninterrupted digital creativity. To charge a 2nd generation Apple Pencil, simply attach it magnetically to the side of a compatible iPad. This easy method keeps your stylus ready for use.
For 1st generation Apple Pencils, remove the cap to reveal a Lightning connector. Plug this into your iPad’s Lightning port or a USB power adapter. A charging icon on your iPad screen confirms the pencil is powering up.
Check your Apple Pencil’s battery level in the Batteries widget or Settings app. This helps you plan ahead and avoid running out of power mid-project. Keep your digital tools charged and your ideas flowing.

Charging Your Apple Pencil: A Quick Guide
The Apple Pencil is a great tool for artists, note-takers, and anyone who wants more precision when using their iPad. But just like your iPad, the Apple Pencil needs to be charged regularly. The charging method depends on which generation you have. Here’s a simple guide to charging your Apple Pencil.
1st Generation Apple Pencil
The 1st generation Apple Pencil has a Lightning connector and a female Lightning adapter. This makes charging it quite easy. You have two main options:
- Plug the Apple Pencil directly into the Lightning port of your iPad.
- Use the Lightning adapter to connect the Apple Pencil to a Lightning cable and a USB power adapter.
2nd Generation Apple Pencil
The 2nd generation Apple Pencil brought a significant change in charging. This model attaches magnetically to the side of compatible iPads. Once attached, it pairs with your iPad and charges wirelessly. It’s a very convenient way to keep your Apple Pencil ready to go.
3rd Generation Apple Pencil (USB-C)

The 3rd generation Apple Pencil uses a USB-C connector for charging. You can charge it with a USB-C cable and a USB-C power adapter. Apple also introduced a USB-C to Apple Pencil adapter, allowing you to charge your Apple Pencil with your iPad’s USB-C port. This is similar to how the 1st generation model charges.
Apple Pencil Pro
The Apple Pencil Pro, the newest model, also uses a USB-C connector for charging. Like the 3rd generation Apple Pencil, it can be charged with a USB-C cable and power adapter. It also offers wireless charging. You can charge it wirelessly with a MagSafe charger or by magnetically attaching it to the side of a compatible iPad.
Charging Table for All Generations
| Apple Pencil Generation | Charging Method |
|---|---|
| 1st Generation | Directly into iPad’s Lightning port Via Lightning cable and adapter |
| 2nd Generation | Magnetically attach to compatible iPad |
| 3rd Generation (USB-C) | USB-C cable and power adapter Via iPad’s USB-C port with adapter |
| Apple Pencil Pro | USB-C cable and power adapter MagSafe charger Magnetically attach to compatible iPad |

Understanding Your Apple Pencil Model
Apple offers two generations of Apple Pencil with different charging methods. Knowing which model you have is crucial for proper charging and compatibility with your iPad.
Identifying Your Apple Pencil Generation
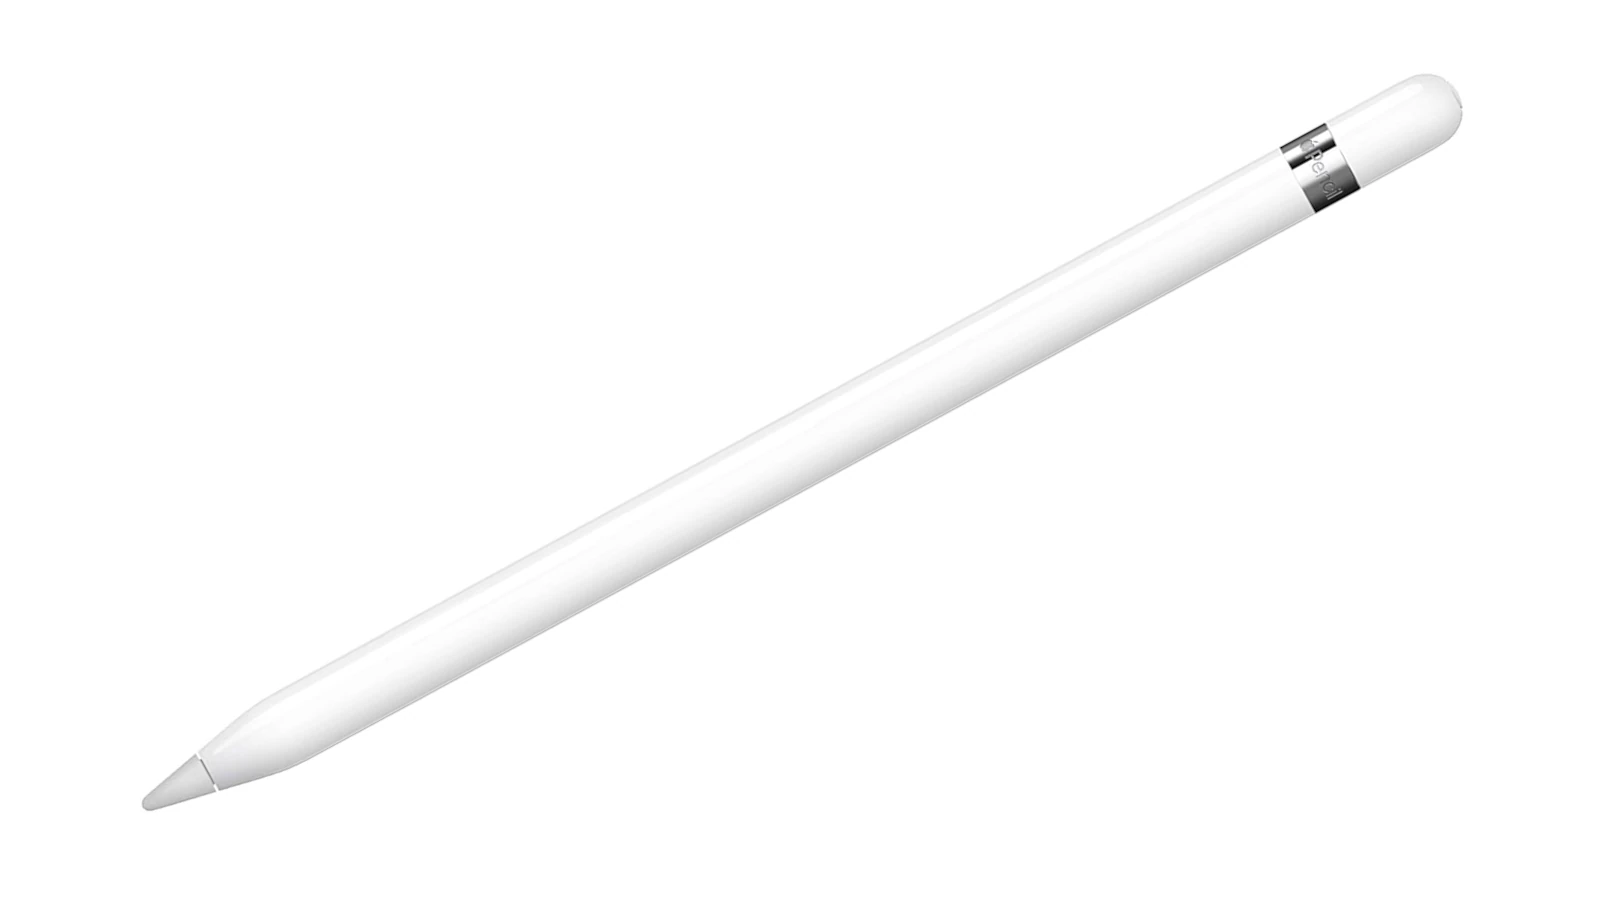
The 1st generation Apple Pencil has a removable cap that reveals a Lightning connector. It’s cylindrical with a glossy white finish and a silver band near the tip. This model works with older iPad Pro models and some standard iPads.
The 2nd generation Apple Pencil has a matte finish and one flat side. It lacks a removable cap or visible connector. This version is compatible with newer iPad Pro models and the iPad Air (4th generation and later).
To check compatibility, look up your iPad model number in Settings > General > About. Then compare it to Apple’s official compatibility list.
Comparing Charging Methods for Different Generations
1st Generation Apple Pencil:
• Plug directly into iPad’s Lightning port
• Use included adapter with Lightning cable
• Full charge takes 15-30 minutes
2nd Generation Apple Pencil:
• Attach magnetically to iPad’s side
• Charges wirelessly
• Pairs automatically when attached
| Feature | 1st Generation | 2nd Generation |
|---|---|---|
| Charging Method | Lightning | Magnetic/Wireless |
| Compatibility | Older iPads | Newer iPads |
| Pairing | Manual | Automatic |
The 2nd generation offers more convenience with its magnetic attachment and wireless charging. However, the 1st generation remains useful for compatible iPads.
Preparing to Charge the Apple Pencil
Before charging your Apple Pencil, you need to ensure your iPad is compatible and Bluetooth is enabled. These steps are crucial for a successful charging process.
Checking iPad Compatibility
To charge your Apple Pencil, you must have a compatible iPad model. First-generation Apple Pencils work with older iPads that have Lightning ports. Second-generation Apple Pencils are designed for newer iPad Pro models with USB-C ports.
Check your iPad’s model number in Settings > General > About. Compare this to Apple’s compatibility list. If you’re unsure, look at your iPad’s charging port. A Lightning port means you need a first-gen Pencil. A USB-C port indicates compatibility with a second-gen Pencil.
Compatibility affects how you charge. First-gen Pencils plug directly into the iPad’s Lightning port. Second-gen Pencils attach magnetically to the iPad’s side.
Ensuring Bluetooth Connectivity
Bluetooth is essential for your Apple Pencil to function and charge properly. To check Bluetooth:
- Open Settings on your iPad
- Tap Bluetooth
- Ensure the toggle is switched on
If Bluetooth is off, turn it on. Your iPad will search for nearby devices. For second-gen Pencils, this allows magnetic pairing and charging.
| Pencil Generation | Charging Method | Bluetooth Requirement |
|---|---|---|
| First-gen | Lightning port | Not required |
| Second-gen | Magnetic side | Required |
Restart your iPad if Bluetooth issues persist. This often resolves connectivity problems. With Bluetooth on, your iPad is ready to pair and charge your Apple Pencil.
Step-by-Step Charging Instructions
Charging your Apple Pencil is simple and quick. The method varies depending on which generation you own. Both types can reach a full charge in about 30 minutes.
Charging the First-Generation Apple Pencil
To charge your first-generation Apple Pencil:
- Remove the cap from the back of the pencil.
- Plug the Lightning connector into your iPad’s Lightning port.
- Wait for the charging indicator to appear on your iPad’s screen.
A full charge takes about 30 minutes. For quick use, 15 seconds of charging provides roughly 30 minutes of power.
If you prefer not to plug directly into your iPad, use the included adapter:
- Connect the pencil to the adapter.
- Plug the adapter into a Lightning cable.
- Connect the cable to a power source.
Charging the Second-Generation Apple Pencil
The second-generation Apple Pencil charges wirelessly:
- Attach the pencil to the magnetic connector on your iPad’s side.
- Ensure proper alignment for charging to begin.
- Check the battery widget on your iPad to monitor charge level.
Your pencil charges automatically when attached. Keep it connected to your iPad when not in use for constant charging.
Using Charging Adapters and Accessories
For iPads with USB-C ports:
- Use the USB-C to Apple Pencil Adapter.
- Connect the adapter to a USB-C cable.
- Plug the cable into a power source.
This method works for both first and second-generation Apple Pencils.
| Pencil Generation | Charging Method | Charging Time |
|---|---|---|
| First-Generation | Lightning port or adapter | ~30 minutes |
| Second-Generation | Magnetic attachment | ~30 minutes |
| Both | USB-C adapter | ~30 minutes |
Always use Apple-certified accessories to ensure safe and efficient charging.
Monitoring Apple Pencil Battery and Troubleshooting Issues
Keeping tabs on your Apple Pencil’s battery and resolving charging issues are crucial for uninterrupted use. You can easily check battery levels and address common problems to ensure your stylus is always ready.
Checking Battery Levels and Widget Use
You can view your Apple Pencil’s battery level in several ways. The Today View or lock screen offers a quick glance at the battery percentage. To access this, swipe right from the home screen or swipe down from the top-right corner on newer iPhones.
For a more detailed view, add the Batteries widget to your home screen:
- Long-press on the home screen
- Tap the “+” icon
- Search for “Batteries”
- Add the widget
The Control Center also displays the Apple Pencil battery. Swipe down from the top-right corner of your iPad to check it quickly.
Addressing Charging and Signal Interference Problems
If your Apple Pencil isn’t charging, try these steps:
- Ensure proper connection
- Clean the charging port
- Restart your iPad
- Update your iPad’s software
Signal interference can sometimes disrupt charging. Remove any metal cases or magnetic accessories near your iPad and Apple Pencil.
If problems persist, try unpairing and re-pairing your Apple Pencil:
- Go to Settings > Bluetooth
- Tap the “i” icon next to your Apple Pencil
- Select “Forget This Device”
- Reconnect your Apple Pencil
For fast charging, connect your Apple Pencil directly to your iPad for about 15 seconds. This quick charge can provide up to 30 minutes of use.
| Charging Method | Charging Time | Usage Time |
|---|---|---|
| Quick Charge | 15 seconds | 30 minutes |
| Full Charge | 15 minutes | 12 hours |
Frequently Asked Questions
Charging an Apple Pencil can sometimes be confusing. Here are answers to common questions about charging different models and troubleshooting issues.
What are the charging options for the second-generation Apple Pencil?
The second-generation Apple Pencil charges wirelessly. Place it on top of a supported iPad with Bluetooth turned on. The pencil attaches magnetically to the side of the iPad. This method is simple and convenient.
Is there a way to charge the first-generation Apple Pencil without the adapter?
Yes, you can charge the first-generation Apple Pencil directly. Remove its cap and plug it into the iPad’s Lightning port. This method works without needing any extra adapters.
How can you tell if the Apple Pencil is charging properly?
There are a few ways to check if your Apple Pencil is charging:
- Look for a charging icon on your iPad screen when you connect the pencil.
- Check the Batteries widget on your iPad.
- Go to Settings > Apple Pencil to see the current charge level.
What should you do if the Apple Pencil will not charge?
If your Apple Pencil won’t charge:
- Make sure it’s properly connected or placed on the iPad.
- Check that your iPad’s Bluetooth is turned on.
- Restart your iPad.
- Ensure the charging port or magnetic strip is clean.
If these steps don’t work, contact Apple Support for help.
Can you charge the Apple Pencil 2nd generation without using an iPad?
No, the second-generation Apple Pencil can only be charged using a compatible iPad. It doesn’t have a separate charging port or method. Always keep your iPad charged to ensure your pencil stays powered.
What are the steps to connect the Apple Pencil to an iPad?
To connect your Apple Pencil to an iPad:
- For 1st gen: Remove the cap and plug it into the iPad’s Lightning port.
- For 2nd gen: Place it on the magnetic connector on the iPad’s side.
- Wait for the pairing prompt to appear on your iPad screen.
- Tap “Pair” to complete the connection.
| Apple Pencil Generation | Charging Method | Compatible iPads |
|---|---|---|
| 1st Generation | Lightning connector | iPads with Lightning port |
| 2nd -4th Generation | Wireless magnetic | iPads with USB-C port |

