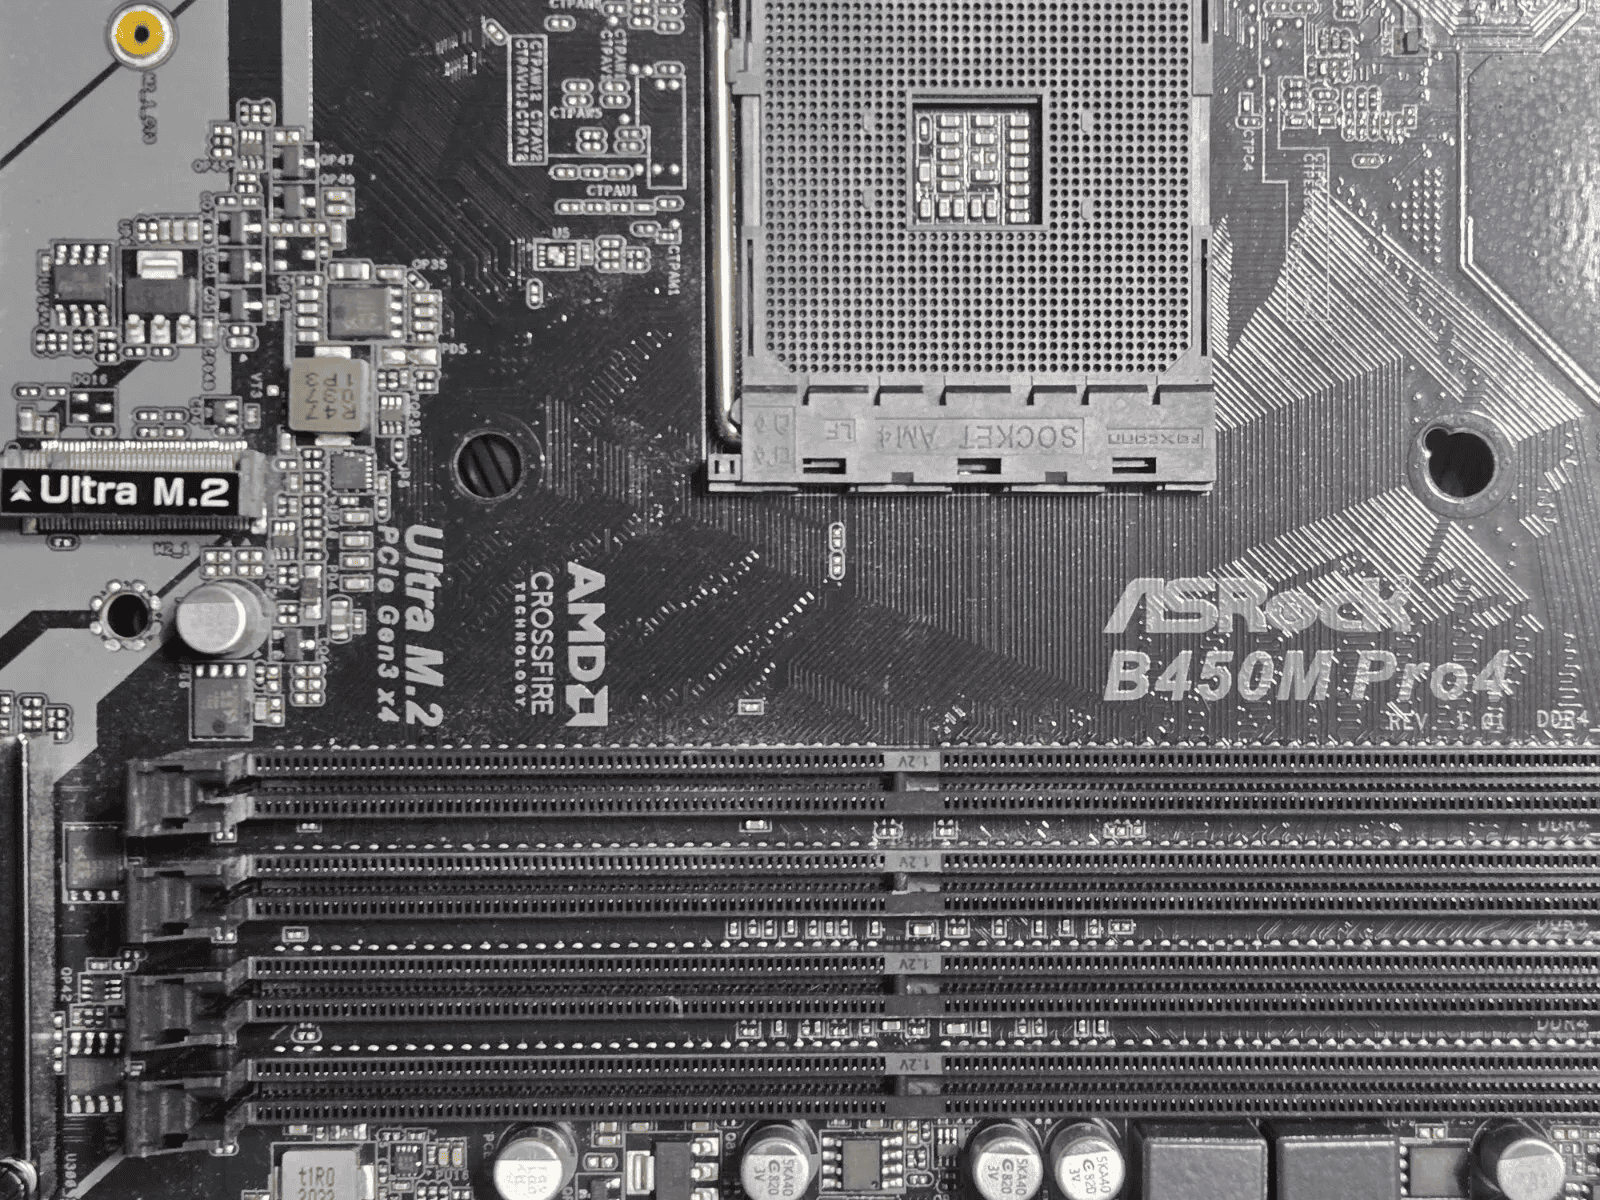
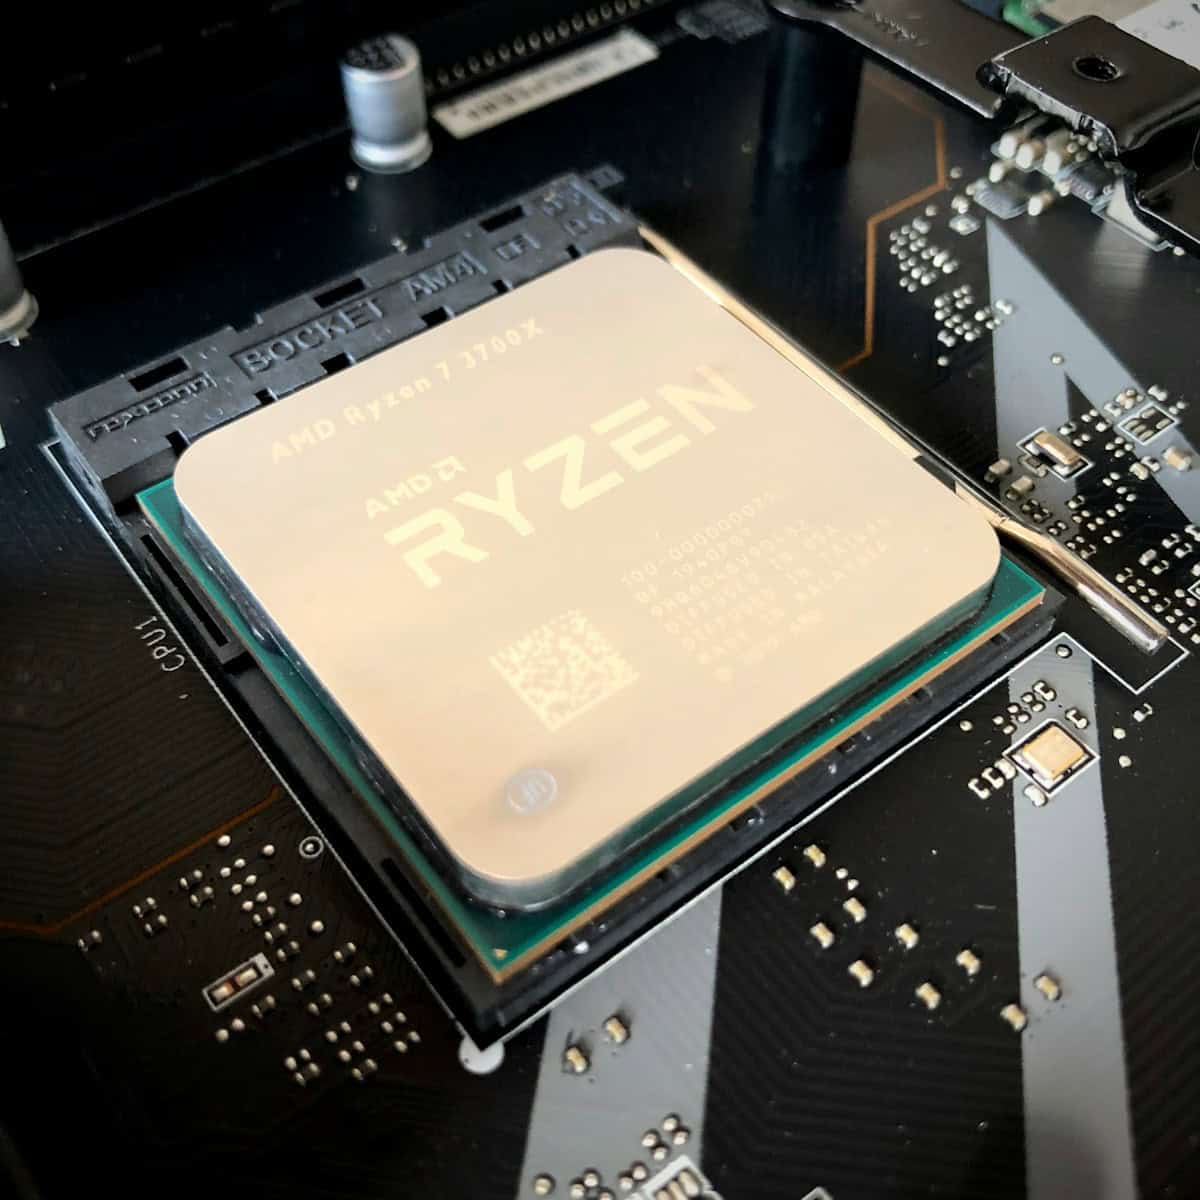
Installing a CPU is a crucial step in building or upgrading a PC. It’s simpler than many think but requires care and attention to detail. To install a CPU, align it with the motherboard socket, gently lower it into place, and secure it with the lever.
Proper CPU installation can boost your computer’s performance and longevity. Whether you’re building a new PC or upgrading an existing one, this process is key. It’s a task that even beginners can handle with the right guidance.
Before you start, gather your tools and prepare your workspace. You’ll need a clean, static-free area and a few basic items. Let’s look at what you’ll need:
| Item | Purpose |
|---|---|
| CPU | The processor to be installed |
| Motherboard | Where the CPU will be placed |
| Thermal paste | Aids heat transfer |
| CPU cooler | Keeps the processor cool |
| Anti-static wrist strap | Prevents static damage |

Installing Your CPU: A Step-by-Step Guide
Installing a CPU can seem scary. But don’t worry, it’s easier than you think! Just follow these simple steps to get your processor up and running:
1. Gather Your Tools
You only need a few things:
- Your motherboard
- Your new CPU
- Thermal paste (often included with CPU coolers)
- Your CPU cooler
- The motherboard manual
- A well-lit workspace
2. Open the CPU Socket
- Find the CPU socket on your motherboard. It will have a lever or a latch.
- Open the socket carefully by lifting the lever or releasing the latch.
3. Align the CPU
- Your CPU has a gold triangle on one corner.
- The CPU socket on your motherboard also has a matching triangle.
- Line up the two triangles to ensure the CPU is oriented correctly.
- Gently place the CPU into the socket. Do not force it! It should fall into place easily.
4. Secure the Socket
- Close the lever or latch on the CPU socket to secure the CPU in place.
5. Apply Thermal Paste
- Thermal paste helps transfer heat from the CPU to the cooler.
- Apply a small amount of thermal paste to the top of the CPU.
- A pea-sized amount is usually enough.
- Refer to your CPU cooler’s instructions for specific guidance.
6. Install the CPU Cooler
- Align the cooler with the mounting holes on the motherboard.
- Gently place the cooler on top of the CPU.
- Secure the cooler using the provided screws or clips.
- Connect the cooler’s power cable to the motherboard’s CPU fan header.
7. Double-Check Your Work
- Make sure the CPU is properly seated and secured in the socket.
- Ensure the cooler is firmly attached and the fan is connected.
That’s it! You have successfully installed your CPU. Now you can continue building your PC.
Choosing the Right CPU Cooler
There are two main types of CPU coolers:
- Air coolers: These use a heatsink and fan to dissipate heat. They are affordable and easy to install.
- Liquid coolers: These use a pump, radiator, and fans to cool the CPU. They offer better cooling performance but are more expensive and complex to install.
Consider these factors when choosing a CPU cooler:
- Your CPU’s thermal design power (TDP)
- Your case’s size and airflow
- Your budget
- Your desired noise level
If you are unsure which cooler to choose, consult your motherboard manual or seek advice from an experienced PC builder.
Preparing the Workspace and Tools
Proper preparation is key to a successful CPU installation. A clean workspace and the right tools will help you avoid mistakes and protect sensitive components.
Safety Precautions
Always handle computer parts with care to prevent damage from static electricity. Use an anti-static wrist strap to ground yourself before touching any components. If you don’t have one, touch a metal object to discharge static buildup.
Keep your workspace free of carpets or fabrics that generate static. Work on a hard, non-conductive surface like wood or plastic. Avoid eating, drinking, or smoking near computer parts to prevent accidental spills or contamination.
Store the CPU in its anti-static bag until you’re ready to install it. This protects it from static discharge and physical damage.
Required Tools
Gather these essential tools before starting:
- Phillips head screwdriver (small and medium sizes)
- Thermal paste
- Isopropyl alcohol (90% or higher)
- Lint-free cloth
- Flashlight
- Anti-static wrist strap (recommended)
- CPU installation manual
A magnetic screwdriver can be helpful but use it carefully to avoid dropping screws onto the motherboard.
Workspace Setup
Choose a well-lit area with plenty of space to work. Clear a flat surface and cover it with an anti-static mat if possible. Organize your tools within easy reach.
Set up good lighting to see small details clearly. A desk lamp or headlamp can be useful for peering into the computer case.
Have a small container ready to hold screws and other tiny parts. This prevents losing important pieces during the installation process.
Keep the CPU manual nearby for reference. It contains specific instructions for your processor model.
| Item | Purpose |
|---|---|
| Anti-static mat | Protects components from static discharge |
| Container | Holds small parts securely |
| Desk lamp | Improves visibility in tight spaces |
| Manual | Provides model-specific guidance |
Understanding CPU and Motherboard Compatibility
Choosing the right CPU for your motherboard is crucial for building a functional computer system. Compatibility depends on socket types, chipset support, and BIOS versions.
Identifying CPU Socket Types
CPU sockets are the physical interface between processors and motherboards. Intel and AMD use different socket designs that change over time. Common Intel sockets include LGA 1700 for 12th and 13th gen processors, while AMD currently uses AM5 for Ryzen 7000 chips.
CPU-Z software can help identify your current socket. Look for the socket name under the “Package” field in the CPU tab.
Socket types are not interchangeable. An AM4 CPU won’t fit in an LGA 1700 socket. Always check compatibility before purchasing.
| Brand | Recent Socket | Compatible CPUs |
|---|---|---|
| Intel | LGA 1700 | 12th/13th Gen |
| AMD | AM5 | Ryzen 7000 |
Motherboard CPU Support
Motherboards support specific CPU generations and models. Check the manufacturer’s website for a list of compatible processors. This list is often called the “CPU Support List” or “Qualified Vendor List” (QVL).
Key factors in motherboard support:
• Chipset
• Power delivery
• BIOS version
Newer CPUs may require a BIOS update before they’ll work with older motherboards. Always verify compatibility before upgrading.
BIOS/UEFI Updates
BIOS or UEFI firmware updates can add support for newer CPUs to existing motherboards. These updates may also improve system stability and performance.
To check your current BIOS version:
- Press Windows Key + R
- Type “msinfo32” and press Enter
- Look for “BIOS Version/Date” in the System Summary
Visit your motherboard manufacturer’s website to find the latest BIOS version. Compare it with your current version to see if an update is needed.
Updating BIOS can be risky. Follow the manufacturer’s instructions carefully. A failed update could render your motherboard unusable.
CPU Installation Process
Installing a CPU requires precision and care. Follow these steps to ensure proper placement and optimal performance of your processor.
Inserting the CPU
Carefully remove the CPU from its packaging. Hold it by the edges to avoid touching the pins or contacts. Locate the CPU socket on your motherboard. Look for a small arrow on one corner of the CPU and match it with a corresponding mark on the socket. This ensures correct orientation.
Gently lower the CPU into the socket. It should fit easily without force. If you feel resistance, stop and double-check the alignment. Do not push down on the CPU. Let it settle naturally into place.
Securing the CPU
Once the CPU is seated, it’s time to lock it in place. Find the metal lever or retention arm next to the socket. Slowly lower it, engaging the retention plate. You’ll feel some resistance as it secures the CPU.
Press down firmly but gently until the lever clicks into its locked position. This step ensures the CPU makes proper contact with the socket pins. Double-check that the CPU hasn’t moved during this process.
Applying Thermal Paste
Thermal paste is crucial for heat transfer between the CPU and cooler. Clean the top of the CPU with isopropyl alcohol and a lint-free cloth. Apply a pea-sized dot of thermal paste to the center of the CPU.
Don’t spread the paste manually. The pressure from installing the cooler will distribute it evenly. Using too much paste can hinder heat transfer, so err on the side of less rather than more.
Attaching the CPU Cooler
Select a compatible CPU cooler for your processor. Remove any protective plastic from the cooler’s base. Align the cooler with the mounting holes or brackets on your motherboard.
Lower the cooler straight down onto the CPU. Secure it according to its design – this may involve push-pins, screws, or a custom bracket. Connect the cooler’s power cable to the CPU_FAN header on your motherboard.
| Cooler Type | Installation Method | Typical Use Case |
|---|---|---|
| Stock Intel | Push-pin mechanism | Budget builds |
| Stock AMD | Clip-on bracket | Entry-level systems |
| Aftermarket Air | Screw mounting | Better cooling performance |
| Liquid AIO | Custom brackets | High-performance setups |
Check that the cooler is firmly attached and doesn’t wobble. Ensure its fan or pump is properly connected for immediate cooling when you power on your system.
Finalizing the CPU Installation
After installing the CPU, you need to complete a few crucial steps to ensure proper functionality. These steps involve reassembling your computer, performing post-installation checks, and verifying system operation during the first boot.
Reassembling the Computer
Start by reattaching the CPU cooler. Apply a pea-sized amount of thermal paste to the center of the CPU if needed. Carefully place the cooler on top and secure it according to the manufacturer’s instructions. This step is vital for proper heat dissipation.
Next, reinstall your RAM modules. Align the notches and press firmly until you hear a click. If you removed your graphics card earlier, slot it back into the PCIe lane and secure it with screws.
Reconnect all power cables, including the 24-pin motherboard connector and the CPU power connector. Double-check that all components are properly seated and secured.
Finally, close your computer case. Make sure no cables are pinched or obstructing fans.
Post-Installation Steps
Before powering on your system, perform a visual inspection. Look for any loose cables or components. Ensure all power connections are secure.
Reconnect peripherals like your monitor, keyboard, and mouse. Plug in the power cord to your PC.
If you’re using a new motherboard, you may need to update the BIOS. Check the manufacturer’s website for the latest version and follow their update instructions.
Consider this checklist before proceeding:
- CPU cooler properly mounted
- RAM modules seated correctly
- All power cables connected
- Case panels secured
- Peripherals plugged in
First-Time Boot and System Check
Press the power button to start your PC. Watch for the initial POST (Power-On Self-Test) screen. If it appears, your CPU installation was likely successful.
Enter the BIOS by pressing the designated key during startup (often Delete or F2). Verify that your system recognizes the new CPU correctly.
Check CPU temperature readings in the BIOS. Normal idle temperatures typically range from 30-40°C. If temperatures seem high, recheck your cooler installation.
| Boot Phase | What to Look For |
|---|---|
| POST | Screen displays, no error beeps |
| BIOS | Correct CPU model listed |
| OS Load | Smooth boot to desktop |
If your PC fails to boot, recheck all connections. Ensure the CPU is properly seated and no pins are bent.
Once in your operating system, install CPU monitoring software to keep an eye on temperatures and performance. Run a stress test to ensure stability under load.
Frequently Asked Questions
Installing a CPU can seem daunting. These common questions address key aspects of the process for different processor types and highlight important safety measures.
What is the proper method for installing an AMD CPU into a motherboard?
To install an AMD CPU, locate the golden triangle on the processor corner and align it with the socket’s matching mark. Gently lower the CPU into place without force. Once seated, close the retention arm to secure it.
Can you guide me through the installation of an Intel CPU?
For Intel CPUs, start by lifting the socket load lever. Align the notches on the processor with the socket’s tabs. Place the CPU gently into the socket without pushing. Lower the load plate and secure the lever to complete installation.
What steps should be followed to correctly apply thermal paste when installing a CPU?
Apply a pea-sized amount of thermal paste to the center of the CPU. Don’t spread it manually. The cooler’s pressure will distribute it evenly. Avoid using too much paste as it can hinder heat transfer.
How do I install a Ryzen processor in my computer?
Ryzen installation is similar to other AMD CPUs. Align the golden triangle on the chip with the socket’s indicator. Lower the CPU into place without force. Close the retention arm to secure it in the socket.
What precautions should I take when installing a CPU by myself?
Ground yourself before handling components to prevent static discharge. Work on a clean, non-conductive surface. Handle the CPU by its edges to avoid damaging pins or contacts. Don’t force the CPU into the socket.
What is the correct orientation for inserting a CPU into a socket?
CPUs have alignment markers that match the socket. For AMD, look for a golden triangle. Intel CPUs have notches that align with socket tabs. Match these indicators carefully to ensure proper orientation before insertion.
| CPU Type | Alignment Indicator |
|---|---|
| AMD | Golden triangle |
| Intel | Notches on edges |
| Ryzen | Golden triangle |


